
A folder full of raw footage, hours of review ahead of you, and the desire to edit has already vanished before you've even watched the first clip? This is exactly where the AI quick cut feature in Adobe Firefly comes in. It takes care of the first rough cut and gives you a template that you can then refine to your liking.
The video is only loaded from YouTube when you play it – data (including your IP address) is then transmitted to YouTube/Google. More in the privacy policy
In this guide, I'll walk you step by step through the entire process: from opening the web app, creating a project, and uploading your video files, to reviewing the finished rough cut. The feature is currently still in the beta phase. The interface may therefore change in its details. However, the basic steps generally remain the same.
Key Takeaways
- The AI quick cut can be found in the "Edit video" section of Adobe Firefly and is still in the beta phase.
- You first create a project with a suitable video format, for example the YouTube format.
- You can guide the AI with a short instruction, but you don't have to provide one. Without any input, the AI decides for itself which scenes to use.
- Creation takes a few minutes depending on the amount of material. In the example in the video, it was around three minutes.
- The rough cut already contains cuts and transitions. It is a foundation that you should review and adjust.
Step-by-Step Guide
Open Firefly and switch to the "Edit video" section
The first step takes you to the Adobe Firefly website. The address is firefly.adobe.com. Log in with your Adobe account if you haven't done so yet. On the home page, scroll down a bit until you see the "Edit video" section. It is still labeled as beta. Click on it to open video editing.

Create a new project
In the "Edit video" section, you select the option for a new project. This creates your own workspace in which all media and the later rough cut are saved. You can give the project a meaningful name, for example "Computer Fair Highlights". If you leave the name as suggested, it works just the same. However, a unique name will help you later when you are working on several projects in parallel.


Select the right video format
Now you choose the format for your video. Firefly offers various templates, for example for different platforms and aspect ratios. If your result is intended for YouTube, choose the YouTube format. Make sure the format matches your source material. A portrait video from a smartphone quickly looks messy in a landscape project because borders appear or image content gets cropped.

Then confirm your selection by clicking "Create project". Firefly then opens the actual working environment.

Add media from your computer
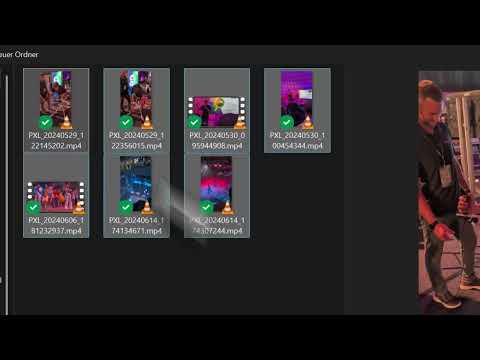
In the opened working environment, you select "Add new media". You can then choose all the video files you want directly from your hard drive. You don't have to upload each file individually. Simply select all the clips that should go into the rough cut. Confirm with "Open", and the files will be uploaded.


The more material you upload, the greater the selection for the AI. At the same time, processing takes longer. Therefore, choose carefully what really belongs in the video. For example, don't upload failed takes that you would never use anyway.
Start the quick cut and optionally guide it
Once your files are loaded, you click on "Quick cut". This is where the AI does the actual work. Before you start, you have the option of using a text field. There you can give the AI an instruction, for example: "Aim for a dynamic compilation with the best moments and smooth transitions."
The input is optional, though. If you don't enter anything, the AI decides on its own which scenes to use, in which order they appear, and where to cut. For a first draft, that is often completely sufficient. If you already have a clear idea, such as a calmer style or a focus on certain people, then state it specifically. Short, precise sentences usually deliver better results than long descriptions.


When you are satisfied, click "Create".

Wait for the result and check the rough cut
Now it's time to be patient. Creation can take a few minutes; in the video's example it took about three minutes. During this time, Firefly first creates a transcript of your footage, extracts the sentences, and assembles the cut from them. Keep the window open until the process is complete.

After that, the timeline with your video opens. You can play the rough cut directly and immediately see which scenes the AI has selected. You will also see that various cuts and transitions have already been inserted. This in particular saves an enormous amount of time, because you don't have to set every cut by hand.


Do check the rough cut carefully, though. Pay particular attention to the following:
- Do the scenes match your message in terms of content?
- Do the transitions seem fitting, or are they too noticeable?
- Are there passages that are too long or end abruptly?
- Are there important moments missing that absolutely should be included?
With this checklist, you can quickly find out where you need to make adjustments. The AI cut is a good starting point, but rarely the final version. The final fine-tuning remains your job.

Summary – Rough cut with the AI quick cut in Adobe Firefly
With the AI quick cut function in Adobe Firefly, you save yourself the tedious first cut. You open the "Edit video" area, create a project with a suitable format, upload your footage, and start the quick cut. With an optional instruction, you steer the selection, without being required to enter anything. After the wait, you get a timeline with cuts and transitions already inserted, which you check and refine. This turns a mountain of raw footage into a solid foundation for your finished video in a short time.
FAQ
How long does it take to create the rough cut?The duration depends on the amount of uploaded footage. In the example in the video, it took about three minutes.
Do I have to enter an instruction for the AI?No, the field is optional. Without input, the AI decides for itself which scenes to use and how they are cut.
Which video format should I choose?Choose the format that suits your target channel. For YouTube, the YouTube format is suitable. Also make sure that it matches your source material.
Can I still edit the rough cut after it has been created?Yes, the rough cut appears in the timeline and can then be checked and adjusted.
Is the function already fully available?The "Edit video" area is currently still labeled as beta. The interface and individual functions may therefore still change.

