
Imagine you want to place a polar bear on a sheet of ice, and do it for free, without signing up and without a subscription. That is exactly what the ImageEditor shows you. It offers access to well-known AI models and is suitable for image editing, creative experimentation and even for removing watermarks. With a little trick, you can also use it when you don't want to upload a photo of your own.
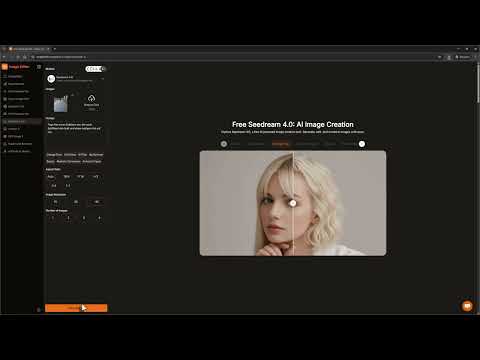
The video is only loaded from YouTube when you play it – data (including your IP address) is then transmitted to YouTube/Google. More in the privacy policy
Introduction
The ImageEditor is a web-based tool that you can use to modify, redesign or creatively expand existing photos. You need neither an account nor a payment method for it. However, there are two limitations you should know about before you get started: generation doesn't work without an uploaded image, and there is a daily limit on the number of edits. In this guide, I'll show you step by step how to use the tool, which models are available, and how to get a result even without your own photo by using a transparent pixel.
Key Takeaways
- The ImageEditor is free and requires no sign-up.
- An image must always be uploaded for generation. The trick with a transparent pixel gets around this hurdle.
- Nano Banana is the preselected model and delivers fast, good results. Nano Banana Pro is a bit more powerful still.
- Seedream 4.0 offers more possibilities, including higher resolutions up to 4K, different aspect ratios and the creation of several variants at once.
- With Nano Banana, image content stays consistent, whereas with Seedream images can be changed more significantly. Therefore, word your prompt carefully.
- A daily limit restricts the number of edits. If you reach it, you simply have to wait a day.
Step-by-Step Guide
Step 1: Select and Upload a Photo
The first step is uploading your source image. In the example in the video, it is a photo of a daughter ice skating on a sheet of ice. Simply drag and drop your image into the upload field or click on it to select it via the file dialog. Make sure the subject is clearly recognizable, because the AI orients itself to the existing content.

Step 2: Choose the AI Model
After the upload, you can choose the model you want. Nano Banana is preselected by default, and it is a good choice to start with. It works reliably and delivers usable results in a short time. If you want to get even more quality, try Nano Banana Pro. It is somewhat better, as becomes clear in the video, and therefore deserves a test for more demanding subjects.
Step 3: Write the Prompt and Start Generation
In the next step, you describe in a text field what the AI should change. In the example, the prompt is roughly: Insert a polar bear walking on the ice and wearing a funny hat. The more precisely you state where the object is, what it looks like and what it should do, the more precise the result will be. Once your prompt is ready, click "Generate". The calculation usually takes only a few seconds; in the example it was less than 20.
Step 4: Use Predefined Prompts
In addition to the free text field, the ImageEditor offers a selection of predefined prompts. This is handy if you want to achieve a specific result quickly without spending a long time writing. Typical examples are creating an action figure from your photo or removing the background. Try out these templates to get a feel for the tool's possibilities.

Step 5: Download the Result and Check the Resolution
When the image is finished, you can download it. Pay attention to the resolution. In the video, it was noticeable that the downloaded result with Nano Banana had a lower resolution than the original. There, the width was 864 pixels instead of 1466 pixels. If you want to print the image large later or use it in high quality, you should plan for this beforehand.

Step 6: Use Higher Resolutions and More Options with Seedream 4.0
If you need more control over the result, switch to the Seedream 4.0 model. It offers significantly more settings. For example, you can choose 4K output, set the aspect ratio and have two variants generated at once. That way you immediately have a selection and don't have to click "Generate" multiple times, which makes sense given the daily limit.

Step 7: Compare the results and pay attention to consistency
With Seedream, the test showed that the image was changed significantly. The daughter was no longer visible in the result, and only the hat was still recognizable. Nano Banana, on the other hand, kept the scene largely stable, so the images remained consistent. If important elements of your photo need to be preserved, include that in your prompt, for example with a sentence stating that the person must still be clearly visible. Seedream's higher resolution of 1667 x 2213 pixels makes up for it if the subject remains unchanged.

Step 8: Working without your own image – the pixel trick
If you want to create something completely new, such as a flying house, the ImageEditor still requires an input image. Without an upload, an error message appears. The trick is: upload a small, transparent pixel. This pixel is so inconspicuous that it doesn't influence the image generation, but it fulfills the upload requirement. In the video, this was tested with a PNG file of a single transparent pixel, which you can find on image databases like Wikimedia Commons.

Step 9: Download and upload the pixel
Download the transparent pixel to your computer. Then drag it into the ImageEditor's upload field or select it via the file dialog. After uploading, enter your prompt, for example: A house that can fly. Then start the generation. In the test, the method worked, and the result matched the idea exactly. The pixel had no visible influence on the subject.

Step 10: Check the result
Check whether the image meets your wishes. The flying house was fully realized in the example. If you don't like the result yet, you can adjust the prompt and start the generation again. Keep the daily limit in mind and rather formulate your prompt a bit more precisely instead of experimenting aimlessly.

Step 11: Apply creative effects like the comic look
The ImageEditor is also excellent for playful effects. Upload a portrait photo, select the model, and enter a prompt like "Turn this into a comic look." The result looks like a drawn comic character. In the past, you would have needed Photoshop or paid plugins and filters for this. Here, you do it in a few seconds.
Step 12: Remove watermarks
A particularly impressive feature is the watermark remover. You can either upload your own image with a watermark or choose one of the examples offered. After starting, the AI often removes the watermark completely and seamlessly. When downloading, the resolution of the original is retained, so the image is not downsized. In the video, this was confirmed with a second example, in which the watermark also disappeared cleanly.

Summary – Using free AI images with the ImageEditor without an upload
The ImageEditor is a powerful and free tool for AI-assisted image editing. You upload an image, select a model, formulate your prompt, and receive a result in a short time. Nano Banana is suitable for a quick start and for consistent images, while Seedream 4.0 offers more flexibility with 4K resolution and multiple variants. With a transparent pixel, you bypass the upload requirement and can also create completely new subjects. In addition, the tool offers comic effects and a watermark remover that leaves the resolution unchanged. Just give it a try, because you need no subscription and no money.
FAQ
Does using the ImageEditor really cost nothing?Yes, you can use the features for free, without registration and without a subscription.
Why does the ImageEditor always require an uploaded image?The generation is based on an input image, so an upload is mandatory. With a transparent pixel, you can bypass this requirement.
Is there a limit on usage?Yes, there is a daily limit. If you reach it, you have to wait until the next day.
Which model should I choose to get started?Nano Banana is preselected and is well suited for getting started. For more quality, you can try Nano Banana Pro.
When is Seedream 4.0 worthwhile?Seedream 4.0 is suitable if you need high resolutions like 4K, specific aspect ratios, or multiple variants at once.
Why was my person no longer recognized in the image?With models that change images heavily, the subject can get lost. Include in your prompt that the person should be preserved.
Is the resolution retained when removing watermarks?Yes, according to the test in the video, the resolution of the original remains identical when downloading.

