
Imagine you need an image for a blog post, a presentation, or a social media post in ten minutes. Searching through stock photos takes time, and your own photos are rarely suitable. With Freepik, you can describe exactly the image you have in mind, and the AI creates it for you. The special thing: you don't have to commit to a single model, but can choose from a large selection of different image AI models and directly compare which one you like best.
The video is only loaded from YouTube when you play it – data (including your IP address) is then transmitted to YouTube/Google. More in the privacy policy
In this guide, I walk you through the entire process: from signing up through entering the prompt and choosing the model to post-processing. I'll also show you how to tell which models are available in the free plan, and how to get around typical hurdles.
Key Takeaways
- Freepik bundles numerous AI models from different providers, including Google Nano Banana, Google Imagen 3, Flux, and others, in a single interface.
- In the free plan, you can currently create about 20 images per day.
- The "Auto" option automatically selects an available model for you and prevents you from being blocked by premium models.
- Premium models such as Flux 2 Pro can only be used with a paid subscription and can be recognized in the selection menu.
- The integrated editor offers functions such as resizing, retouching, and background removal, so you often no longer need an image editing program.
- Video generation is not included in the free plan.
Step-by-Step Guide
Step 1: Log in and open the image generator
First, log in to Freepik with your account. After logging in, you'll find the various AI tools on the home page. Click on the "Image Generator" area, because that's where you create your images. On the home page, by the way, you can also see which other AI models Freepik works with, for example for video, voice, or music.

Step 2: Write the prompt
In the input field, you describe what the image should show. The more precise your description, the better the result. An example: "A cat sits on a windowsill, morning light, realistic style." Make sure you only describe things that the AI can actually depict. In my test, I wanted a cat that is vomiting. Instead, the result showed a rather cute cat. A practical tip: for actions or scenes with movement, it's worth describing the situation as concretely and vividly as possible so that the result comes out right.
Step 3: Select the model manually
Above the input field, you'll find the model selection. Here you can specify which AI model should generate your image. In the test, the palette showed over 30 models to choose from, which illustrates Freepik's variety well. However, not every model is available to you for free. If you select a premium model such as Flux 2 Pro, a notice appears saying that a paid subscription is required. This is not an error, but simply shows you which models are locked in your plan. To see the differences, you can open the overview. There you can see which models you can use and whether unlimited generation would be possible. However, I did not find a comparison table there that specifically shows the performance of the free model.
Step 4: Use the "Auto" option
If you're unsure about the model choice or don't want frustration with locked models, choose the "Auto" option. Freepik then automatically selects the best available model included in your palette. The quality is generally convincing. One drawback remains: you don't immediately find out which model was actually used. If you want to know, keep an eye on the details in the result.
Step 5: Set the orientation and keep an eye on the daily limit
Below the prompt, you can determine the orientation of the image, such as landscape for presentations or portrait for social media stories. Choose the format that suits your purpose. In addition, the interface shows you how many images you can still create today. In the free plan, it's 20 images per day. In the test, this limit seemed generous at first, and it quickly becomes noticeable when you test many variants. Therefore, plan your prompts carefully instead of generating variants indiscriminately.
Step 6: Generate the image and evaluate it
Click on "Generate". After a short time, the results appear. Evaluate them critically: Does the subject match your prompt? Does the depiction look realistic? In my test, the result looked very realistic, and the details were convincing. If something doesn't fit, formulate the prompt more precisely and generate again. If a result is worthwhile, you can use it right away.

Step 7: Editing the Image and Removing the Background
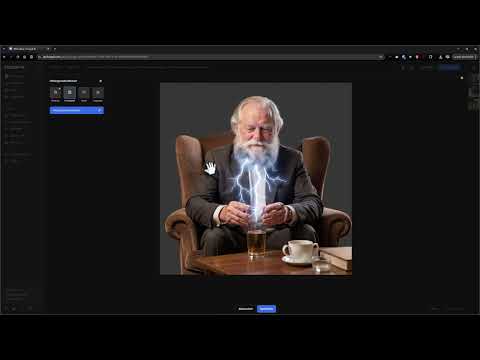
Clicking on the finished image opens the editing functions. There you can adjust the size, retouch areas, or completely redesign the image, for example by changing the background. The "Remove background" function is particularly useful. It isolates the subject so that you can place it on other backgrounds without Photoshop. In the test, the cutout worked very cleanly, and even fine strands of hair were preserved. Then save the result using the corresponding button.

Step 8: Fixing Errors and Properly Understanding Premium Models
Sometimes the interface does not respond as expected. In the test, selecting "Auto" occasionally displayed a premium notice, even though a free model should have been used. In this case, it helped to reload the page, paste the prompt again, and click "Generate." After that, the generation worked without any problems. So if you notice inconsistencies, make sure to refresh the page first before doubting your configuration.

Step 9: Understanding the Limits of the Free Plan
Freepik also offers a video generator, but it cannot be used in the free plan. If you want to create videos, you need a subscription. For images, however, free access is sufficient for many everyday uses. The test also showed that Freepik does not always clearly communicate which model is actually included in the free plan. Therefore, before larger projects, check the model overview to see which options are available to you.
Summary – Using Freepik for Free: Creating and Editing AI Images in Nine Steps
With Freepik, you can create AI images quickly and at no cost, at least within the free plan with about 20 images per day. You sign up, write a precise prompt, choose a model or trust the "Auto" option, and adjust the result in the integrated editor. The background removal function additionally saves you a trip to an image editing program. Premium models remain locked without a subscription, and videos are not included in the free plan. If you receive notices or error messages, reloading the page often helps. Feel free to try it out, because Freepik is a very accessible tool for getting started with AI image generation.
FAQ
How many images can I create with the free plan?With the free plan, you can currently generate about 20 images per day; the display in the image generator shows you your remaining quota.
Why do I see a premium notice for some models?Premium models such as Flux 2 Pro can only be used with a paid subscription, which is why a notice appears when you select them in the free plan.
What does the "Auto" option do?The "Auto" option automatically selects an available free model from your range, so you don't end up with locked models.
Can I also create videos with Freepik?The video generator is not available in the free plan; for videos you need a subscription.
How do I remove the background of an image?Open the generated image, select the "Remove background" function in the editing menu, and save the isolated result.
What should I do if the generation doesn't work?Reload the page, paste your prompt again, and start the generation once more; this mostly helped in the test.
How do I improve the result of my images?Phrase your prompt as concretely as possible, describe the subject, style, and lighting, and avoid actions that an AI has difficulty depicting.

