You don't need a photo studio for impressive portraits. Often a large window is enough, if you know how to direct its light. Window light is natural, directional, and free. It acts like a large softbox, but cannot be controlled as precisely as a real studio light. In this guide, you'll learn how to use the light from a window so that your subject stands out clearly and the background disappears into darkness.
The video is only loaded from YouTube when you play it – data (including your IP address) is then transmitted to YouTube/Google. More in the privacy policy
Key Takeaways
- Window light counts as natural light, even if you shape it with aids.
- The light comes from a clear direction. This main light side determines how your subject is lit.
- As the distance from the window increases, the brightness in the room decreases. This light falloff is your most important tool for a dark background.
- A room with few other windows and a lot of depth is best suited.
- The combination of side light, a dark background, and a subject positioned in the room automatically draws the eye to the face.
Step-by-Step Guide
Step 1: Understand the Principle
Before you get started, you should know why window light works so well. Even if you shape the light with a reflector or other means, it remains natural light. You are not creating an artificial light source with it. The decisive factor is the direction: the light falls in a concentrated way through the window opening into the room. Look at the situation and consider from which side the brightness actually enters. This very side will later become your main light.

Step 2: Choose the Right Room
Look for a room that has no other windows all around. Additional light sources would ruin the mood and light your subject from several sides. In addition, the room should be as deep as possible. The more space there is behind you, the more clearly the light can fall off into the room. A large window on the front side is ideal, especially if it doesn't let in too much light. That gives you control over the brightness.

Step 3: Determine the Main Light Side
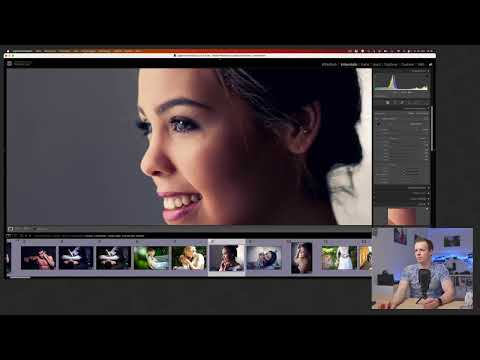
Position your subject so that the light comes from one side, usually from the left. In the example image from the video, the main light falls on the model from the left. Practically nothing comes from the right and from the front, and the remaining illumination arises only from reflections off the walls. This clear difference between the lit and dark sides gives the portrait depth and dimensionality. Make sure that light from behind does not become the main light source either, otherwise the image loses its direction.

Step 4: Bring the Subject Close to the Window
Now comes the most important trick: bring your subject as close to the window as possible. You then shoot, so to speak, into the room. As a result, the lighting looks as if you were standing in a photo studio, even though you are merely using a window front. Make sure the face is hit evenly by the light and that no harsh shadows form that obscure the facial features.
Step 5: Use Light Falloff for the Dark Background
Light falloff is the heart of this technique. The farther you move from the window, the darker the room becomes. Your subject stands close to the light and is therefore well lit, while the background disappears into darkness as the distance increases. Backgrounds that are far enough away become dark on their own. So you don't need to darken anything additionally. Test different distances until the transition from light to dark looks exactly as you imagine it.
Step 6: Design Portraits Deliberately and Control the Light
For portraits, the principle works just the same. The large light source from the left provides a soft yet still directional light. You will notice that this window becomes visible as a reflection in the subject's eye, which impressively shows the size of the light source. Note, however, that you cannot control window light as easily as a studio light. If areas turn out too bright or too dark, you can correct this in post-processing. However, the exposure should already be as right as possible when shooting.

Step 7: Using Visual Flow in the Image
A successful window light photo automatically guides the viewer's eye. Since the subject is bright and the background is dark, you look at the person first. Enhance this effect by positioning the subject so that they look into the room. This creates a natural visual flow from the person into the depth of the room. This technique costs nothing, and everyone has a window. Try it out and observe how much even small changes affect the impact.

Summary – Window Light as a Studio Substitute: How to Achieve Atmospheric Portraits
Window light is a simple yet effective light source. You choose a deep room without any other windows, position your subject to the side of the light, and bring them close to the window. You achieve the dark background through the natural light falloff, and the visual flow comes about almost by itself. The topic of reflectors, which allow you to brighten or redirect the light in a targeted way, is covered in the next section.
FAQ
Do I need special equipment for window light?No, you basically only need a camera and a large window. A reflector can further improve the results, but it is not strictly necessary.
Which room is best suited?An ideal room is a deep one that has no other windows all around. This way the light falls off evenly, and the background becomes dark.
From which side should the light come?A side position, usually from the left, has proven effective. This creates a clear contrast between the lit and shaded halves of the face.
Why does the background automatically become dark?Light decreases with increasing distance from the window. As soon as your subject stands close to the window and the background is far enough away, the background remains in shadow.
Can I control the brightness of the window light?Only to a limited extent. You can change the distance to the window or adjust the exposure. Differences between bright and dark areas can also be corrected in post-processing.


