

Do you want to get started with Adobe Illustrator but don't yet know where to begin? This guide takes you step by step from installation to your first saved project. Along the way, you'll get to know the most important areas of the user interface, create your first document with suitable settings, and learn how to speed up workflows with keyboard shortcuts and workspaces.
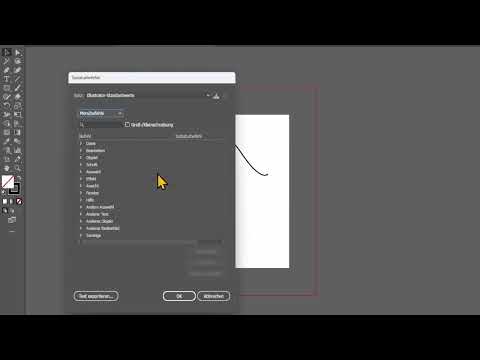
The video is only loaded from YouTube when you play it – data (including your IP address) is then transmitted to YouTube/Google. More in the privacy policy
Key Takeaways
- The easiest way to install Adobe Illustrator is via the Creative Cloud Desktop app.
- In the start area, you'll find training, your files, shared documents, and deleted items.
- 72 dpi is enough for digital projects; for print, you should choose 300 dpi.
- RGB is suitable for screen content, CMYK for print.
- A bleed serves as a guide so that important content isn't cut off.
- Custom keyboard shortcuts and workspaces will save you a lot of time later.
Step-by-Step Guide
Step 1: Find and Download Adobe Illustrator
The first step takes you to Adobe's official website. Simply search Google for "Adobe Illustrator" and click on the result from the Adobe website. There you can subscribe to the program. At the time of the video, the price was about €23.79 per month. Check the current terms directly on the site, as prices can change.

Step 2: Installation via the Creative Cloud Desktop App
After completing the purchase, you download the application via the Creative Cloud Desktop app. The installation is usually straightforward: you sign in with your Adobe account, select Illustrator, and follow the on-screen instructions. Once the installation is complete, you can start the program right away.

Step 3: Getting to Know the Start Screen
When you open it for the first time, you'll see the start screen. On the left side there are various menu items through which you can access learning content, your files, and the cloud areas. Take a moment to familiarize yourself with this structure, because this is where you start every piece of work.

Step 4: Using the Built-in Training
Under "Training" you'll find small lessons that explain basics such as creating and editing shapes, changing colors and strokes, and many other functions. If you click on a lesson, you'll be taken directly to a project where you can download the material and follow the video tutorials. Especially for beginners, this area is an excellent complement to this guide.

Step 5: Managing Files, Cloud Areas, and Deleted Documents
Under "Your Files" you'll find all the projects you've saved. Here you can rename files, open them with a double-click, or delete them via the options. The "Shared" area is interesting if you collaborate with others and receive documents from a partner. Accidentally deleted files end up in the "Deleted" area, so you can restore them there at any time.

Step 6: Creating a New Document
To create your first project, click "New File" at the top left. A dialog window with various settings opens. You can choose ready-made templates, but many professionals prefer to create their own document, since they usually need custom sizes, color modes, or resolutions.
Step 7: Opening Existing Illustrator Files
If you already have a file with the extension ".ai", you can load it via "Open". You can recognize the file by the typical Illustrator icon. Afterwards, the project can be edited like your own file, and you can freely change and rearrange elements.
Step 8: Setting Width, Height, and Templates
In the dialog, you enter the width and height of your document. If you set, for example, 3000 as the width and 4000 as the height, this format will subsequently be saved under "Recently Used". The templates for mobile devices, web, print, film, or video are also handy if you want to get started quickly.

Step 9: Choose the right unit
To the right of the dimensions, you select the unit. For digital projects, pixels are a good choice. If you are working on a poster or a printed product, you can use centimeters. If you need to convert between units later, you can simply switch the unit, and the program automatically converts the values.
Step 10: Set orientation and bleed
With the orientation, you determine whether your document is portrait or landscape. The bleed is an area around the actual document that serves as a guide for you. Enter a value of 100 pixels, for example. With the chain link, you apply the same value to all sides. If you deactivate the chain, you can set the values for each side individually. Make sure you place important text and elements within the white area so that nothing gets lost.
Step 11: Select the right color mode
Illustrator offers two color modes. RGB stands for Red, Green, and Blue and is suitable for digital content such as websites or social media graphics. CMYK stands for Cyan, Magenta, Yellow, and Black and is the standard for printing. So decide when creating the document what your project is intended for.
Step 12: Set the raster resolution in dpi
You specify the resolution in dpi. For digital projects, 72 dpi is completely sufficient. If you are planning a printout, 150 dpi is possible, but in most cases 300 dpi is better. You rarely go wrong with 300 dpi, so when in doubt, I recommend this value. Then you click on "Create," and your document opens.

Step 13: Check the document in the workspace
After creating it, you see your document surrounded by a red line. This marks the bleed that you set previously. An example: If you are designing a banner, you should not place text right up to the edge, because it could be lost when trimming. With a simple brush stroke, you can now test how the document behaves.

Step 14: Save your project
To save your project, go to "File" at the top left and select "Save." You can store the file on your computer as an ".ai" file or save it in the Creative Cloud. I recommend the cloud option, since you can access it from anywhere. Give your project a meaningful name, for example "Brush stroke," and confirm with "Save."

Step 15: Reopen saved projects
If you close Illustrator and want to continue working later, click the home icon at the top left. Your file appears under "Your files." A double-click opens it immediately. Via the options on the file, you can also rename or delete it.

Step 16: Insert and transform graphics
To insert a design element, simply drag it from a folder or from another window into the drawing area. You can then adjust it using the Selection tool in the toolbar. You change the size by dragging the corners. If you want to maintain the proportions, hold down the Shift key.

Step 17: Rotate and delete objects
Once you have selected an object, two arrows appear at the corners. With them, you can rotate the element freely. If you no longer want to keep it, select it and press the Delete key. With the key combination Ctrl+Z (or Cmd+Z on a Mac), you undo the last step.

Step 18: Save, export files, and choose formats
Under "File," you will find "Save As," where you can choose numerous formats such as AI, PDF, or EPS. In addition, there is the "Export" area for formats such as JPEG or PNG. If the AI format is missing from the export, you can reliably find it under "Save As" or "Save a Copy."

Step 19: Use scripts as helpers
Under the "Scripts" tab you can load scripts that automate recurring workflows. This topic is intended more for advanced users, but it is worth exploring once you are confident using the program.

Step 20: Define your own keyboard shortcuts
Under "Edit" you will find the keyboard shortcuts. There you can assign your own shortcuts to tools or menu commands. For example: you set a combination of Shift, Ctrl and S for saving. If you choose a key that is already assigned, Illustrator shows you a message. Then you can decide whether to undo the change, resolve the conflict, or overwrite the existing shortcut. Don't forget to save your keyboard shortcuts using the save icon at the top.

Step 21: Show, arrange and close windows
Via the "Window" menu item you display additional panels, for example "Actions". This window records workflows that you can later play back again with one click. You drag windows to the right edge until a blue line appears, then they dock there. You can also move them to a second screen or close them with the X.

Step 22: Customize the toolbar and save a workspace
The toolbar on the left side can also be moved. If you drag it to the left edge, it is docked again. Once you have set up your interface the way you want, you save it under "Window", "Workspace", "New Workspace". You can create several workspaces for different projects and switch between them at any time.

Step 23: Zoom with the mouse wheel and use the space bar
You activate zooming with the mouse wheel under "Edit", "Preferences", "General" tab. There you check the box for the option to zoom with the mouse wheel. To move your view, hold down the space bar, no matter which tool is active, and then drag with the left mouse button.

Step 24: Tool groups and colors for fill and stroke
Many tools have a small corner at the bottom right. Right-clicking on it opens further related tools. At the bottom left of the toolbar you see the color swatches for fill and stroke. With the arrow icon you swap the two. The small icon below it resets the default colors, that is, a white fill with a black stroke.

Step 25: Use the help
At the top right you will find the magnifying glass for searching. If you enter a term there, such as "stroke line", Illustrator shows you where the function is located in the menu. This way you can also find effects that you can't immediately find again, for example under "Effect", "Distort & Transform".

Summary – Installing and setting up Adobe Illustrator: Getting started step by step
You now have all the basics to install Adobe Illustrator, set up your interface and create your first document. With every new project, pay attention to format, color mode and resolution, save regularly, and use keyboard shortcuts and workspaces to speed up your work. The next step is to practice with the training lessons and create your own small designs.
FAQ
How much does Adobe Illustrator cost?At the time of the video, the price was about €23.79 per month. You can find current prices directly on the Adobe website.
Do I have to use the Creative Cloud Desktop app?The video shows the installation via the Creative Cloud Desktop app. It also makes saving to the cloud easier.
Which color mode should I choose?RGB is suitable for digital content, CMYK for print.
What resolution do I need for print?For print I recommend 300 dpi. For digital projects, 72 dpi is sufficient.
What does the bleed mean?The bleed is a frame around your document that serves as a guide for you. You should place important content within the white area.
Where do I find the AI format if it is missing in the export?You can find the AI format under "Save As" or under "Save a Copy".
How do I activate zooming with the mouse wheel?You go to "Edit", then to "Preferences" and select the "General" tab. There you activate zooming with the mouse wheel.
How do I find a function I don't know?Use the magnifying glass at the top right. Enter the term, and Illustrator shows you where to find it in the menu.

