

Sometimes a single day is enough to realize how much has changed in a program. That's exactly how I felt when I went through the first four months of 2024 in Illustrator. Waiting for you are new dimensioning tools, AI-powered pattern creation with color presets, customizable stars, handy keyboard shortcuts for fonts, and several improvements to linked files. In this tutorial, I will guide you step by step through all the new features so you can use them directly in your daily work.
The video is only loaded from YouTube when you play it – data (including your IP address) is then transmitted to YouTube/Google. More in the privacy policy
Key Takeaways
- The new dimensioning tool displays distances, angles, and radii directly on the object and can be conveniently adjusted via the mini toolbar.
- Pattern creation from text can be controlled via color presets. You specify which colors are allowed to appear and can limit the number to a maximum of three colors.
- You can pin the contextual task bar so that it no longer constantly reappears.
- Stars can be adjusted precisely afterwards by dragging with the mouse, using the arrow keys, or via the Properties panel.
- With the E key, you select individual objects specifically, even if they overlap.
- Font styles such as bold, italic, and underline can be applied more quickly via keyboard shortcuts.
- Linked files are restored automatically, can be sorted by size, and remain intact when moved.
Step-by-Step Guide
Step 1: Displaying and Drawing Dimensions
The starting point is the new dimensioning tool. It's best to first draw a simple rectangle and tilt it a bit so you can test the function well. Then select the dimensioning tool. A small mini toolbar will then appear directly on the object. With it, you specify which type of dimensioning you want to use.

Now click on the starting point of the measurement and then drag to the desired end point. As soon as you release, Illustrator shows you the length in millimeters directly on the object. This method works equally from any side. So you can also measure the entire surface or just a section, for example from the center to an edge.
The display is especially useful when you create site plans or floor plans. You see the dimensions immediately and no longer have to note them down separately. Make sure to briefly check the dimensioning after placing it, because the position of the dimension line can be readjusted at any time.
Step 2: Using Angular and Radial Dimensioning
In addition to linear dimensioning, the tool also offers angular dimensioning. With it, you display the angle between two lines. To do so, select the corresponding option, click on the vertex, and then drag out the angle. Illustrator then tells you the number of degrees directly.
Radial dimensioning is suitable for round shapes. To do this, draw a new rectangle with rounded corners and select the radial option in the dimensioning tool. Then you click on the arc, and the radius appears as a dimension. You can freely determine the position of the display by dragging it to the desired spot.
If you don't like the appearance yet, open the gear icon in the mini toolbar. There you set whether the dimension line should be black or colored, whether it should be dashed, which unit of measurement is used, and which font and font size are applied. This step is especially worthwhile for presentations or print templates.

Step 3: Creating Patterns with a Color Scheme
Pattern creation with AI has received a noticeable improvement. You'll find the feature under "Window" and "Text to Vector Graphic (Beta)". Since it is still a beta version, the result may vary depending on the request. First create a new document; the size doesn't matter here. In the field at the top, select the type "Pattern".

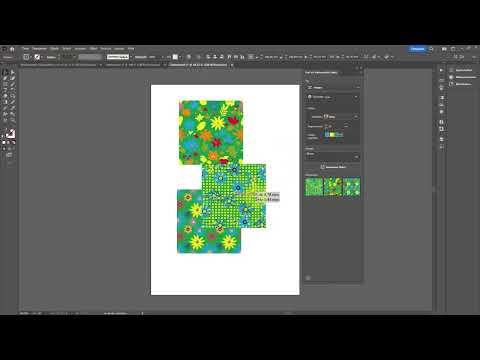
Now comes the actual novelty: You can specify colors. Suppose you want flowers in blue, yellow, and green. Define the three colors and then enter the subject term, for example "flower". With a click on "Generate", the AI creates three variations. You can specify up to twelve colors. For a corporate design or a fixed color palette, however, it's worth working with few colors so the result doesn't look overloaded.
The three suggestions then appear in the view. Drag the variant you like best into your document using drag-and-drop. Note that the specified colors are included, but additional colors often show up in the suggestions as well. This is normal and a sign that you still need to fine-tune.

If a particular color bothers you, use the "Remove color" option. For example, you can remove magenta and describe a sunflower instead. Then generate again until the result fits.

If you want to make sure that only the specified colors are used, activate the limit to three colors. After creating it, the pattern then contains only blue, yellow, and magenta. In this case the result is clearly convincing, and you save yourself a lot of rework.

Step 4: Pinning the Contextual Taskbar
The contextual taskbar often appears in places where you don't want it. With a small setting, you stay in control. To do this, open the bar's menu and select "Pin bar position". From that moment on, the bar stays in the same place, no matter where you move the mouse pointer. This seems unremarkable, but it noticeably improves your workflow.
Step 5: Adjusting Stars Precisely
Star shapes are among the motifs that work well in many designs, and there are now more options for exactly that. Select the Star tool and drag out a star. Tip: While you are dragging, you can use the up and down arrow keys to change the number of points or the size. It's best to color the star with a high-contrast color so you can see the changes more easily.
To change the tips, move the mouse over the small dot on the star. Hold down the mouse button and drag until the star looks pointier or rounder. If you want to create several stars at once, press the tool and hold the mouse button down until you have reached the desired number.
You can work even more precisely in the Properties panel. There you open the "More options" option and set the number of points and other values exactly. In this way you create stars that fit your design exactly.

Step 6: Selecting Objects Specifically with the E Key
By default, dragging a marquee with the mouse selects all objects in the area. Especially with overlapping elements, this quickly becomes confusing. Imagine you only want to select the topmost star, but the others lie partially underneath. Simply drag a frame and press the E key while dragging. A square bracket appears, with which you select exactly the objects that are located within the frame. When you release the mouse button, only that one star is selected.


Step 7: Formatting Fonts with Keyboard Shortcuts
Font styles can now be set more quickly via keyboard shortcuts. Select your text and, if necessary, zoom in with Ctrl and the plus sign so you can see the changes better. Press Ctrl + Shift + B to make the text bold, or press it again to remove the formatting. With Ctrl + Shift + I you switch between italic and normal. Ctrl + Shift + U applies an underline.

One small drawback remains: The Shift key is part of the combination. If you only know Ctrl + B or Ctrl + I from other programs, you'll need to adjust briefly. After that, though, you'll quickly have internalized the shortcuts.
Step 8: Managing Linked Files Conveniently
There are also some improvements for linked files. If a linked file is missing, Illustrator automatically searches for it in the folder. If the file reappears, the link is re-established without any further action. This saves you a lot of time, especially when you work with many images.

For extensive projects, sorting by size also helps. To do this, open the menu at the top via the links and select "Sort by size". Then you decide whether to sort in ascending or descending order. This way you can quickly find the largest files that unnecessarily burden your document.
The last new feature concerns moving. If you move an Illustrator document together with its linked files to another folder or to another system, the relative positions are preserved. The links are therefore not broken. This is especially helpful when you pass projects on to colleagues or switch between computers.
Summary ??? Illustrator 2024: New Features at a Glance
You have now learned about all the important new features from the first four months of 2024. With the dimensioning tools, you document plans directly in the document, with pattern generation you create designs in your desired colors, and with stars, keyboard shortcuts, and the E key you work more precisely and faster. In addition, there are improvements to linked files that save you a lot of rework. It's best to try out the features directly on a project of your own, so that what you've learned sticks.
FAQ
How do I draw a dimension in Illustrator?Select the dimensioning tool, click on the starting point, drag to the end point, and release the mouse button. The measurement appears directly on the object.
Can I define the colors for the AI pattern?Yes, you can specify up to twelve colors. With the limiting option, you also determine that only the specified colors are used.
How do I pin the contextual task bar?Open the bar's menu and select "Pin bar position". The bar then stays in the same place.
How do I select only one of several overlapping stars?Drag a frame around the desired star and press the E key while dragging. Then only the objects within the frame are selected.
What keyboard shortcuts are there for font styles?Ctrl + Shift + B sets bold, Ctrl + Shift + I italic, and Ctrl + Shift + U underlined.
Are linked files preserved when moving?Yes, when moving the document together with linked files, the relative positions are preserved and the links are not broken.
