

Illustrator CC 2021 looks like a small update at first glance, but it brings three new features that noticeably make your everyday work easier. You will learn how to match the colors of an object to another image, how to save and restore files in the cloud, and how to align objects to glyphs. Finally, I will show you how to edit locked objects again more quickly. You can follow all the steps directly in your own document.
The video is only loaded from YouTube when you play it – data (including your IP address) is then transmitted to YouTube/Google. More in the privacy policy
Key Takeaways
With "Recolor Image" you take colors from any source, for example a logo, and apply them to another motif. Cloud documents store your files online, offer a version history, and can be made available offline. Aligning to glyphs helps you position text and characters precisely. Locked objects can be configured via the preferences so that you can unlock them again more quickly.
Step-by-Step Guide
Step 1: Finding the "Recolor Image" Tool
Select the object whose colors you want to change. Then click the "Recolor Image" icon in the top control bar. The panel with the color options opens right away, and you can immediately see which colors your motif contains.

Step 2: Setting Another Image as the Color Source
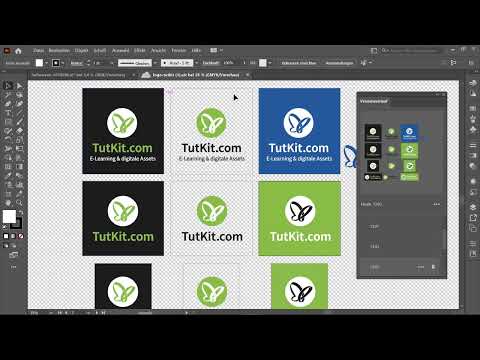
What is truly new in CC 2021 is the ability to take over the colors not manually, but based on another image. To do this, scroll on the artboard to the object that should serve as the template, for example a logo with a specific shade of blue. Select it and click the selection icon for the color source in the panel. Illustrator then adopts the color scheme of the template.

Step 3: Checking the Result
After the click, you can see how the object has taken on the colors of the logo. Compare the tones closely, because the transfer is usually very precise. A glance at the preview immediately shows you whether the overall effect is right.

Step 4: Applying the Logo as a Source to a New Motif
The function becomes really useful when you have an image with a completely different color scheme. To do this, insert a new motif into your document and select it. Then choose the Tutkit logo as the source again. The motif now adapts to the look of this logo. The result is not always perfect, but it reproduces the color mood surprisingly well, and even text in the logo is adjusted accordingly.

Step 5: Selecting Areas Selectively
You don't have to take over the entire image. With the mouse button held down, you can mark an area that Illustrator should take from the image. This way you can, for example, use only the green of a logo while other colors remain untouched. Try out different selections until the result matches your ideas.

Step 6: Fine-Tuning Colors Afterwards
If the result seems too light or too dark, you edit the colors individually. In the panel you can select and adjust each color. This way you keep control over the final result, even if the automatic transfer doesn't quite fit.
Step 7: Saving Files Directly to the Cloud
The second new feature concerns saving. When you work via "Save As," Illustrator asks whether you want to store the file on your computer or in the cloud. Choose the cloud, assign a file name, and confirm. Your file is then accessible at any time from any computer you are logged into.

Step 8: Using the Version History
A major advantage of cloud storage is the version history. Under "File" you will find a history of all saved states of your document. The more often you save, the more extensive this list becomes. If you want to bring something back, select the desired state and click the option to restore this version. In my example, I removed a logo and then reset the document to the earlier state, which reappeared immediately.

Step 9: Manage cloud documents and make them available offline
Via the Home icon, you open the "Cloud documents" area. There you can see all the files stored in your cloud. If you want to work on a document without an internet connection, you activate the "Available offline" option. A green checkmark shows you that the file is stored locally. Alternatively, you can always make a document available offline. It will then be downloaded automatically when needed and will always be immediately available to you.

Step 10: Align objects to glyphs
The third new feature concerns precise alignment. Under "View", activate the "Snap to Glyph" option together with the Smart Guides. If you now move an object, it snaps to prominent points of the glyphs, such as the baseline, the x-height, or the top edge of a capital letter. This is especially helpful when you want to align text and graphic elements neatly with each other.

Step 11: Set alignment options in the Character panel
For finer control, first click into a text section and open the Character panel. There you define what the text should be oriented to, such as the baseline or the glyph bounds. If you activate all options, you can see exactly where Illustrator snaps while moving: at the bottom line of letters like Y, at the upper boundary of U and C, or at characters like the exclamation mark, the t, the K, or the i. Experiment with the settings, because depending on the font, different alignment points result.


Step 12: Unlock locked objects faster
Finally, I'll show you a practical trick for locked objects. If you lock an object via "Object > Lock > Selection", you can no longer move or modify it. To change that, open the Preferences, switch to the "Selection and Anchor Display" area, and activate the option to select and unlock objects on the artboard. After that, a click on the small lock icon is enough to edit the object again. Note: If you unlock it this way, it stays permanently unlocked until you lock it again.


Summary ??? Illustrator CC 2021: Transfer colors, use cloud documents, and work more precisely
Illustrator CC 2021 brings three features you can use right away. With "Recolor Image" you take over colors from any image, whereby you can freely choose the area of the source and readjust the results. Cloud documents save your work online, offer a version history for restoring earlier states, and can be marked for offline use. Aligning to glyphs makes it easier for you to position text and characters exactly, and the Preferences help you unlock locked objects again faster. Try out each feature in its own test document, and you will quickly notice how much time you can save with it.
FAQ
Can I match the colors of an object to a logo?Yes, select the object, click "Recolor Image", and choose the logo as the color source. Illustrator automatically takes over the color scheme.
Do I always have to use the entire image as the color source?No, by holding down the mouse button you can mark an area whose colors are to be taken over.
Can I change the transferred colors afterwards?Yes, in the "Recolor Image" panel you can adjust each individual color.
Where do I save a document in the cloud?In "Save As", choose the Cloud option instead of Computer, enter a file name, and confirm.
How do I restore an earlier version of my document?Under "File", open the version history, select the desired state, and reset the document to that version.
How can I open a cloud file even without an internet connection?In the cloud documents, activate the "Available offline" option or always make the document available offline. It will then be downloaded when needed.
How do I align objects to glyphs?Under "View", activate the "Snap to Glyph" option together with the Smart Guides. When moving, objects snap to the glyph bounds.
How do I permanently unlock an object faster?In the Preferences under "Selection and Anchor Display", activate the option to select and unlock objects on the artboard. After that, you can click the lock icon to unlock the object.
