

Illustrator CC 2017 brings no spectacular new features, but a series of small improvements that noticeably save you time in everyday work. Stefan from psdtutorials.de goes through the new features in the video step by step: from the "New File" dialog through font management to pixel-precise working. This guide shows you where to find which function, how to use it, and where the limits are.
The video is only loaded from YouTube when you play it – data (including your IP address) is then transmitted to YouTube/Google. More in the privacy policy
Key Takeaways
- The "New File" dialog offers templates from the Adobe Stock gallery, preview images, and a list of recently used documents.
- Missing fonts can be synced via Typekit directly when opening a document.
- You enable pixel-precise working permanently via an option for creating and transforming.
- The font menu shows a live preview, can be filtered, and supports favorites.
- In the Glyphs panel, you can suggest alternative characters directly on the selected letter.
- New text objects can be filled automatically with placeholder text.
- With Ctrl + Zoom, you bring a clicked object directly to the center of the field of view, but text input is still excluded from this.
Step-by-Step Guide
Step 1: Start Documents with Templates
Open the new dialog via "File > New". It is strongly modeled on Photoshop and InDesign and directly offers you templates for mobile, web, or print. Choose a category, and the matching sizes are preselected. You can adjust the width and height at any time and switch to the familiar dialog via the additional settings.

Step 2: Load Templates from the Adobe Stock Gallery
In the same dialog, you browse the stock gallery directly. Click a template and use the preview to check the layout before downloading. Stefan shows how he first rejects a brochure as too colorful and selects another one. The file is then downloaded, which takes varying lengths of time depending on its size. An icon shows you that the file is ready to open.

Step 3: Sync Missing Fonts via Typekit
When opening the downloaded template, Illustrator detects which fonts are missing on your system. These are synced and installed directly via Typekit. The fonts, which are initially marked orange or pink, switch to their normal display after syncing. So you no longer have to search for and install the fonts manually before you can work with the document.

Step 4: Use Recently Used Files
If you open "File > New" again later, you will find your recently used documents there with a preview image. This saves a detour through the file folder. Individual entries can be removed from the list again via a button if you want to tidy up the overview.

Step 5: Align Pixel-Precisely with the Pixel Grid
Especially with web graphics, you often need to work exactly on whole pixels. To do this, create a new web document and enable the grid via "View". You will find the new option for aligning to the pixel grid in the preferences under the category for artwork when creating and transforming. When it is enabled, objects snap directly to whole pixels when moved. Without this option, moving creates positions between pixels, which later look blurry.

Step 6: Check the Pixel Preview
To see how your graphic will look in the end, turn on the pixel preview under "View". It simulates the display on screen and makes blurry edges visible. If you do not want to constantly switch between views, you can also enable pixel-precise display permanently in the document.

Step 7: Set Pixel-Precise Display Permanently
For work that should be permanently pixel-precise, there are two ways. You can click the icon in the Control panel, and the object is aligned once. Alternatively, you use the new icon, which stays permanently active. Via the right mouse button, you will also find the command "Apply Pixel-Precise Display". If it is already active, the menu shows this. If you do not want the function, you can simply deselect it again.
Step 8: Using the Font Menu with Live Preview
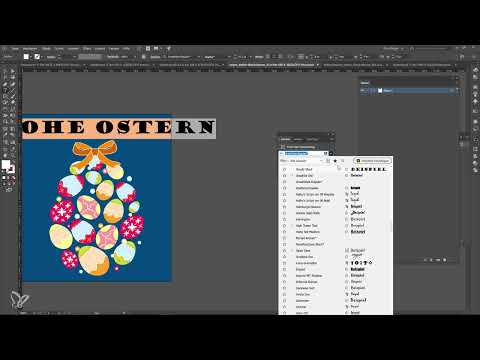
When selecting a font, Illustrator now shows a live preview. If you hover the mouse over a font, you can already see it on your selected text without clicking it. This also works via the Character panel under "Window > Type > Character". For convenient use, you can move the menu and adapt it to your way of working.

Step 9: Filtering Fonts and Setting Favorites
In the font menu, you can filter by categories such as serif, script, or blackletter. You can also mark fonts as favorites with a star. Stefan emphasizes that you only regularly use a few favorite fonts anyway. With favorites, you quickly bring them to the top. According to Stefan, you can't yet create your own categories, which he wishes for in future versions.

Step 10: Selecting Alternative Glyphs
The glyphs function is one of the most useful new features. Select a letter in the text and press the key that displays alternatives. Illustrator immediately shows you matching characters from the font, such as other variants for an F, W, or e. With another keypress, you switch between the variants. Previously, you had to laboriously search in the Glyphs panel. Incidentally, this function comes from InDesign.

Step 11: Using Special Characters and Placeholder Text
In the Character panel, under the settings, you'll find special characters such as bullet points, whitespace characters, or break characters, which you can insert directly. In addition, Illustrator automatically fills new text objects with placeholder text. If you don't want that, you can deactivate the option in the Preferences under the Type section. There you will also find the setting with which you generally switch the placeholder text on or off.

Step 12: Zooming Directly to an Object with Ctrl + Zoom
Click on an object, such as a character's nose, and press Ctrl + Zoom. Illustrator then zooms directly to that object, and it stays in view. Previously, you had to laboriously scroll back and forth. However, note that this function does not work in text editing mode. There you continue to zoom the classic way via the View menu.

Summary – Illustrator CC 2017 New Features: Templates, Pixel Grid & Glyphs at a Glance
Illustrator CC 2017 offers above all practical improvements for everyday use. Templates from the Stock gallery and automatic Typekit synchronization speed up the start of new projects. With the pixel grid, you work cleanly for the web, and the new font selection with live preview, filters, and favorites makes working with fonts significantly more pleasant. Glyphs, placeholder text, and Ctrl + Zoom save additional time, although zooming in text mode is still missing.
FAQ
Where do the templates in the new "New File" dialog come from?The templates come from the Adobe Stock gallery and can be searched and downloaded directly in the dialog.
Do I have to install missing fonts manually?No, missing fonts are automatically synchronized via Typekit when you open a document.
How do I make sure my objects are pixel-perfect?In the Preferences, activate the option to align to the pixel grid when creating and transforming, or use the corresponding icon in the control panel.
Can I create my own categories for fonts?Not currently, but you can mark favorite fonts as favorites and filter by categories such as serif or script.
Does Ctrl + Zoom also work when editing text?No, this function is not yet available in text editing mode.

