Renaming or renaming images in Lightroom is a simple yet crucial task to better organize your photo files. Thoughtful naming not only helps you keep track but also significantly simplifies the later search for specific shots. In this guide, I will explain how you can efficiently name images in Lightroom to ensure a structured and comprehensible image archiving.
Key Findings
- Selecting images can be done quickly via the film strip or thumbnail view.
- You can rename images individually or in groups, with the original file number being helpful.
- Custom names can be associated with keywords, making later sorting easier.
Step-by-Step Guide
Step 1: Select Images
Before you can start renaming your images, you first need to select the images you want to rename. Go to the library in Lightroom and look at the film strip at the bottom of the screen. Here you'll find all your imported images. Simply click on an image you want to rename. If you want to select multiple images, you can hold down the Command key (Mac) or the Ctrl key (Windows) and then click on the desired images.

Step 2: Deselect
If you accidentally selected the wrong image, you can quickly undo the selection by pressing the Command D shortcut (Mac) or Ctrl D (Windows). This immediately clears the current selection and you can reselect without having to deselect all images individually.

Step 3: Select Multiple Images in a Group
If you want to rename a series of photos, for example, the first nine images, you can do this as well. Keep the Shift key ready and click on the last image of the series. This will select all images from the first selection to the last image, making the editing more efficient.

Step 4: Rename Images
Once you have selected the desired images, you can start renaming them. Click on the "Rename Photos" function in the library. A small window will pop up where you can enter the new filename. Initially, you will see the default names as they come from the camera. These names are often not informative and may duplicate older images.

Step 5: Create Custom Names
To prevent these duplicates, it’s advisable to choose custom names that relate to keywords which will help to sort the images later. In the naming window, you can now enter a custom name. To retain the original file number, you can use the original filename and append something like "Model".
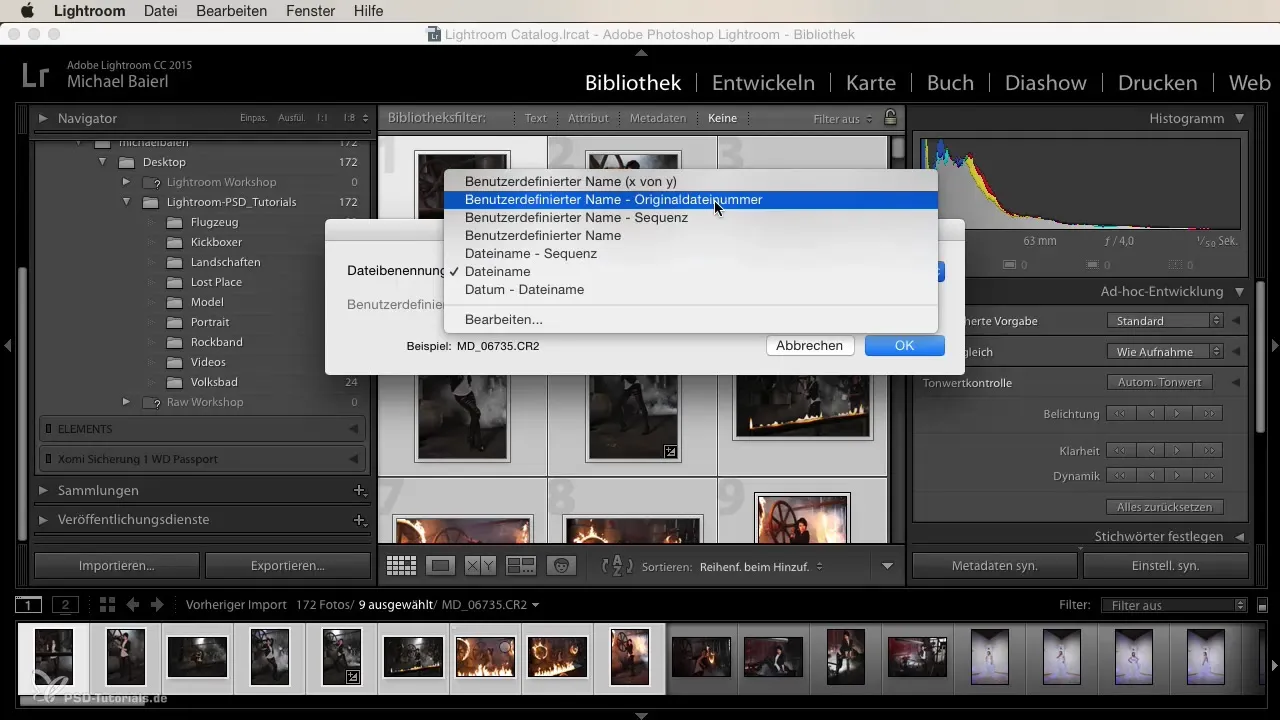
Step 6: Adjust Filenames
If you want, you can also adjust the name in real-time. As you type, the change will be immediately displayed in the window. This helps you to instantly check whether the name sounds as you envisioned it. An example could be "Model Hochofen". This way, you immediately know that this image is related to a shoot at the Hochofen.
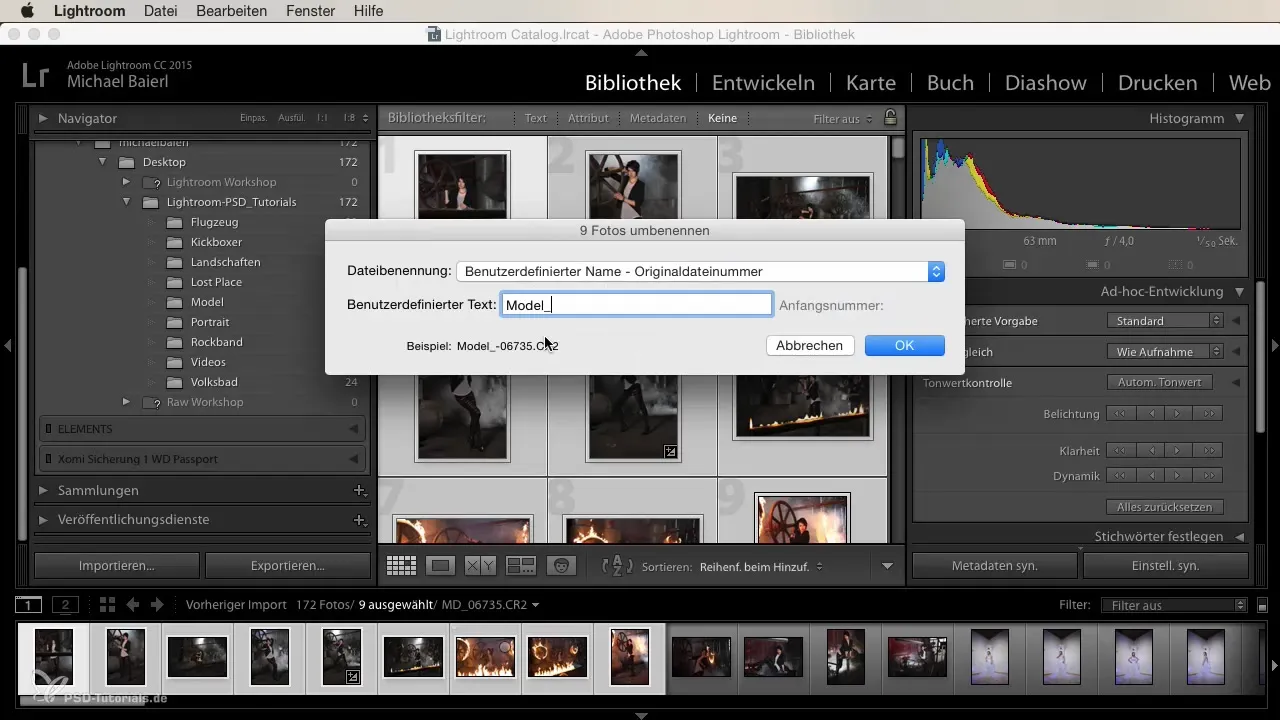
Step 7: Finalize Naming
Once you are satisfied with the new name, click on "OK". Depending on the settings you have made in Lightroom, you can choose the custom name with a sequence that integrates the original file number. This makes searching and matching the images easier when you need specific images for other programs like Photoshop.
Summary – Effectively Naming Images in Lightroom: A Step-by-Step Guide
Naming your images in Lightroom is not just a simple process, but it is also crucial for good organization of your photo files. With the steps mentioned above, you can ensure that you always keep track and easily find your images again.
Frequently Asked Questions
How do I select multiple images in Lightroom?Hold the Command key (Mac) or Ctrl key (Windows) to select multiple images.
Can I undo the selection of images?Yes, just press Command D (Mac) or Ctrl D (Windows) to deselect.
How do I name my images in Lightroom?Go to the library, select the desired images, and click on "Rename Photos."
What is the advantage of a custom name?Custom names help you categorize and find the images later more easily.
Can I label images individually or use a sequence?Yes, you can choose a custom name or a sequence from the original file number.


