You are on the right track to implementing your musical ideas digitally. In this part of the tutorial, you will learn step by step how to load instruments into the step sequencer of FL Studio and effectively use the pattern principle. Whether you’re an experienced producer or a newcomer, understanding these concepts will significantly enhance your music production.
Key Insights
The loading of instruments and working with patterns are fundamental skills in music production. You will learn how to easily add instruments, organize them into groups, and work with patterns to create creative beats.
Step-by-Step Guide
To add an instrument to the step sequencer of FL Studio, you have several options. You can click on the plus symbol at the bottom of the window or use the menu at the top. Click on "Add" and select from the list of available instruments under "Channels". I can only see a few instruments because I have hidden the options I don’t need. This keeps my workspace tidy.
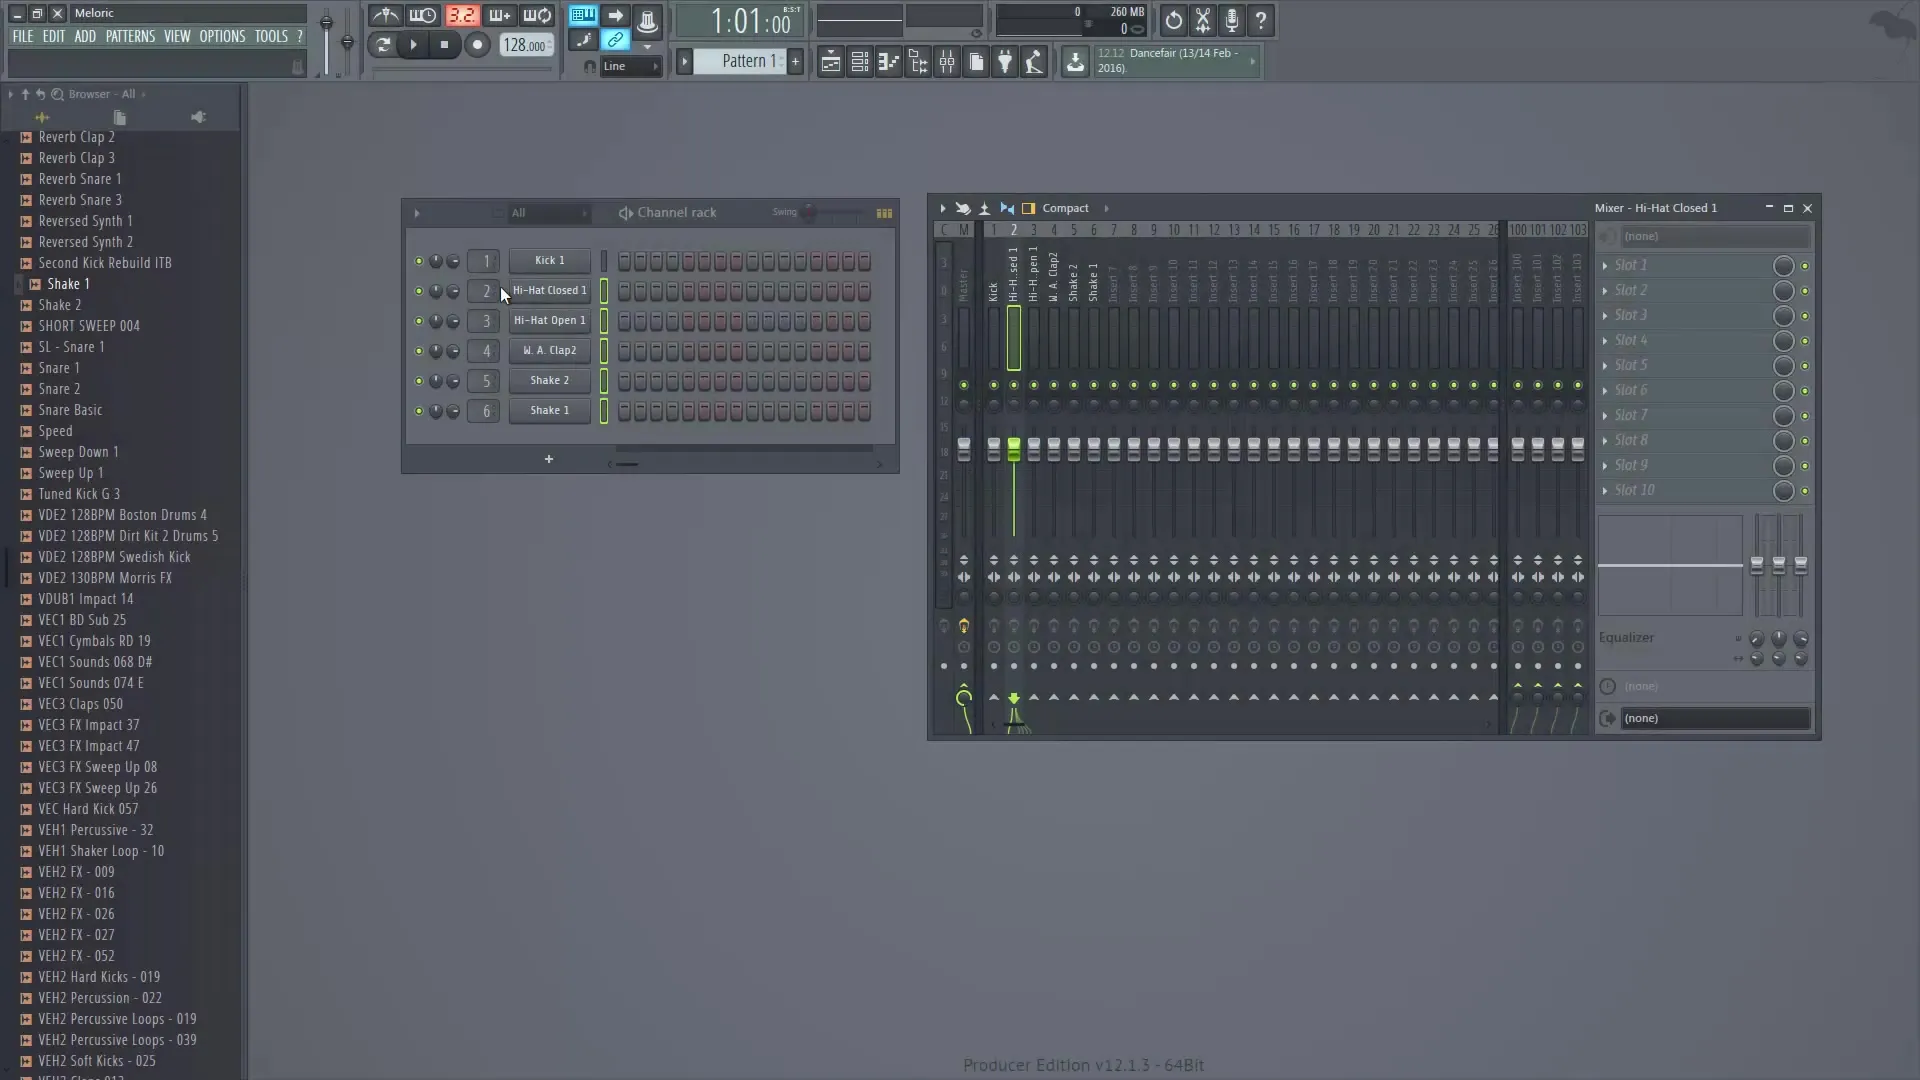
I will now select the sample player Nexus. Once I have loaded it, it appears in the step sequencer. To assign the Nexus sample player to a mixer channel, I switch to the mixer and select the desired channel. I right-click and choose the option "Route Selected Channel to this track". Now the sample player is displayed in the mixer.
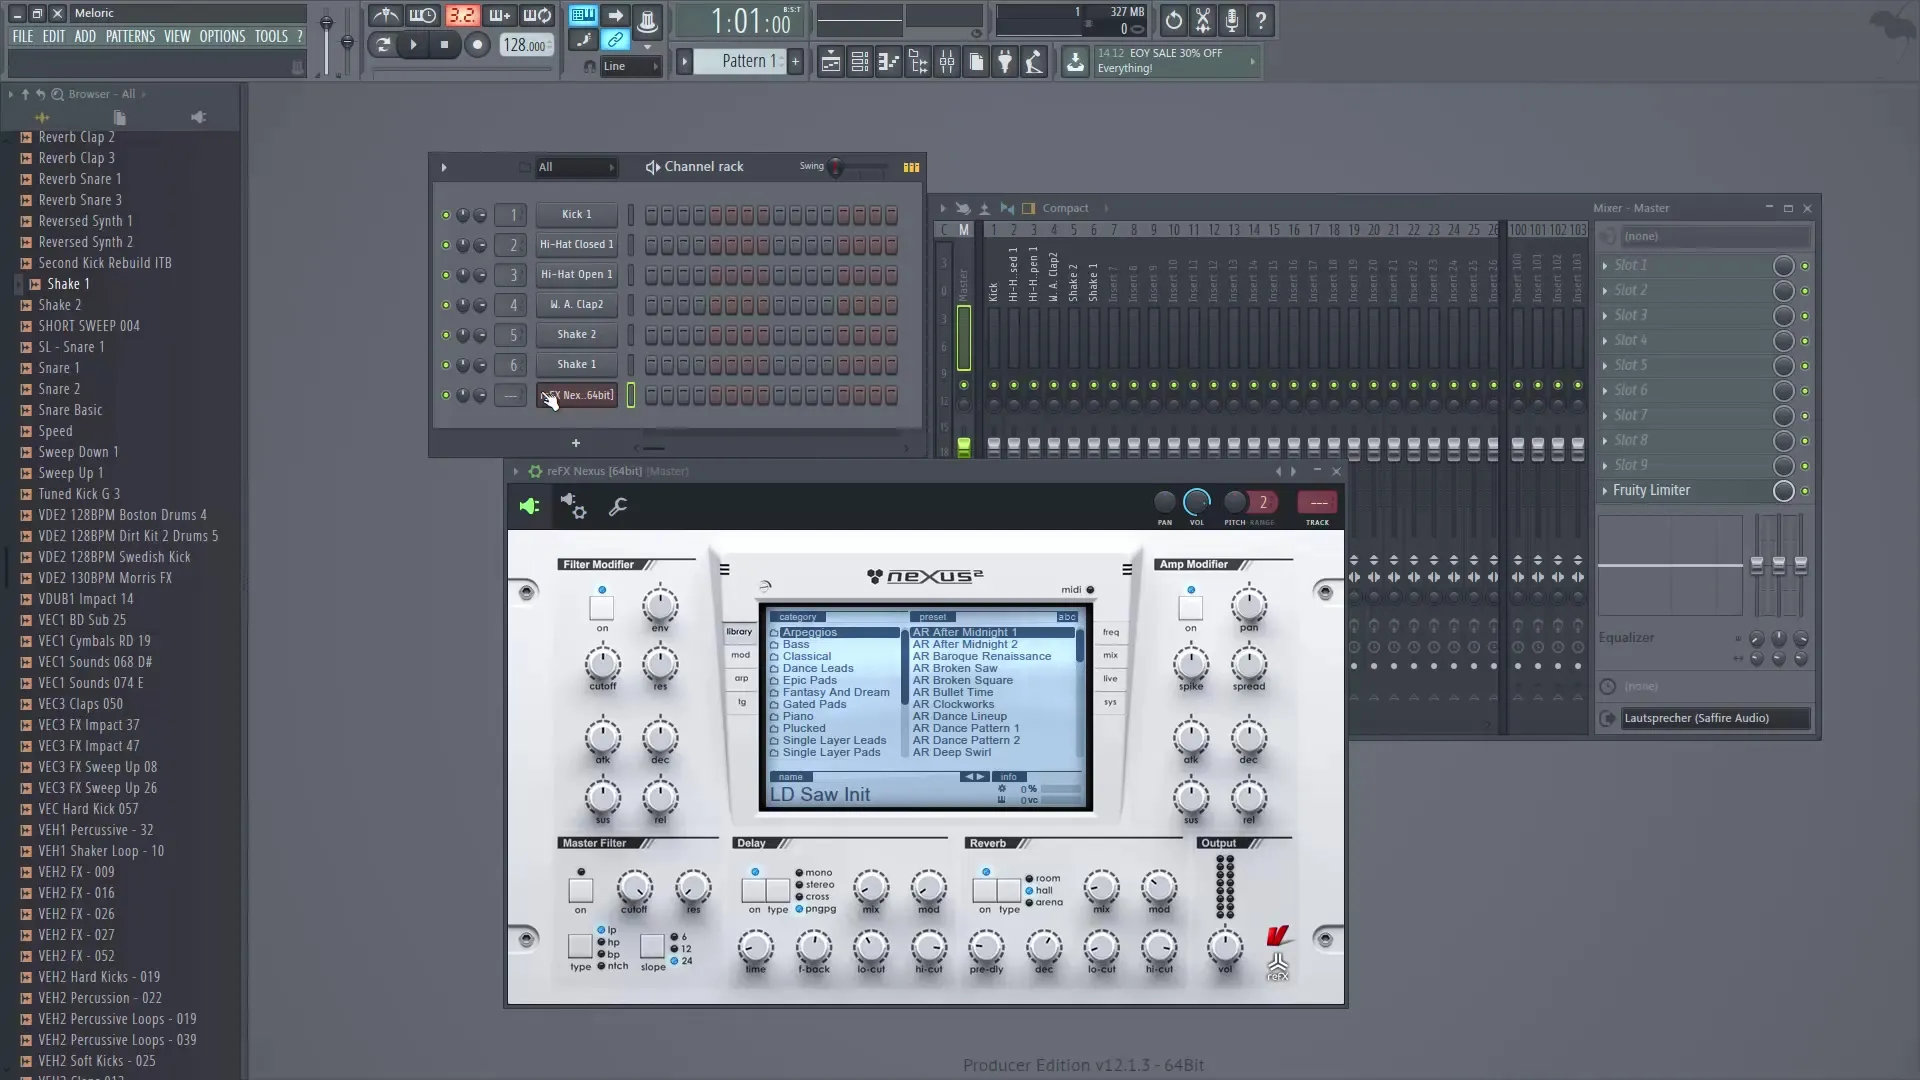
To maintain an overview in the step sequencer, it makes sense to organize the individual elements into groups. Since I already have drum elements and now a synthesizer or sample player, I will move this into a separate group. I press the Alt and G keys and name it "Synth".
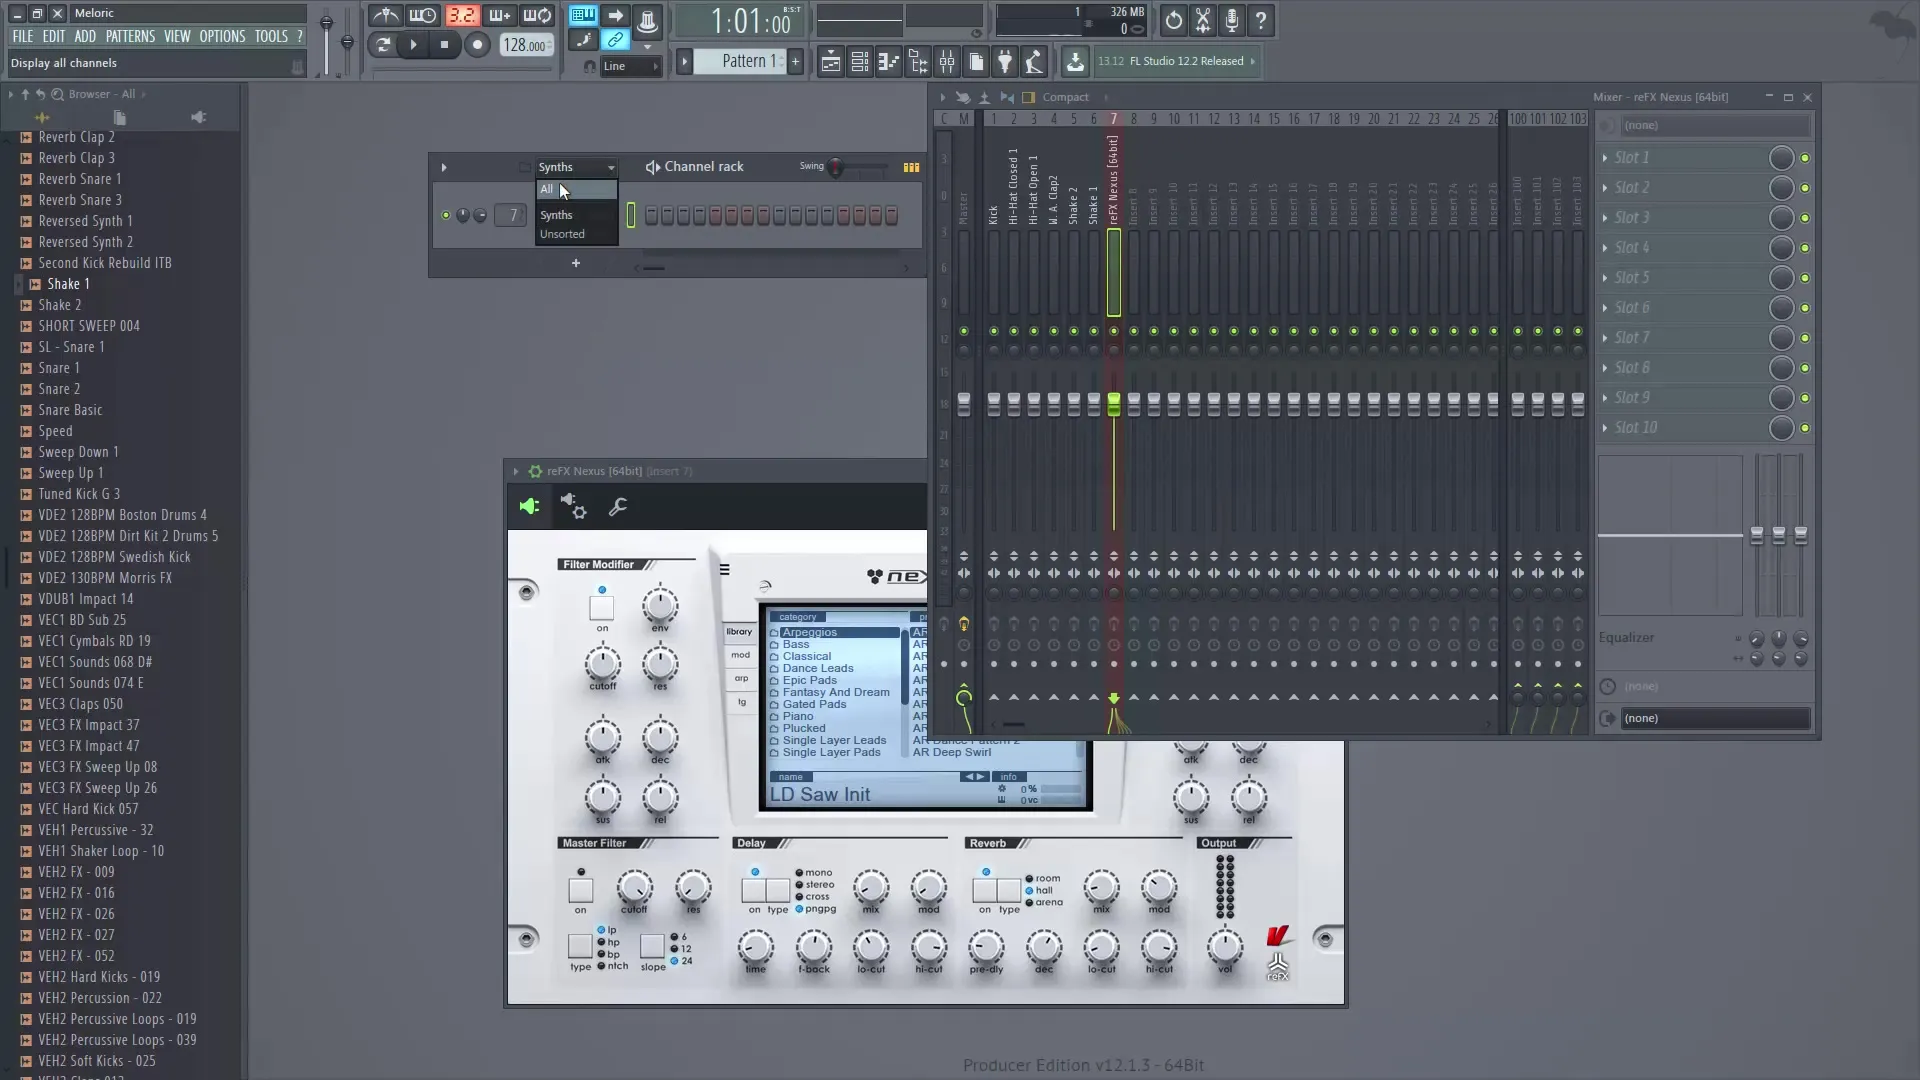
If I want to see the other elements, I click on "All" to display all drum samples. These are currently not assigned to a group, so I find them under "Unsorted". To also put them in a group, I select all drum elements, press Alt and G again, and name the group "Drums".
Now I can easily switch between the groups and keep track. Now let's take a closer look at the pattern principle. Once I have loaded the instruments in the step sequencer, I want to start creating a drum beat. I select my drum elements and begin programming a simple beat.
I add a kick note to each first beat in a measure. When I play it back, it already sounds good. Now I have the kick in pattern 1. I can place this pattern directly in the playlist. I drag it into the playlist, where only the kick is currently audible.
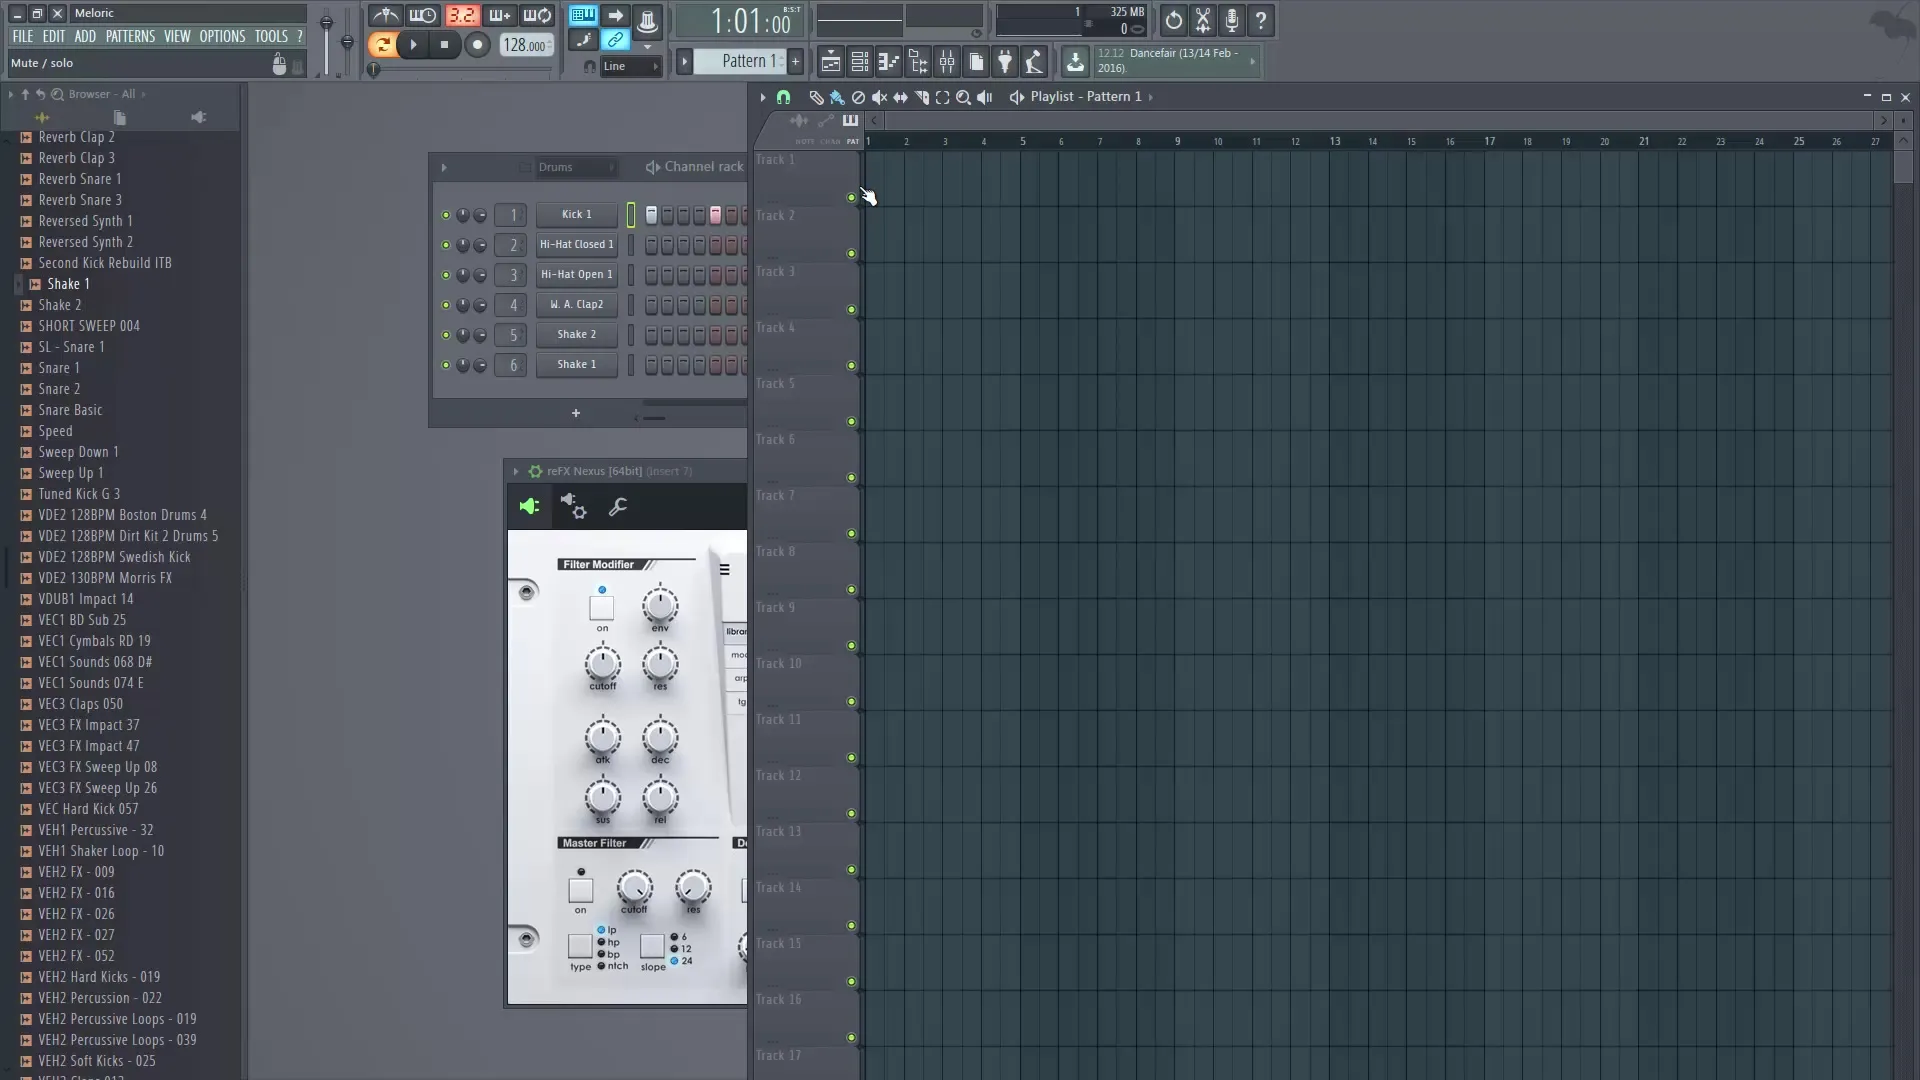
If I want to use a separate pattern for each drum element, I click on the small plus symbol to create a new pattern. I name it for example "Claps". Since no kick is shown in pattern 2, it is now empty.
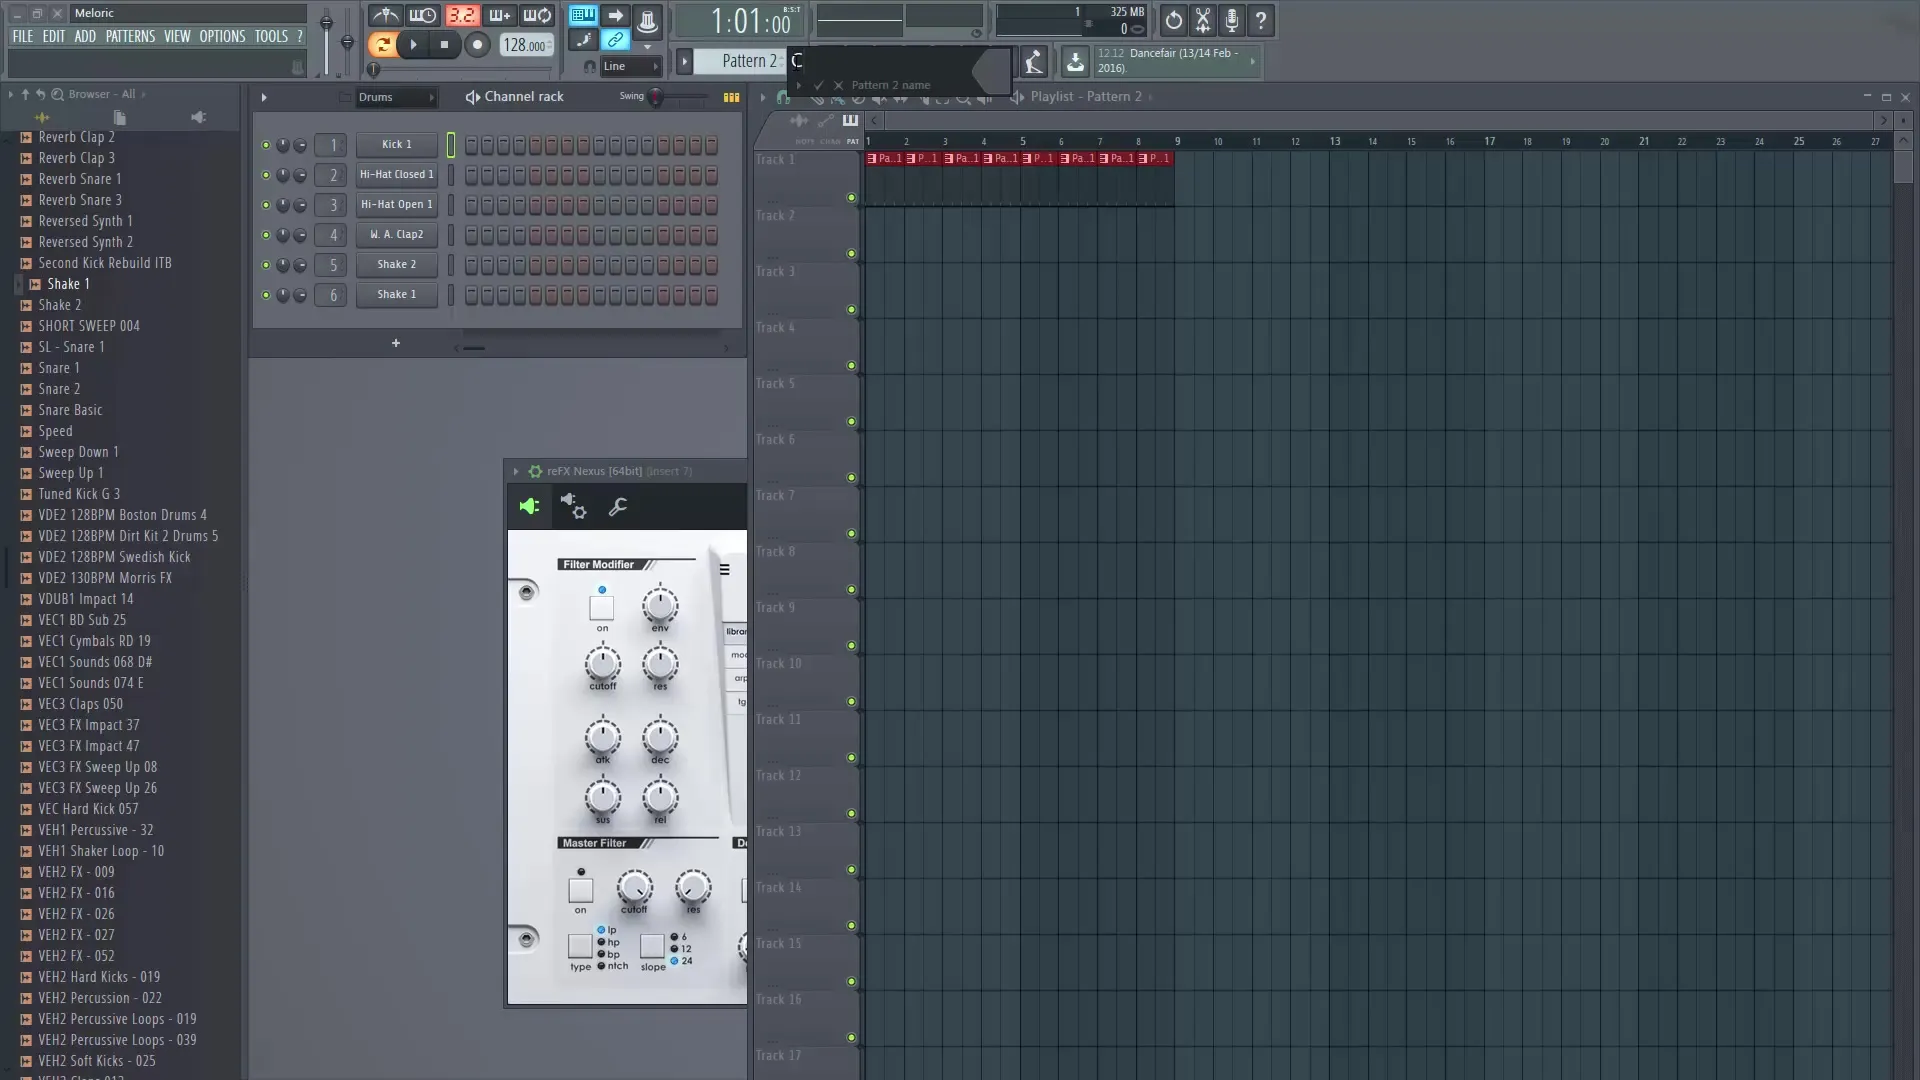
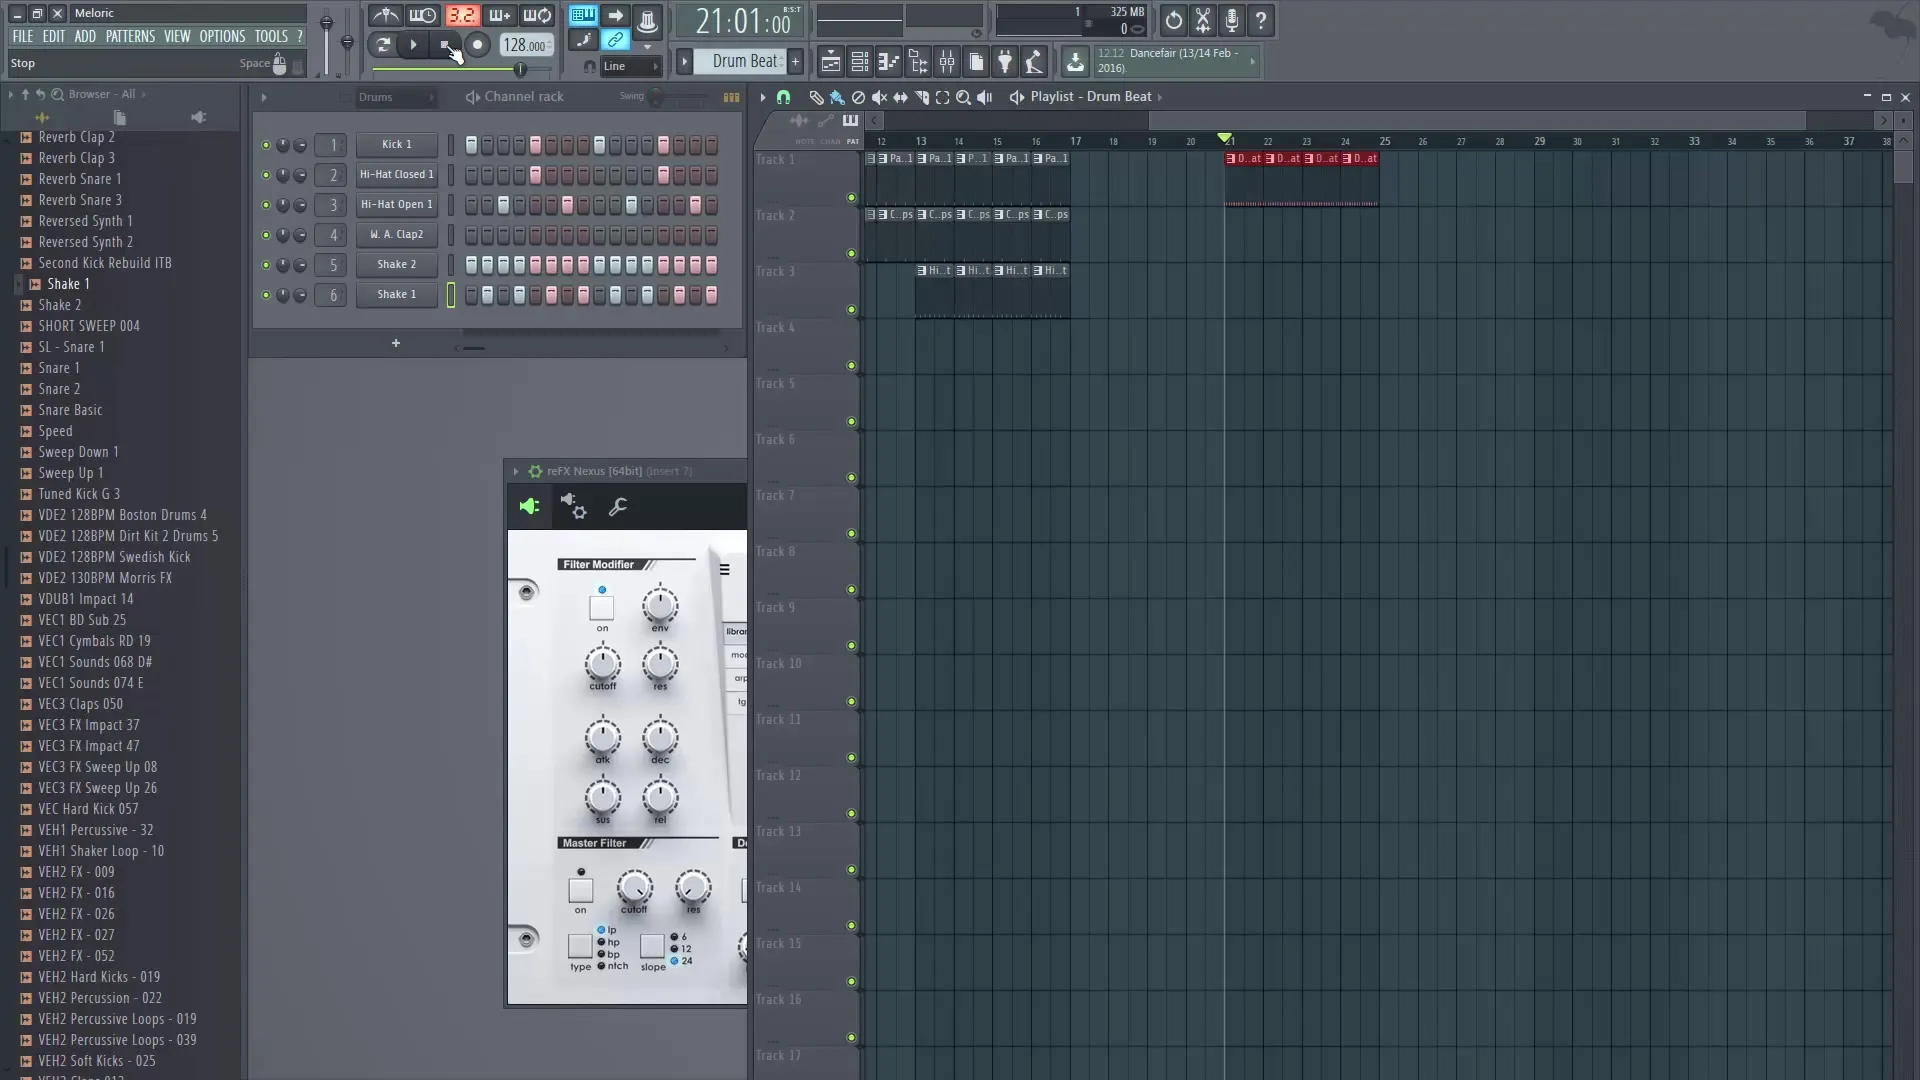
Now I place the claps on the second and fourth beats. When I drag the pattern into the playlist, my first little drum beat is already created. Since I am now in song mode, I play the playlist to hear the entire structure.
I continue with this and create a third pattern called "Highhat". I add a few hi-hat elements, which I place on every second eighth note, and drag this pattern into the playlist as well.
Practice shows: If I change something in a pattern, this update applies to all instances of that pattern, unless it has been made unique beforehand. So I can simply add or remove elements. This makes building the song much more flexible.
This is the basic idea behind using patterns: I can reuse them over and over again to structure my songs. For example, you can create sections where only kicks are played, followed by claps and hi-hats.
If I want to pack all drum elements into one pattern, I create a new pattern named "Drumbeat" and add all the desired samples.
Now I have a complete beat that I can drag into the playlist to create another section of my song.
When applying patterns, you can quickly test which variation is better suited for your music. It affects how many tracks you want to have in your playlist. The more you fit into a pattern, the more space you save, but flexibility could suffer.
If I want to change something later in the song, there is also the possibility of turning an existing pattern into its own. To do this, click in the upper left corner of the used pattern and select "Make Unique". This makes a locked pattern standalone.

Your new pattern now has its own place in the list, meaning changes to this new pattern will not affect the original. This is especially useful when you only want to change something in one spot.
This way, patterns help you to steer and optimize your creative process while you work on your track.
Summary - Step Sequencer and Pattern Principle in FL Studio
In the third chapter, you learned how to load instruments into the step sequencer, organize them, and effectively implement the pattern principle in FL Studio. With these techniques, you will purposefully develop your musical ideas and keep control over your workflow.
FAQ
How do I add an instrument to the step sequencer?You can click on the plus symbol in the step sequencer or use the “Add” menu to select an instrument.
How do I organize my instruments into groups?Use the shortcut Alt + G to create a group and choose a name for it.
What happens if I change an element in a pattern?Changes in a pattern affect all instances of that pattern unless it has been made unique beforehand.
How do I create my own pattern?Click on the plus symbol to generate a new pattern and name it as needed.
How can I make an existing pattern unique?Click in the upper left corner of the pattern and select “Make Unique” to create a copy of the pattern that can be edited independently.
