Anyone who has ever photographed a portrait under a ceiling light knows the result: the eyes sink into shadow, the nose casts a harsh line across the cheek, and the face looks flat. Most of the time this isn't down to the camera, but to a single decision, namely the angle from which the light falls on your subject. In this guide, you'll learn how to choose the light direction deliberately, control shadows consciously, and emphasize your subjects so that they look three-dimensional and alive.
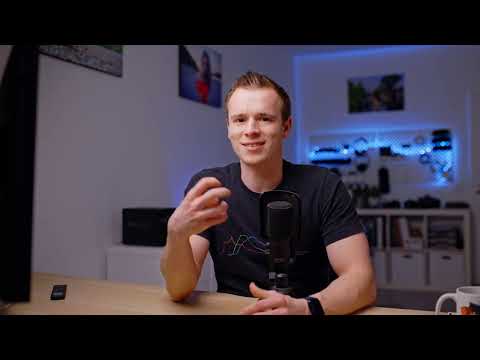
The video is only loaded from YouTube when you play it – data (including your IP address) is then transmitted to YouTube/Google. More in the privacy policy
Key Takeaways
- The light direction determines where shadows appear and how three-dimensional your subject looks.
- Frontal light coming directly from the camera looks flat and boring.
- Light from above creates shadows under the eyes, nose, and chin. Light from below looks unnatural.
- A lateral position of about 30 to 40 degrees to the side and 30 to 40 degrees upward has proven to be a good starting point.
- Small light sources create hard shadows, large light sources create soft transitions.
- In sunlight, avoid midday and let the sun fall from the side and at a lower angle.
Step-by-Step Guide
Step 1: Recognizing Light Direction as a Creative Tool
Before you change anything, observe what a lamp does to your subject. The instructor in the video demonstrates this with a simple example: the normal ceiling light in the room. It hangs above the subject and creates clear shadows under the eyes, nose, and chin. Even if color and brightness are right, the result remains unflattering. Light sources from above are therefore among the least favorable directions of all. With every set-up, first pay attention to where the light is primarily coming from and where the shadows fall.

Step 2: The Size of the Light Source Determines the Hardness of the Shadow
Direction is only part of the effect. A small light source, like a single lamp, delivers hard light with sharply defined shadows. A large light source, such as a softbox or a large window, distributes the light more evenly and creates soft transitions. Especially in portraits, soft shadows usually look more pleasant. If you use hard shadows, you should be aware that they emphasize texture and expression much more strongly.

Step 3: Controlling Shadows Consciously
With the light direction, you determine where the shadow lands. This effect can be positive or negative, and that is precisely the core of the design. A certain amount of shadow on the face is an important means of creating shape and depth. If no shadow at all is visible on the face, it quickly looks flat and without structure. Your task is therefore not to avoid shadows at all costs, but to place them so that they support your subject.

Step 4: Properly Assessing Frontal Light and Ring Light
A ring light, which shines from the front around the lens, creates barely visible shadows. This is practical for certain situations, such as video recordings in front of the camera, where the person needs an even look. The downside: the light direction is hardly recognizable to the viewer, and the image quickly looks flat and artificial. Frontal light from the camera position is likewise boring, especially with the flash on a phone or an on-camera flash. If you have to stick with these situations, at least try to move the light source a bit away from the camera axis.

Step 5: Finding the Ideal Angle
For his videos, the instructor uses a light source positioned about 30 to 40 degrees to the side and 30 to 40 degrees upward. This starting point is a reliable basis. Whether the light comes from the right or left hardly matters. What's decisive is that you have a clear main direction. In the video, the right half of the face is slightly brighter than the left, and precisely this slight difference gives the image character. A completely black side is, however, too much, so with strong lighting you should always check whether details remain recognizable.

Step 6: Avoiding Extreme Positions
If the light source is very steeply above the subject, unattractive shadows quickly appear. The eyes become dark, so-called raccoon eyes appear, and the shadow under the chin becomes distracting. They can be an intentional stylistic device in a horror film, but in classic portraits you should avoid them. Also make sure the eyes don't become too dark. A light source from below should not be the strongest, unless you deliberately want to create a creepy mood. As a rule of thumb: the main light source comes neither frontally nor directly from above or below.

Step 7: Making even light visible
When the light is even everywhere, the direction disappears. This often happens under an overcast sky. Even then, however, a main direction remains recognizable if you consciously look for it. It makes sense to choose your position so that the light does not come straight from the front, but slightly from the side. In cloudy weather, direction has less of an effect, but even then you can shape the subject through your position relative to the light source. Frontal light is usually the most boring option of all.

Step 8: Using sunlight deliberately
Sunlight follows the same principles as artificial light. At midday, the sun stands almost vertically above the subject and creates raccoon eyes and an unflattering chin shadow. Sunglasses can help hide the eye shadows, but it is better to plan the shot so that the sun is far from its midday position. Try to position the sun to the side of or slightly behind the subject. This creates a softer and more pleasant light. For a photo shoot, the period around the morning and late afternoon is ideal.

Step 9: Using reflections as fill light
Not every side of a subject has to remain dark. A bright wall can reflect light and gently brighten the shadows. This creates a second, weaker light source that complements the main light source. The ratio between the main light and the reflected light determines how high-contrast your image appears. If you have multiple light sources in the scene, it is worth clearly defining the main light source and using the other lights as support.

Step 10: Using light direction in landscapes too
The principle applies equally to landscape shots. If the sun is directly in front above a mountain and you photograph from the side, hardly any shadows appear, and the landscape looks flat. It gets more interesting when the sun is lower and shines in from the side. Then long shadows appear that emphasize structures and give the image depth. Especially at sunset, a particularly atmospheric effect can be achieved this way.

Step 11: Using exceptions deliberately
There are situations in which you have no choice, for example when the location is predetermined or the midday sun is unavoidable. Then you can work with orientation, backlight, or a different perspective. The instructor reports on his own experiences in which an unfavorable direction still worked well. What matters is that you choose the exception deliberately and do not accept it out of carelessness.

Summary – Mastering light direction: Side light for effective portraits
Light direction is one of the most powerful tools for giving subjects dimension and expressiveness. If you place the light to the side and slightly above, you clearly bring out form and texture. Avoid frontal, steep, or from-below light unless you are deliberately seeking an effect. Also pay attention to the size of the light source, and with sunlight, use time of day and angle to soften harsh shadows. With a little practice, you will quickly recognize which direction suits each subject.
FAQ
Why does a ceiling lamp look unflattering for portraits?A ceiling lamp shines from above. This creates strong shadows under the eyes, nose, and chin, and the face looks unflattering.
How do I position a light source correctly for a portrait?A good starting point is about 30 to 40 degrees to the side and 30 to 40 degrees upward. Whether the lamp is on the left or right is usually secondary.
What is the difference between hard and soft light?Small light sources produce hard light with sharp shadows. Large light sources deliver soft light with gentle transitions.
Why are raccoon eyes a problem?If the light is too steeply above the subject, the eye sockets are heavily shadowed. This looks distracting in most portraits, unless you want to achieve a dramatic effect.
Is a ring light always the right choice?No. A ring light avoids shadows, but as a result looks flat. For portraits with character, a side light source is usually more suitable.
How do I deal with sunlight?Avoid midday when the sun comes steeply from above. Position the subject so that the sun is to the side of or slightly behind the subject.


