
Imagine your logo gliding into the frame from the left as the page opens, a headline slowly growing out of the center, and the whole thing running without any action from your reader. That is exactly what InDesign makes possible with the Animation panel. You don't have to be a programmer, because all settings can be made via menus and dropdown lists.
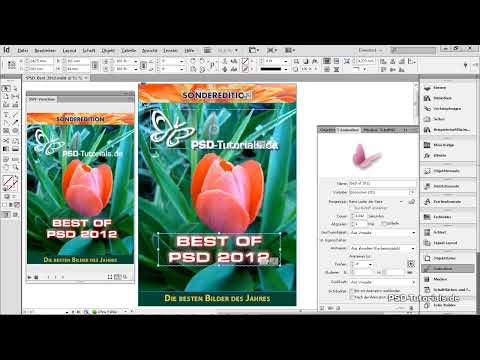
The video is only loaded from YouTube when you play it – data (including your IP address) is then transmitted to YouTube/Google. More in the privacy policy
In this tutorial, I will guide you step by step through the process: from the first animation effect to fine-tuning duration, speed, and end position, through to the preview, export as a SWF file, and controlling multiple animations. In the end, you will be able to deliberately plan and implement your own animations.
Key Takeaways
- You manage animations in the "Animation" panel, which you open via the "Window" menu, "Interactive".
- Each object gets its own effect, which you select from a list. You can set duration, speed, and trigger individually.
- With the "To Current Appearance" option, the object stays in its usual place after the animation.
- The spread preview allows you to test animations directly before you export.
- Animations can be played one after another or simultaneously. You control the order in the "Timing" panel.
- Animated effects only work in SWF format, not in PDF.
Step-by-Step Guide
Opening the Animation Panel
The control center for all animations is the "Animation" panel. You can find it via the "Window" menu, then "Interactive", and there the "Animation" entry. The panel can be moved freely, so you can place it next to your page. If you later switch between layout and animation more often, it is worth docking it directly to the workspace.

Selecting an Object and Giving It a Meaningful Name
Before you assign an animation, you select the object that should move. In the example, it is a headline. At the top of the panel is the name of the object. If only a generic name such as "Object 1" is entered there, you can overwrite it. Especially with several animated elements, a clear name saves you a lot of time later, because you can distinguish the effects from each other more quickly. Names such as "Headline", "Logo_PSD", or "Slogan" have proven to be useful for this.

Defining the Desired Effect
In the "Preset" field you will find a small arrow. Clicking on it opens a list of various effects. Choose, for example, "Fly in from left". The effect then appears in the object's row. Next to it, a small graphic shows the motion path. If you hover the mouse over this graphic, the effect is played directly. This way you can see immediately whether the movement matches your expectations.

Determining Trigger and Duration
Below the effect row, you specify when the animation starts. The "On Page Load" option ensures that the effect runs automatically as soon as the page is opened. Alternatively, you can link the animation to a click on the page or to a mouse click on the object itself. For introductions or title pages, page load is usually the right choice.
You set the duration in the lower area. A duration of about two seconds feels pleasant in most cases. You can also let the effect play as a loop, in which it repeats continuously. However, you should use this sparingly, because permanently moving elements quickly distract the viewer and can be tiring.
Adjusting Speed and End Position
Via the "Speed" field, you determine the progression of the movement. With a deceleration at the end, the object looks more natural because it comes to a gentle stop. Feel free to try out the options and observe the result in the preview.
The "To Current Appearance" setting is particularly important. With it, you ensure that the object stays exactly at the spot where you originally placed it after the animation ends. Without this option, it would take a different position on the spread after playing.
Using Rotation, Scaling, and Opacity
Further down in the panel, you can additionally rotate and scale the object or change its opacity. This opens up creative possibilities, for example when an element flies in slightly rotated and straightens up in the process. You can also specify that the object is hidden until the animation begins and only becomes visible afterwards. The "Hide After Animating" option, on the other hand, makes the element disappear at the end. To get started, the basic settings are completely sufficient; you can use the advanced options deliberately later.
Check the animation in the spread preview
To see how your settings take effect, click the small camera icon at the bottom left of the panel. It is called "Spread Preview". A new window with the SWF preview then opens. There you will find a Play button with which you can play the effect as often as you like. Clicking again reloads the page and runs the animation completely.
It is advisable to leave this preview window open while you work and simply move it to the edge of the screen. This way you can check every change immediately.


Add more objects and effects
For each additional element, you repeat the same process: select the object, assign a name, choose an effect, and set the timing. An example would be a logo that flies in from the right. The order in which you create the effects initially also determines the order of execution.
If you also want an object to grow into the image, you can choose the effect "Zoom In 2D". The element then appears to enlarge from the background into the foreground. You should also check this effect in the preview before you continue.


Understanding motion paths and deleting effects
Every effect is based on a path. You can edit these paths afterwards with the path tools. For example, you can extend them or add a curve so that the object takes a detour. This procedure is advanced and requires some practice, but it opens up many creative possibilities for you.
If you want to remove an effect again, select the object and click the trash can icon at the bottom of the Animation panel. The effect is then deleted, while the object itself remains unchanged.

Export as an SWF file
Animations can only be output in Flash format (SWF), because the PDF format cannot display the effects. To do this, you first export the InDesign file via "File", "Export" or with the keyboard shortcut Ctrl+E. You can choose the file name freely. In the file type field, click the arrow and select the entry "Flash Player (SWF)". After clicking "Save", another dialog appears in which you can usually accept the settings unchanged. Confirm with "OK" and the file will be created.
Note: In current versions of InDesign, SWF export is no longer included. The video shows an older version. Therefore, check in advance which export options are available to you.
To play it, open the file in Adobe Media Player, for example. The effects play there, and you can assess your result. With the reload button, you repeat the animation as often as you like.


Control the order with the Timing panel
By default, animations are played in the order in which you created them. However, this sequence can be changed. To do so, open the "Timing" panel via "Window", "Interactive", "Timing". There you see all the effects you have set up. You move them into the desired order via drag and drop. To do this, click on the entry, hold down the left mouse button, and drag it to the desired position. With the preview, you can then check whether the new sequence is correct.


Play animations simultaneously
Sometimes several elements should start moving at the same time. To do this, select the relevant effects in the Timing panel and click the "Play Together" button. Animations can also be combined in groups. For example, one effect can start on its own, and the other two then run together afterwards. If you link all three effects and start the preview, you will see that they run simultaneously. The bracket next to the entries shows you which effects belong together.
Changing the Triggering Event
Finally, you can specify which event triggers an animation. By default, it starts when the page loads. If you want to change that, select the relevant effects in the panel and open the context menu. There you choose "Reassign" and then the desired event, for example "On Page Click". The effects will then only be executed on click. This approach is particularly suitable if you want to actively involve the viewer in the process.
Summary ??? Creating Animations in InDesign: Making Objects Fly In Stylishly
With the Animation panel in InDesign, you bring pages to life without needing any programming knowledge. You choose an effect for each object, set the trigger, duration, and speed, and use the "To Current Position" option to make sure everything stays in its place. With the Spread Preview, you test the result before exporting the file as SWF. Finally, via the Timing panel, you determine the order and decide which animations run simultaneously. Take your time trying out the features, and you will quickly develop a feel for effective movements.
FAQ
Why isn't my animation displayed in the PDF?The PDF format cannot display the animation effects, so you have to export the file as a Flash Player SWF file.
How can I make an animation repeat?In the Animation panel, select the loop playback option, and the effect will be repeated continuously.
How do I remove an effect?Select the object in the Animation panel and click the trash can icon at the bottom, and the effect will be deleted.
How do I change the order of the animations?Open the "Timing" panel and drag and drop the entries into the desired order.
How do I start multiple animations at the same time?Select the desired effects in the Timing panel and click the "Play Together" button.
How do I specify that an animation only starts on click?Select the effects, open the panel's context menu, choose "Reassign," and then "On Page Click."


