
An interview appears in almost every issue of a magazine. If you set up the structure cleanly once, you save a lot of time with every subsequent issue. That is exactly what I'll show you in this guide step by step: from the new document through master pages and color swatches to paragraph styles for questions and answers.
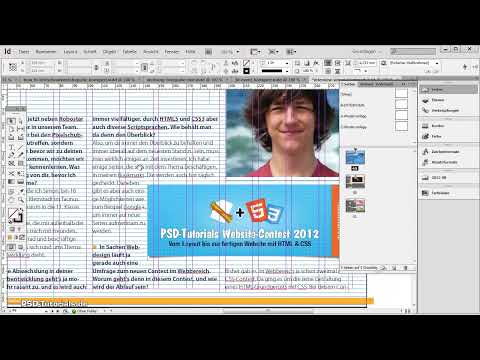
The video is only loaded from YouTube when you play it – data (including your IP address) is then transmitted to YouTube/Google. More in the privacy policy
The example comes from the August 2012 issue of Commag. However, you can apply the steps to any magazine you like.
Key Takeaways
- Master pages are the heart of a recurring layout. Everything you create there appears automatically on every page to which the master page is assigned.
- The current page number and the issue name can be inserted as special characters, so they don't have to be updated by hand.
- Color swatches and paragraph styles can be loaded from an existing file. This keeps the look consistent across all documents.
- Paragraph styles for questions and answers make working with text much faster, because you only have to paste new text and assign it a style.
Step-by-Step Guide
Step 1: Create the Document
Start as usual with a new document via "File" and "New". For a landscape-format magazine, set the orientation accordingly. Make sure to deactivate the option for facing pages if your magazine does not present pages opposite each other. Then each page is treated individually, and you don't have to consider which page lies on the left or right. Save the file right away with a meaningful name, such as "Interview".

Step 2: Create a Master Page for the Interview
Open the Pages panel and create a new master page there. It receives its own letter, B in this example, and can be opened with a double-click. Everything you draw here will later appear on every page to which this master page is assigned. The title "Interview" at the top, the rounded area, and the footer therefore belong on the master page and not on each individual page.

Step 3: Import Color Swatches from an Existing File
You need the colors orange and blue, which are already used in other files. Instead of mixing them anew, you simply load the color swatches from a file, for example your cover file. In the Swatches panel you'll find the menu for this, where you select "Load Swatches". After that, the colors are available to you in the new document. This is the most sensible approach if you pass a template file on to editors.
Then you drag a rectangle onto the master page and assign it the color orange. Remove the stroke so that only the fill remains. In the "Stroke" panel, simply select "None" for this.

Step 4: Round Only the Lower Corner of the Rectangle
The rectangle should be rounded only at the lower corner. Select it and open the "Corner Options" via "Object". There you can set each corner individually. Deactivate the link between the values so that only the lower corner is rounded. Then adjust the size of the rectangle once more until it fits harmoniously with the layout of the original.

Step 5: Insert the "Interview" Lettering
Drag a text frame over the upper orange area and type the word "Interview". Select the text and set the font to Myriad Pro in the Bold style at 16 pt. The color is white so that the lettering remains easy to read on the orange background. Then set the text to centered via the text frame options so that it sits in the middle of the box. If the distance to the top edge looks too small, simply move the text frame down.

Step 6: Design the Lower Area with the Blue Bar
For the lower area, you drag another rectangle, which you fill with the color blue and give no stroke. So that all elements fit together exactly, you enter the dimensions via the Control panel or the "Transform" panel. In this example, you use a width of 17 mm, a height of 4.5 mm, and a uniform spacing so that the bars look even. Also align the rectangle at the same height as the orange bar.

Step 7: Insert the Current Page Number Automatically
Place a small text box in the bottom bar, select it, and set the font to Myriad Pro Light at 8 pt. You don't insert the page number itself by hand. To do this, go to "Type", then "Insert Special Character" and "Markers". There you choose "Current Page Number". InDesign now displays an "A", which is automatically replaced by the correct number on each page. Then align the text to the right and adjust the distance to the right margin.

Step 8: Enter the Issue Name
The left bar contains the name of the magazine and the issue. Type this text into another text box, set the same font as for the page number, and center it using the text frame options. In this example, the entry reads "PSD Tutorials Commag Issue 81". You can simply overwrite the name later when the issue changes.

Step 9: Apply the Master Page to the Pages
Select the entire master page, cut it, and paste it again on the master page so that all elements sit neatly in their place. Then go back to the Pages panel. There you drag master page B onto the page it should be assigned to. A page to which you have applied this master page shows you the page preview directly.
You can edit a master page at any time by double-clicking it. The changes are applied immediately to all following pages that use this master page. Especially with multi-page documents, this saves an enormous amount of time. If you want individual pages without a master page, for example for a large full-bleed photo, simply drag the "None" option onto the respective page.

Step 10: Set Up the Three-Column Grid
A column grid is helpful for working with text. Open the "Margins and Columns" dialog via "Layout" and set three columns. The columns are later also the basis for aligning the text blocks, because you can drag the guides directly to the columns. This makes placing the blocks considerably easier.

Step 11: Create the Paragraph Style for the Headline
Now it's time for the text. Copy the interview data from a text file, for example from an ODT file, and paste it unformatted with "Ctrl+Shift+V". This way you see what the text looks like without a template. Then select the headline and open the "Paragraph Styles" panel. There you create a new style with the "Create New Style" icon and name it, for example, "Headline".
In the Basic Character Formats, you set Myriad Pro, the Bold style, and the color blue. The most important settings are usually font, font style, size, and color; you rarely need the other options. You can rename or adjust any style at any time. If you change the style later, it automatically affects all paragraphs to which the style is assigned.

Step 12: Control Spacing with the Paragraph Style
For an additional headline, it is advisable to create another style, such as "Headline 2" in Myriad Pro Italic. In the "Indents and Spacing" section, you define how much space should come before the paragraph. A value of 3 mm, for example, ensures that the headline doesn't stick too close to the text. The preview lets you see immediately whether the spacing fits.

Step 13: Create the Paragraph Style for the Questions
The interview questions get their own style called "Interview Question". Set the font to Myriad Pro in the Bold style at 12 pt. To make the question stand out, you activate a symbol in the "Bullets and Numbering" section. For this, choose a font such as Webdings and a suitable character, such as an arrow or a triangle.
The color of the character should be orange. To do this, you create a separate character style, which you call "Bullet Orange", and assign the color orange to it. After saving, the symbol appears before each question in the desired color.

Step 14: Create the paragraph style for the answers
For the answers, copy the "Interview Frage" style by dragging and dropping it onto the new icon, and rename the copy "Interview Antwort". Then remove the bullet and set the font to Myriad Pro Light at 12 pt. Now copy an answer text into the document. It automatically adopts the style you last set, so that questions and answers are clearly separated from each other.

Step 15: Resolve text overflow cleanly
Sometimes the text no longer fits in the column, and a small red plus appears at the bottom. This symbol indicates overset text. Click it once, and the remaining text hangs on the mouse pointer. Then draw a new text frame, for example in the next column, and click there to insert the remaining text. This way, the body text stays distributed across several columns.
If you want to arrange the columns differently, you can adjust the paragraph styles at any time and check the changes immediately in the preview. Make sure that the headings, questions, and answers are formatted consistently, otherwise the layout quickly looks restless.

Summary ??? Interview Layout in InDesign: Using Master Pages and Paragraph Styles
You have now created a master page for the interview, set up the colors and rounded corners, and automatically inserted the current page number and the issue name. You have also built paragraph styles for headings, questions, and answers, with which you can fill new interviews in no time. If you save this template, you can reuse it in every further issue and save a lot of time with each magazine.
FAQ
Why should I work with master pages instead of designing each page individually?Master pages automatically take over recurring elements such as titles, bars, and page numbers, and changes immediately affect all assigned pages.
How do I insert the current page number without changing it every time?Under Type, Insert Special Character, and Markers, you select the option "Current Page Number", and then InDesign automatically replaces the inserted character on every page with the correct number.
How do I take over colors from another file?In the menu of the Swatches panel, you select "Load Swatches" and open the desired file, after which its colors are available to you in the current document.
What advantage does a paragraph style have over manual formatting?A paragraph style saves font, size, color, and spacing once, so that you can assign it to any paragraph with one click and later change it centrally.
What do I do if the text does not fit in the column?Click on the red plus at the end of the text frame, drag the remaining text to a new frame or into the next column, and place it there.


