
Imagine a magazine being produced at several workstations at the same time. One colleague designs the cover, another colleague the photo essay, and in the end you put together the finished issue from them. This is exactly what InDesign offers the option for: placing not only images, text, and graphics, but also entire InDesign documents or individual pages from them.
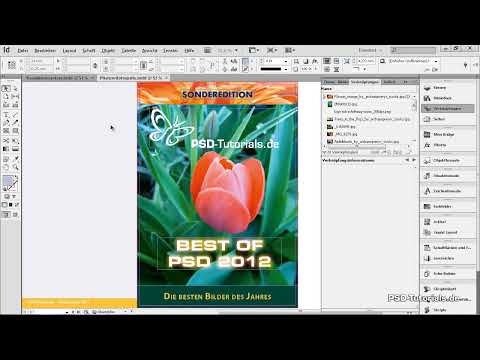
The video is only loaded from YouTube when you play it – data (including your IP address) is then transmitted to YouTube/Google. More in the privacy policy
In this tutorial, I will show you step by step how to import an InDesign file, define the pages to be placed, and position them cleanly in the bleed. You will also learn how to maintain links, update changes, and finally create a new document from pages of different source files.
Key Takeaways
- With Place File (Ctrl + D or Cmd + D) you can insert not only images, but also InDesign files and PDFs.
- With the Show Import Options option enabled, you define before placing which pages or page ranges are to be imported.
- Placed pages are linked like images and cannot be edited directly in the target document. You make changes in the original file.
- You update links automatically or manually via the Links panel.
- To place with bleed, you set the page in the upper left corner of the bleed area and check the dimensions in the Control panel.
Step-by-Step Guide
Step 1: Open the Source File
Open your target document and press Ctrl + D (Cmd + D on Mac). The Place dialog appears. There, select the InDesign file from which you want to import pages. It is best to store all source files in a shared folder beforehand so that you can find them quickly.

Step 2: Enable Import Options
Before you confirm the file, make sure the Show Import Options checkbox is enabled. Only then do the additional settings appear that allow you to control the import precisely. Without this option, InDesign would place the entire file without asking.

Step 3: Check the Preview and Page Count
After selecting the file, the import dialog opens. On the left you see the preview window. Below it, it shows how many pages the document has in total. The currently displayed page is marked at the top. With the small arrow buttons you page through the document and find the page you need.

Step 4: Define the Page Range
On the right side of the dialog, you determine what is to be imported. You can take the page from the preview, place all pages, or define a range, for example pages 3 to 5. Enable the page preview if you only want to insert a specific page. In the example, the cover page is enough, so you select exactly that.
Step 5: Choose Bleed or Crop Marks
In the options, you define whether the page should be placed with or without bleed. With bleed, the area up to the bleed line is included, which you usually need for printing. The Slug option is only relevant if the source file has a slug area. If that is not the case, it has no effect.
Step 6: Consider Layers (optional)
If the source document has multiple layers, you will find the option to show or hide individual layers in the Layers tab. This way you import only the layers you actually need. If you want to import everything, leave the settings unchanged. Then confirm with OK.
Step 7: Place the Page in the Bleed
After confirming, the page hangs on your mouse as a loaded cursor. Zoom in so that you can clearly see the upper left corner, and click exactly in the bleed area. A single click is enough, and the page sits in the right place. Afterwards, set the view back to the whole page.

Step 8: Check the Dimensions in the Control Panel
The placed page should be 216 mm wide, because it includes 3 mm of bleed on the left, right, top, and bottom. Check these values in the Control panel. If they are correct, the placement is correct.

Step 9: Using display quality and your own frame
The page is initially displayed in normal display quality. To see it sharp, set the display to high quality in the View menu. Alternatively, with the loaded cursor you can drag out a frame. This frame automatically maintains the aspect ratio. When you release the mouse button, the page is placed within this frame. Undo the step if you prefer placing it in the corner.

Step 10: Finding the placed page in the Links panel
Open the Links panel. The placed InDesign file appears there as a link. If you expand the small arrow in front of it, you will also see the images embedded in this page. You cannot edit the placed page itself in the target document. Text changes or other modifications must be made in the source file.

Step 11: Editing the original file
To make changes, select the entry in the Links panel and open the context menu with the right mouse button. Choose Edit Original there. The source file opens, and you can change the desired text, for example with the Type tool. Save the file afterwards.
Step 12: Updating changes in the target document
When you switch back to your target document, InDesign usually updates the change automatically. However, this doesn't always work. If you see a small yellow warning icon at the top left of the page, the link must be updated manually. A single click on it is enough. Alternatively, use the Update Link button in the Links panel. Afterwards, the high display quality is also reactivated.

Step 13: Placing another page from a different document
For a second page, proceed in the same way. Press Ctrl + D to open the dialog, select the next file, and activate the page preview again. Select the desired left page. You don't need to change the other settings if they are still the same as for the first import. Place the page again in the upper left corner of the bleed.
Step 14: Understanding overlaps correctly
With spreads, it can happen that a placed page visually extends into the area of the neighboring page. This is due to the bleed and is merely a display issue. This area is not output when printing. You can set the guides that reinforce this impression to zero via Layout, Margins and Columns. Then they disappear from the view.


Step 15: Placing PDF files as well
Besides InDesign files, you can also place PDFs. First, click on an empty spot in the document so that no selection is active anymore. Then press Ctrl + D to open the desired PDF file and confirm in the import dialog. With PDFs there are more settings than with InDesign files. If the page contains crop marks, you can specify whether they should be visible. If you select only the bleed, the marks are left out.

Step 16: Setting the position precisely
First place the PDF page in the bleed area and then check the position in the Control panel. In this example, you set the value to 207 mm. This accounts for the 3 mm bleed at the gutter, and the page sits exactly on the bleed on the outside. The 3 mm at the gutter are not taken into account when printing.

Step 17: Packaging the document for printing
At the end, you can package the file for printing. In doing so, all linked InDesign documents as well as the images and graphics they contain are copied into a common folder. This keeps the project complete, and later changes remain possible. Make sure that all individual documents are in one place before you create the package. This applies especially if you are working over a network or a cloud service such as Dropbox.

Summary ??? Placing InDesign Files: Linking Pages from Multiple Documents
With the Place File function, you can bring individual pages from external InDesign documents or PDFs into your project. The import options give you control over which pages, layers, and bleeds are imported. The placed pages remain linked, so you can make changes in the source file and update them in the target document. When placing, pay attention to the bleed, check the dimensions, and package the project completely at the end. This way, a new, coherent overall document is created from several documents that may have been created at different workstations.
FAQ
Can I edit placed InDesign pages directly in the target document?No, placed pages behave like images. You always make changes in the original file and then update the link.
Why isn't a change applied automatically?InDesign does not always update links automatically. If a yellow warning icon appears, click on it or use the Update Link button in the Links panel.
How do I import only a specific page?In the import dialog, enable the Show Import Options option, select the desired page in the preview, and confirm with OK.
What does the bleed mean when placing?The bleed is the area that is cut off during trimming. In the example, it covers 3 mm on all sides. If you choose to place with bleed, this area is included.
Can I place PDF files in the same way as InDesign files?Yes, PDFs can also be inserted with Place File. For PDFs, the import dialog even offers more settings, such as the visibility of crop marks.
How can I hide guides that cover the bleed?Go to Layout, Margins and Columns and set the values to zero. The distracting guides will then disappear from the view.
Why does my page look blurry?The page is displayed in normal display quality. Switch the display to high quality, and it will be displayed sharply.
What happens when packaging with linked documents?When packaging, all linked InDesign documents and the images and graphics they contain are copied into a common folder. This way, you can continue editing the project later.


