
Discounts are among the most effective tools for motivating customers to buy. Whether it's a percentage discount, a fixed amount, or free shipping: in Shopify, you set all of this up in the "Discounts" section. This guide walks you through all the settings, from the first click to checking your finished code.
The video is only loaded from YouTube when you play it – data (including your IP address) is then transmitted to YouTube/Google. More in the privacy policy
Key Takeaways
- You'll find discounts in the menu on the left under "Discounts". With "Create discount" you start a new coupon.
- First, you decide which type of discount you want to offer: products, order, buy X get Y, or free shipping.
- A discount code can deduct a percentage or a fixed amount. You can name it yourself or have it generated.
- With minimum requirements, customer eligibility, usage limits, and combination rules, you control exactly who may use the code.
- You set the validity period via the start and end date. Afterwards, you save the discount or discard it.
Step-by-Step Guide
Step 1: Open the "Discounts" section
Getting started is quick. In the Shopify admin, open the menu on the left side and click on "Discounts". There you'll find an overview of all existing codes and promotions. From here you start every new coupon.

Step 2: Create a new discount
Click on "Create discount" at the top right. Shopify then opens a selection where you define how the discount should work. Think briefly beforehand about whether you want a code that customers have to enter, or an automatic discount that applies without any input.

Step 3: Select the discount type
Shopify offers several discount types. The most important are "Products" for discounts on specific items, "Order" for a reduction on the entire cart, "Buy X get Y" for promotions such as two for the price of one, as well as "Free shipping". For this example, you choose "Order", since the discount applies to the entire purchase.

Step 4: Define the discount code
In the discount code field, enter the name your customers will later type in at checkout. An example would be "50OFF". Make sure the name is easy to remember and unambiguous. A descriptive code also makes it easier for you to identify it later in the overview.

Step 5: Determine the discount value
In the next section, you define how much the customer saves. You can choose a percentage, for example 50 percent, so the customer saves half at checkout. Alternatively, you deduct a fixed amount, such as 10 euros per order. With fixed amounts, you should always check the value against your product prices so that your margin doesn't come under pressure.

Step 6: Generate the code or enter it yourself
You can choose between your own code and an automatically generated one. Custom codes are clear because you immediately recognize which promotion they belong to. Generated codes, on the other hand, are long and random, which makes them hard to guess. This is especially useful if you want to prevent customers from simply trying different combinations like 50, 60, or 70 percent. With the "Generate" button, you create a suggestion, which you can have regenerated if needed.

Step 7: Set the minimum requirement
Here you decide whether the discount is tied to a condition. You can choose "No minimum requirements", in which case the code applies to every purchase, regardless of the order value. A minimum order value, for example 20 euros, or a minimum quantity, such as five products in the cart, is also possible. You select both in the same section, so that the discount is only applied when the condition is met.

Step 8: Define which customers may use the code
In the "Customer eligibility" section, you determine the group of recipients. The "All customers" option allows any visitor who knows the code to use it. With "Specific customer segments," you limit the discount to groups, such as regular customers. With "Specific customers," you select individual people. You search for them by name or email address and click on them. Only these people can then redeem the code.

Step 9: Set up usage limits
With the maximum number of discount uses, you limit how often the code may be redeemed in total. You can also specify that each customer may use the discount only once. This protects you from a single customer using the voucher multiple times. If you don't want to set an upper limit, simply leave the field empty or enter a very high value.

Step 10: Define combinations
Under "Combinations," you decide whether the discount may be combined with other promotions, such as product discounts or free shipping. If the option is disabled, the customer cannot redeem any additional codes. For a 50 percent discount, it makes sense to turn off combinations. If, on the other hand, you want to offer a shipping voucher in parallel, you enable the corresponding option.

Step 11: Determine the active period
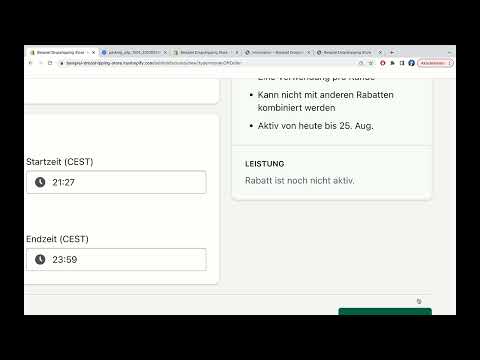
In the lower section, you set the start and end date. The start date determines from when the code is valid. Without an end date, the discount continues indefinitely. For time-limited promotions, such as a week-long offer period, you enter a suitable end date with a time, for example 11:59 PM. Customers then know exactly how long they have.

Step 12: Save the discount
When all settings are correct, you click "Save discount" at the bottom. The code is then activated or, if the start date is in the future, saved as scheduled. From this moment on, it can be redeemed in the store.

Step 13: Understand the discount overview
After saving, you land back on the overview. There you see, for each code, the status (active, scheduled, expired, or ended), the method, the type of discount, the combination option, and the number of uses so far. This way you always keep an overview of your promotions.

Step 14: Filter and sort discounts
With the filter options, you narrow down the list in a targeted way, for example by status, type, combinability, start date, or frequency of use. With the sort function, you order the entries by end date, title, relevance, or creation date. Especially with many promotions, this saves you a lot of time.

Step 15: Export discounts
Using the three dots above the list, you can save or export the current view. The export is done as a CSV file, which you can then analyze in Excel, for example. This is useful for analyses or for documenting past promotions.

Step 16: Offer free shipping
For a shipping voucher, you click "Create discount" again and select "Free shipping." Then you set the code, determine the country, for example Germany, and decide which shipping rates the rule applies to. For larger orders, you can exclude certain rates. You also set customer eligibility, usage limits, combinations, and period as with the other discounts.

Step 17: Save the code for good or discard it
Once you have checked all the details, you click "Save" so that the code is set. If you decide not to publish the draft after all, you select "Discard." In this case, none of the changes are saved.

Summary ??? Creating Shopify Coupons: Setting Up Discount Codes, Minimum Amount, and Shipping
You have now learned all the building blocks you can use to control discounts in Shopify in a targeted way. You start in the "Discounts" section, choose the appropriate discount type, and set the code, value, and minimum requirements. Then you determine who may use the code, how often it can be used, and whether it can be combined with other promotions. You limit the time period with a start and end date. The overview with filters and export helps you keep track of your promotions. With this knowledge, you can plan coupons that benefit both your customers and your business.
FAQ
Can I change a discount code afterwards?Yes, you open the existing discount in the overview, make the desired changes, and save it again.
What is the difference between a discount code and an automatic discount?A discount code must be entered by the customer at checkout. An automatic discount is applied without any input as soon as the conditions are met.
How do I prevent a code from being used multiple times by the same person?In the usage limits, enable the option that each customer may use the discount only once.
Can I reserve a code for specific customers?Yes, under "Customer eligibility" you select "Specific customers" and search for the desired people by name or email address.
What happens if I set a start date in the future?The discount is shown as scheduled and can only be redeemed from the specified date.


