
A design is only finished when you can safely archive, share, or print it. Inkscape offers several ways to do this, which differ significantly in purpose and result. Anyone who knows the differences avoids unnecessary rework, for example when a print shop requires a different PDF version or a graphic for a website turns out too large.
The video is only loaded from YouTube when you play it – data (including your IP address) is then transmitted to YouTube/Google. More in the privacy policy
In this tutorial, you will learn how to save your document as an Inkscape SVG and as a plain SVG, how to create PDF files for printing, and which settings are important in the process. I will also show you the PNG export for the web, exporting only a selected area, and the "Save a Copy" function, which lets you create variants without overwriting your original file.
Key Takeaways
The most important points at a glance:
- Save your working document in the Inkscape SVG format so that layers, guides, and other project data are preserved.
- Use the PDF format for printing. Clarify the PDF version (1.4 or 1.5) and the handling of fonts with the print shop beforehand.
- Convert text to paths if the print shop does not accept embedded fonts or explicitly requires it.
- Export graphics for the web as PNG. Choose carefully whether you want to export the whole page, all drawing elements, or just a selection.
- Use "Save a Copy" when you want to create design variants. This way, your original document remains unchanged.
Step-by-Step Guide
Step 1: Save the document via "Save As"
Open the "File" menu and choose "Save As". A dialog window opens in which you specify the save location and the file name. It is best to create a separate folder for your projects, for example "Examples", so that you can quickly find your files later.

Step 2: Choose Inkscape SVG or plain SVG
In the file type menu of the dialog, several SVG variants are available. SVG is a vector format that is widely used on the web. The "Inkscape SVG" format additionally saves layers, guides, and other Inkscape-specific information. It is therefore the project format for your work in Inkscape. The plain SVG format does not contain this additional data and is therefore better suited for sharing with other programs or for publishing.
If you want to continue working in Inkscape, always choose the Inkscape SVG format.
Step 3: Get to know other formats such as EPS and PDF
Besides SVG, you can also save your document as EPS, which is frequently used in the printing sector. You can likewise create a PDF file that is suitable for printing. In the example, I first save the document as SVG again so that I can clearly tell later which file belongs to which test. Example names like these are a good way to keep track of versions.
Step 4: Reopen the saved SVG file
After saving, you can load the SVG file at any time via "File" and "Open" and continue editing it. This applies especially to the Inkscape SVG format, since all layers and settings are preserved there.

Step 5: Create a print version as PDF via "Save As"
If you need a file for printing, choose "Save As" again and set the file type to "PDF". The resolution is important here. For printing, 300 dpi is a common guideline. However, you should always ask your print shop for the exact requirements.
Then confirm with "Save".
Step 6: Choose the PDF version
After saving, a small dialog window with the PDF options appears. Here you specify the PDF version, usually 1.4 or 1.5. The same applies here: if in doubt, ask the print shop which version it needs. You confirm your selection with "OK".

Step 7: Embed fonts or convert them to paths
In the PDF dialog, you will also find options for fonts. With "Embed fonts", you save the font used directly in the PDF file. This makes sense if the print shop does not have the font installed. However, print shops often require the text to be converted to paths. It is then present as a vector shape, and no font is needed anymore.
Make sure you only use the option to convert text to paths if you no longer need to edit the text afterwards. Your original document remains unchanged; only the exported PDF file contains the paths.
Step 8: Set the resolution and export the PDF
In the same dialog, you can set the resolution in dpi, for example 300 or 400 dpi. Once you have checked all the settings, confirm with "OK". You will then have your PDF file, which you can pass on to the print shop.

Step 9: Export a PNG for the web
The PNG format is suitable for websites, presentations, or social media, especially if you need a transparent background. To do this, open the export dialog in the "File" menu and select the PNG format. Then specify a storage location and a file name.

Step 10: Define the export area: page, drawing, or selection
In the export dialog, you decide what exactly is exported:
- Page: Exports the entire document including the page border.
- Drawing: Exports all objects located on the canvas, without empty margins.
- Selection: Exports only the objects you have selected beforehand.
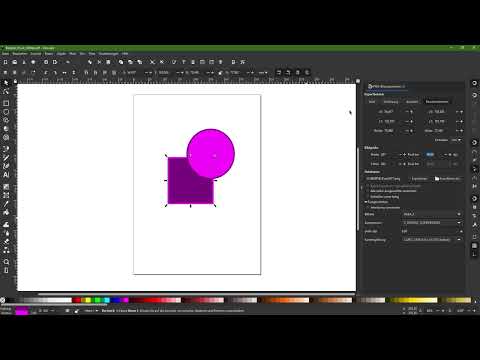
In the example, I show the selection of a rectangle. The export area then also includes the overlapping ellipse, since it lies within the selected area. So make sure you make your selection deliberately.
Step 11: Set the image size, resolution, and file name
In the export dialog, you can also set the image size, the resolution in dpi, and the file name. For screen use, pay attention to a moderate resolution so that the file does not become unnecessarily large. Then click "Export".
Step 12: Check the exported file
Open the exported PNG file to check the result. Verify that the chosen area is fully included and that all elements are displayed correctly. This check is especially worthwhile when selecting areas, because overlapping objects are sometimes captured differently than expected.

Step 13: Choose other image formats with "Export As"
If you need something other than PNG, for example JPG, TIFF, or WebP, use the "Export As" function. There you set the desired format and adjust the settings accordingly. In advanced mode, you can also set the bit depth. For getting started, the basic settings are usually sufficient.
With the "Custom" option, you define the section using the X and Y coordinates as well as width and height. For most use cases, however, the default options are completely sufficient.

Step 14: Create variants with "Save a Copy"
If you want to try out different variants of a design, "Save a Copy" is the right choice. The dialog looks like "Save As", but has a crucial characteristic: your currently open document stays open, and you continue working in your original file.

Step 15: Be careful when overwriting files that have already been saved
Note that "Save" or the keyboard shortcut Ctrl+S overwrites the currently open file. So if you continued making changes after saving as a PDF, Ctrl+S may modify the PDF file. Therefore, deliberately save new versions with "Save As" under a new name, for example "Test", so that the existing file is preserved.

Step 16: Save variants and stay in the original document
Imagine you want to change a circle's color to create a second version. If you then choose "Save a Copy" and assign a new name, the copy is saved, but you remain in the original document. This way, you can create as many variants as you like without overwriting your main file.
Summary ??? Saving and exporting in Inkscape: SVG, PDF, and PNG at a glance
Inkscape offers you the right format for every purpose. Save your work as Inkscape SVG so that you can edit it later. For print, you create a PDF file and clarify the PDF version and the handling of fonts with the print shop beforehand. For the web, you export as PNG and deliberately choose the area. With "Save a Copy," you create variants without losing your original document. If you master these steps, you will stay in control of your files at all times.
FAQ
What is the difference between Inkscape SVG and normal SVG?Inkscape SVG additionally stores layers, guides, and other Inkscape data and is therefore suitable for continuing to work on a file, while normal SVG contains only the graphic itself.
Which PDF version should I choose for printing?Version 1.4 or 1.5 is common, but it's best to get the exact requirements directly from your print shop.
When should I convert text to paths?You should do this if the print shop does not want to embed fonts or if the font is not available there, since the text will then exist as a vector shape.
What resolution do I need for printing?For printing, 300 dpi is a common guideline, although here too the print shop's specifications are what matter.
How do I export only part of my document?In the export dialog, select the "Selection" option after you have selected the desired objects.
What happens if I press Ctrl+S after the PDF export?The currently open file will be overwritten. If you want to keep the old version, use "Save As" or "Save a Copy" with a new file name.
When do I use "Save a Copy"?Whenever you want to save a variant of your design without leaving or overwriting your original document.


