
Imagine you have scattered a hundred small confetti dots across a surface and now want to make them look more lively, without moving each one by hand. That is exactly what the Tweak tool in Inkscape is made for. It turns tedious individual work into a few mouse movements and opens up creative possibilities that you would not have with classic drawing tools. In this tutorial, I will guide you through the most important modes, show you typical stumbling blocks, and explain how to use the tool purposefully.
The video is only loaded from YouTube when you play it – data (including your IP address) is then transmitted to YouTube/Google. More in the privacy policy
Key Takeaways
- The Tweak tool always affects the objects within its radius. The width determines the size of this area, and the force determines the strength of the change.
- The modes range from targeted moving to attracting, repelling, shrinking, and rotating, all the way to random effects, distorting, and blurring.
- With the Shift key, you reverse the effect of many modes.
- The duplicate mode can cause Inkscape to crash. Therefore, save your work regularly.
- The modes for distorting and roughening work directly on the anchor points of paths. The results therefore remain fully scalable.
- Painting with color and blurring are excellent for bringing variety and depth into a layout.
Preparation: Building a Test Field
Before you get started, you need some practice material. Draw several circles on the canvas and distribute them loosely. If you click on a circle, you move it, and with the spacebar you create a copy. Press the spacebar several times until a small cluster of confetti has formed. This pattern is ideal because you can immediately recognize each mode by its visible changes.

Step 1: Select All Objects and Switch to the Tweak Tool
Select all objects, for example with Ctrl+A, and then switch to the Tweak tool. The toolbar at the top changes immediately. Here you will find the settings that largely determine your result. The width determines the area in which the tool is active. The force determines how strong a change turns out. Start with moderate values, because you can readjust at any time.
Step 2: Push Objects in One Direction with the Move Mode
The Move mode is perhaps the most accessible mode. If you drag over the objects with the mouse button held down, they are pushed in the direction of movement. In this way, the confetti can be gently pushed aside as if on a table. If the movement is too strong for you, reduce the force, for example to the value 10. This way you keep control over every shift.
Step 3: Working with Attract and Repel Toward the Mouse Pointer
With the next modes, the objects react to the position of your mouse pointer. Without an additional key, they are drawn toward the center of the mouse pointer as soon as you move over them. If you also hold down the Shift key, the opposite happens: the objects move away. The Shift key reverses the default effect in many modes, and this also applies to the following steps.
Step 4: Introducing Random Movements
The Random mode distributes the objects arbitrarily. At first glance this looks chaotic, but it can be very appealing in certain layouts. You deliberately give up part of the control and let chance play along. Especially with organic-looking motifs, this produces results that you could hardly achieve by hand.
Step 5: Shrinking and Enlarging Objects
With the Shrink mode, objects become smaller with each click. If you hold down the Shift key, they grow instead. Here, too, the same applies: the Shift key usually does the opposite of the default function. This allows you to create size differences deliberately, for example to set focal points in a composition.
Step 6: Rotating Objects
The Rotate mode makes little sense with circles, because you can hardly see the rotation. Therefore, replace the circles with a rectangle and duplicate it again with the spacebar. Select all objects and activate the Rotate mode. If you hold down the mouse button, the objects rotate clockwise. With the Shift key held down, they rotate counterclockwise. This technique is suitable for patterns, ornaments, and rotation effects.
Step 7: Caution with the Duplicate Mode
The Duplicate mode creates copies of the objects beneath the mouse pointer. In the video, however, it regularly leads to Inkscape crashing, because countless duplicates accumulate underneath. If you want to test this mode, save your file beforehand and keep the process short. Inkscape is open source and non-commercial, so such errors can occur. However, the developers are continuously working on fixing them.
Step 8: Liquefy paths with the Deform mode
The Deform mode works similarly to the Liquify tool in Photoshop, but with vectors. You can use it to push parts of a path in any direction. To do this, first select a circle and run the tool over its edge. This lets you change the shape nicely and intuitively without having to set individual nodes. Especially with freeform shapes, this saves you a lot of time.
Step 9: Shrink, attract, and taper path parts
In addition to moving, the tool offers further modes for path parts. You can shrink sections or let them be attracted by the mouse pointer. If you click in the middle of a path, the shape can be tapered, for example. These functions create new shapes in an intuitive way. Without them, you could only have achieved the same results laboriously with the Bézier curve tool.
Step 10: Design edges with the Roughen mode
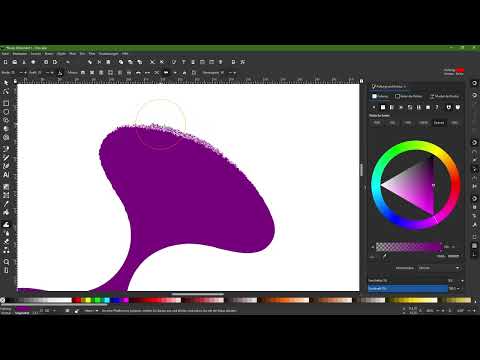
With the Roughen mode, you get an irregular, frayed edge. To do this, briefly run along the edge of a path once. If you then zoom in, you will see that the irregularities consist of individual anchor points and not of pixels. The result can therefore be scaled without loss. However, be careful that Inkscape can respond sluggishly or crash with many anchor points. If that has happened, undo the step with Ctrl+Z.
Step 11: Paint objects with color
The Color mode paints onto selected objects with the tool's color. First select the objects and then click on a color, such as a vivid pink. Then paint over the objects, and the areas you hit will be recolored. This is especially helpful if you have many elements and want to add a bit of color variation. With some objects, the hues or the opacity also change in the process, resulting in a colorful outcome.
Step 12: Create depth with the Blur mode
The Blur mode makes selected objects blurry. In this way, an impression of depth is created, as if the objects were either close to the camera or far in the background. The effect depends on how long and how hard you press. If you linger longer, the objects become noticeably blurrier. With a lower force, such as a value of 5, and a smaller width, on the other hand, you achieve finer transitions. If the result goes too far, simply undo it with Ctrl+Z.

Summary – Sculpt tool in Inkscape: Deform, move, and design objects
The Sculpt tool is a versatile playground for creative experiments. You move, rotate, shrink, and color objects, deform paths, and create random effects that bring your design to life. Width and force control each mode here, and the Shift key often provides the opposite effect. When duplicating and with very many anchor points, pay attention to Inkscape's stability and save your work regularly. Try out the modes on your own layouts, because that is exactly where the most interesting effects arise.
FAQ
How large should the width be set in the Sculpt tool?The width determines the radius in which the tool takes effect. Choose it so that only the desired objects are affected, and adjust it as needed to the size of your subject.
How do I set the strength of the change?You change the force in the toolbar. Smaller values lead to finer, slower changes, while higher values have a stronger and faster effect.
What does the Shift key do in the modes?The Shift key reverses the default effect in many modes. For example, with Attract, objects are repelled, and with Shrink, they grow.
Why does Inkscape crash in Duplicate mode?In this mode, a great many copies are created beneath the mouse pointer. This regularly overwhelms the software, which is why you should save beforehand.
Can the result of the Roughen mode be scaled?Yes, the resulting irregularities consist of individual anchor points. They therefore stay sharp and not pixelated even when greatly enlarged.
Can I undo changes in the Sculpt tool?Yes, you can undo every step with Ctrl+Z. This is especially helpful if a change turns out too strong or Inkscape responds slowly.


