
A rectangle without color quickly looks flat. With a gradient, it gains depth and movement. In Inkscape, you do this with the Gradient tool, and in this tutorial you will learn how to create linear and radial gradients, adjust colors and transparencies, and distinguish the fill from the stroke.
The video is only loaded from YouTube when you play it – data (including your IP address) is then transmitted to YouTube/Google. More in the privacy policy
Key Takeaways
- Gradients can be created via the fill options or directly with the Gradient tool.
- Each anchor point has its own color and its own alpha value. An alpha value of 0 makes the area transparent.
- You can add, move, and recolor as many anchor points as you like.
- In addition to linear gradients, radial gradients are available, which can be shaped into ellipses or circles.
- Gradients can optionally repeat, reflect, or continue with a hard break.
- The stroke of an object can also receive a gradient, independently of the fill.
Step-by-Step Guide
Prepare a rectangle and activate the gradient
To begin, you need an object to apply the gradient to. Draw a simple rectangle and select it with the Selection tool. Then open the "Fill and Stroke" panel via the menu. In the "Fill" tab, you will find the button for the linear gradient. One click on it immediately creates a gradient from the current shade of gray to white.


Continue working with the Gradient tool
If you want to edit the gradient, click the corresponding icon at the bottom of the panel. Inkscape then automatically switches to the Gradient tool. Alternatively, you can select the tool directly from the toolbar. By clicking and dragging, you define a line that determines the direction of the gradient. You can also drag it diagonally. Everything at the starting point receives the start color, everything at the end point the end color.

Position anchor points
The anchor points at the ends of the line determine the color transitions. You can move them freely until the gradient begins and ends exactly where you want it. If you hold down the Ctrl key while moving, the point snaps in fixed steps. This makes precise alignment easier.
Change the colors of the anchor points
Click an anchor point to select it. Then choose a new hue using the color wheel or the color swatches. In the example, the left point becomes orange and the right one red. This creates a transition from orange to red.

Control transparency with the alpha value
You may notice that something is missing at the end of the gradient. By default, the alpha value of the point is set to 0, so the area behind it is transparent. Move the opacity slider to the right to 100 percent so that the color becomes fully visible. The gradient then shows the pure transition between the two colors.
Add more colors
A gradient doesn't have to have only two colors. Double-click on the line to create a new anchor point at that spot. You then assign its own color to this point. In the example, this creates transitions from orange through pink and violet back to red. The anchor points can then be moved as you like, so you can design the distribution of colors according to your ideas.
Use transparent areas in the middle
You can also place an anchor point between two end points and reduce its opacity. If you set the alpha value to 0, exactly this area becomes see-through, while the gradient continues in the remaining places. However, make sure that the background does not show through unexpectedly. If you set a white color instead, the gradient looks lighter overall. Which solution fits depends on what is supposed to lie behind the object.
Create radial gradients
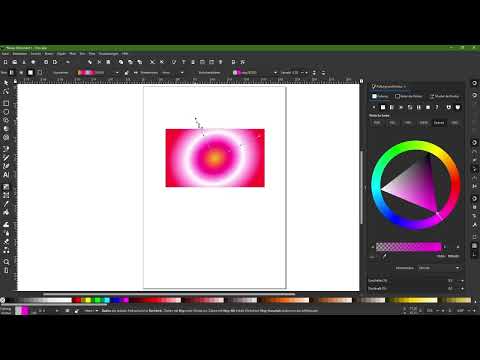
In addition to the linear gradient, there is the radial gradient. To use it, select the radial gradient icon in the panel or in the toolbar. The color transitions are retained, but now run in a circular pattern from the center outward. You adjust the colors via the anchor points, and with the center point you move the entire center. If you pull the shape apart, an ellipse is created, which you can shape into a circle.
Setting the behavior at the end of the gradient
When a gradient reaches its outermost point, the question arises of what happens next. In the panel you will find the options "Repeat" and "Reflect" for this. With "Reflect", the gradient is mirrored and repeats continuously in reverse order. The "Repeat" option, on the other hand, starts the gradient again from the beginning, which can, however, create a hard break at the transition point. Which variant you like better is something you decide depending on the motif.
Applying a gradient to the stroke
A gradient works not only on the fill, but also on the stroke. For the stroke, hold down the Shift key and choose a color, for example yellow. Then switch to the stroke in the Gradient tool and drag out a gradient. This then affects only the outline. In the example, the stroke fades from yellow to transparent, so that it disappears on one side. Alternatively, you can use black as the end color, for example.

Reliably distinguishing between fill and stroke
While editing, pay attention to whether you are currently editing the fill or the stroke. At the top in the toolbar you can see which area is active. Switch between the two using the selection in the tool before you change colors. This way you avoid accidentally adjusting the wrong property.

Summary – Creating and specifically adjusting gradients in Inkscape
With the Gradient tool you can bring objects to life. You define the direction and type of the gradient, set colors and transparencies via anchor points, and decide how the gradient repeats. Whether fill or stroke, with a bit of practice you will achieve varied results.
FAQ
How do I quickly create a gradient in Inkscape?Select the object, open the "Fill and Stroke" panel, and click the linear gradient in the "Fill" tab. Inkscape immediately creates a gradient from the existing color.
How do I edit an existing gradient?Switch to the Gradient tool using the icon in the panel or via the toolbar. There you can move anchor points, change colors, and adjust the direction of the line.
Why does my gradient look transparent in one spot?Anchor points have their own alpha value. If it is set to 0, the area is transparent. Set the slider to 100 percent so that the color becomes fully visible.
How do I add more colors to a gradient?Double-click on the gradient line at the desired spot. A new anchor point is created there, to which you can assign its own color.
What is the difference between a linear and a radial gradient?A linear gradient runs in a straight line, while a radial gradient spreads out in a circular or elliptical shape from the center.
What do the options "Repeat" and "Reflect" mean?With "Repeat", the gradient starts again at the end, which can create a hard break. With "Reflect", the gradient is mirrored so that the transition stays smooth.
Can I also design the stroke of an object with a gradient?Yes. Select the stroke, open the Gradient tool, and drag out a gradient. It then affects only the outline, independent of the fill.
How do I tell whether I am editing the fill or the stroke?Pay attention in the toolbar to which area is active. If needed, deliberately switch between fill and stroke before you change colors or transparencies.


