
Adobe Illustrator course: creative practice

- 8.5-hour video course on Adobe Illustrator
- Create popular effects and illustration styles from A to Z with your trainer
- 15 videos that explain the complete design and elaboration process
- Tips and tricks for working in Adobe Illustrator
Sit down, buckle up, let's go! This video course puts you in the creative fast lane in Adobe Illustrator.
44 Videos, 494 minutes
Creation of a cat
Creating a cat in Illustrator - Part 1
This video training explains how to create the basic shape of the cat in Adobe Illustrator, give it ears and give everything an appealing gradient.
Creating a cat in Illustrator - Part 2
The second video training of this tutorial shows how to work on the cat's ears with an appealing gradient and how to give the cat a beautiful white belly and adjust its color.
Creating a cat in Illustrator - Part 3
Now it's getting fluffy! In the third part of this tutorial, we roughen the edges of our existing shapes to create a fluffy fur look. We also create the cat's eyes, nose and mouth and embellish its fur with stripes.
Creating a cat in Illustrator - Part 4
In the last part of this tutorial, we will create the cat's velvet paws, its bushy tail and an appealing shadow.
Creating balloons
Creating balloons in Illustrator - Part 1
This video training explains how to easily create the basic shape of a balloon in Adobe Illustrator.
Creating balloons in Illustrator - Part 2
The second video training of this tutorial shows how to create a balloon string, place editable letters on the balloons and easily edit the colors of the balloons.
Creation of a loop
Creating a loop in Illustrator - Part 1
This first video tutorial on creating a beautiful loop shows you how to create the left loop and make it more vivid with shadows.
Creating a loop in Illustrator - Part 2
The second video training in this tutorial shows how to use additional shadows and a highlight to make the bow more vivid and make it shine.
Creating a loop in Illustrator - Part 3
The third video training of this tutorial shows how to design the ribbon of the bow and model it with light and shadow.
Creating a loop in Illustrator - Part 4
In the last video training of this tutorial, the knot is designed and the loop is finalized.
colored veil
Creating a colored veil in Adobe Illustrator - Part 1
This video training explains how to easily create an interesting color veil in Adobe Illustrator using individual curved lines.
Creating a colored veil in Adobe Illustrator - Part 2
The second video training of this tutorial shows how to create another colour veil, adjust its individual paths, influence the colour gradient and optimize it with a rainbow effect.
fireworks
Creating fireworks in Adobe Illustrator - Part 1
This video training explains how to create the background for the fireworks in Adobe Illustrator and how to create individual brushes for painting the fireworks.
Creating fireworks in Adobe Illustrator - Part 2
The second video training of this tutorial shows how to paint many different fireworks into the picture using the brushes you have created yourself, adjust their colors and transparencies and make them glow.
Creating a grass text
Creating a grass text in Illustrator - Part 1
This video training explains how to create the basic building blocks for a new individual brush in Adobe Illustrator using individual objects.
Creating a grass text in Illustrator - Part 2
The second video training of this tutorial shows how to create a ready-to-use brush using the previously created elements and how to use it to create a dynamic handwritten grass text and decorate it with symbols.
Pickup Truck
Creating a pickup truck in Adobe Illustrator - Part 1
This video training explains how to create the first areas of the pickup to be created in Adobe Illustrator and how to adjust them optimally using the Pathfinder.
Creating a pickup truck in Adobe Illustrator - Part 2
The second video training of this tutorial shows how to fill the created areas with individual and freely deformable patterns and how to make the finished pickup look even more interesting with an effect layer.
High Heels
Creating high heels in Adobe Illustrator - Part 1
This video training explains how to create the main part of the high heel in Adobe Illustrator and how to light it in a realistic way.
Creating high heels in Adobe Illustrator - Part 2
The second video training of this tutorial shows how to create the heel of the high heel and how to round off the overall piece with details.
Fire
Creating fire in Adobe Illustrator - Part 1
This video training explains how to create and color flames in Adobe Illustrator using the colored pencil tool.
Creating fire in Adobe Illustrator - Part 2
The second video training of this tutorial shows how to create a finished fire from the flames created in part 1 using gradients in a non-destructive way.
Lips
Creating lips in Adobe Illustrator - Part 1
This video explains the advantages of gradient grids in Adobe Illustrator and how to use them optimally.
Creating lips in Adobe Illustrator - Part 2
The second video in this tutorial shows how to create the basic shapes of the upper and lower lip using a rectangle.
Creating lips in Adobe Illustrator - Part 3
The third video in this tutorial shows how the previously flat shapes of the upper and lower lip can be made more sculptural with the help of a gradient grid.
Creating lips in Adobe Illustrator - Part 4
The last video in this tutorial shows how to apply glossy lip gloss to the sculpted lips and finish off the overall look with shading.
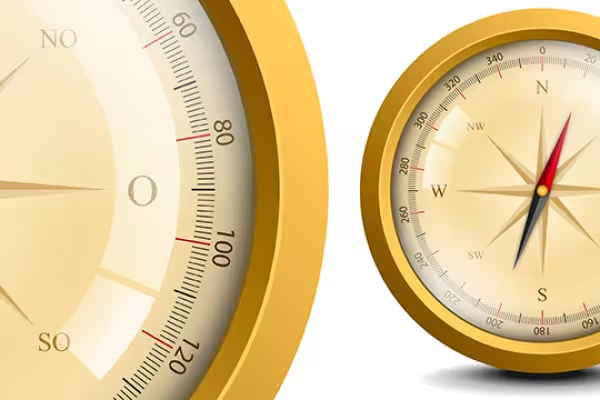
Compass
Creating a compass in Adobe Illustrator - Part 1
In this video, we build the basic shape of the compass and use various contours to create its outer rings.
Creating a compass in Adobe Illustrator - Part 2
In the second video of this tutorial, we use shadows to make the compass more vivid and create 360 individual degree lines.
Creating a compass in Adobe Illustrator - Part 3
The third video in this tutorial shows how to create additional degree lines for 10° and 20° distances and how to place all degree numbers.
Creating a compass in Adobe Illustrator - Part 4
In this video, we design the main pointer of the compass and create the background with some decorative pointers.
Creating a compass in Adobe Illustrator - Part 5
In the fifth video, we place the names of the individual cardinal points and start designing the glass pane that covers the compass.
Creating a compass in Adobe Illustrator - Part 6
In the final video of this tutorial, we round off the compass using reflections and create a shadow underneath the compass.
Neon text
Creating neon text in Adobe Illustrator - Part 1
This video explains how to create a new document for high-resolution graphics and the advantages of saving texts as symbols.
Creating neon text in Adobe Illustrator - Part 2
The second video in this tutorial shows how to create a three-dimensional text from a previously flat text and make it glow with the help of various additional layers.
Creating neon text in Adobe Illustrator - Part 3
The third video in this tutorial shows how to make the previously blue text more colorful using an effect layer and how easy it is to change text afterwards.
Objective
Creating lenses in Adobe Illustrator - Part 1
This video explains how to create the individual rings of the lens in a non-destructive way using numerous contours and how to differentiate them by color.
Creating lenses in Adobe Illustrator - Part 2
The second video in this tutorial shows how to make the lens more three-dimensional using shadows, how to place text along a ring and how to color the lens realistically.
Creating lenses in Adobe Illustrator - Part 3
The third video in this tutorial shows how to round off the lens using a reflective and interestingly colored glass and how to place individual reflections.
Text with long drop shadow
Creating text with a long shadow in Adobe Illustrator - Part 1
This video explains how to prepare texts in a simple way so that they can be changed afterwards.
Creating text with a long shadow in Adobe Illustrator - Part 2
The second video in this tutorial shows how to design a previously flat text in three dimensions and realistically adjust its color.
Creating text with a long shadow in Adobe Illustrator - Part 3
The third video in this tutorial shows how the three-dimensional text can be made even more vivid with the help of additional layers and how a shadow rounds off the overall picture perfectly.
Creating text with a long shadow in Adobe Illustrator - Part 4
The final video of this tutorial shows how to adjust the light and shadow of the three-dimensional text and how to round off the overall work by adding a light spot and changing the color look.
Happy-Birthday
Creating a Happy Birthday lettering - Part 1
In this video tutorial, the background for the Happy Birthday lettering is created.
Creating a Happy Birthday lettering - Part 2
In the second video training of this tutorial, we place individual letters on the previously created background, adjust individual fills and outlines and ensure that the text always remains editable.
Examples of use
-
 Illustrator in practice!
You might also like

Save time with artificial intelligence

More style, more power, more templates!

Full power, more inspirations, maximum WOW effect!

Live your layout now!
Comment now „Adobe Illustrator course: creative practice“