
Vector graphics can be enlarged as much as you like without losing sharpness. Until now, the path to get there often meant: setting paths, adjusting anchor points, and fighting your way through curves. With the "Text to Vector" module in Adobe Firefly, the AI takes care of this part for you. You describe what you need and, within a few seconds, receive several finished drafts as scalable SVG files.
The video is only loaded from YouTube when you play it – data (including your IP address) is then transmitted to YouTube/Google. More in the privacy policy
In this tutorial, I guide you step by step through the workflow: from selecting the module, through style, color, and prompt, to the download. Finally, I show you how to generate a complete scene with a second prompt and evaluate the results.
Key Takeaways
- The "Text to Vector" module in Adobe Firefly creates vector graphics directly from a text input.
- You set the content type (subject or scene), the style, as well as color and tone in advance.
- The prompt determines the content. The more precisely you describe shape, colors, and edges, the more fitting the result will be.
- Firefly delivers four variants, which you can view enlarged and quickly browse through with the arrow keys.
- You download your favorite as an SVG, edit it further in Adobe Illustrator, or use it as a style reference for the next draft.
Step-by-Step Guide
Step 1: Open the "Text to Vector" module
Open Adobe Firefly in your browser and scroll down a little. There you will find the image generation section. Click on "Image" and then select the "Text to Vector" entry. This opens the workspace where all the settings for your vector graphic come together.

Step 2: Set the content type
On the left side, the first thing you do is set the content type. Here you decide whether you need a single subject, for example a symbol or a character, or an entire scene. A single subject is suitable for icons, logos, and illustrations with a clear focal point. A scene fits when several elements relate to one another, such as a cityscape with buildings and traffic.

Step 3: Define the style
Further down, you can determine the style. You have two options. Either you upload a reference graphic for Firefly to follow, or you choose a ready-made effect. In the video, I use the comic effect. The advantage of this preset: you don't have to describe the comic look separately in the prompt, which saves you some wording.

Step 4: Set color and tone
Next, you determine color and tone. Options such as black and white, golden or bold colors, and a warmer look are available. Choose the setting that suits your project. In the example, I opt for a warmer look. Make sure these settings match your later prompt so that the results look coherent.

Step 5: Enter the prompt and generate
Now comes the most important part. In the input field, you describe which vector graphic Firefly should create for you. The more precise the description, the better the result. For a rocket, you could write, for example: "A modern, stylized rocket icon during launch, simple geometric shape, bold orange and dark blue tones, clean edges and no background." Make sure to clearly specify shape, colors, and background. A background that is not wanted should be explicitly excluded. Then click on "Generate".

Step 6: Review the four variants
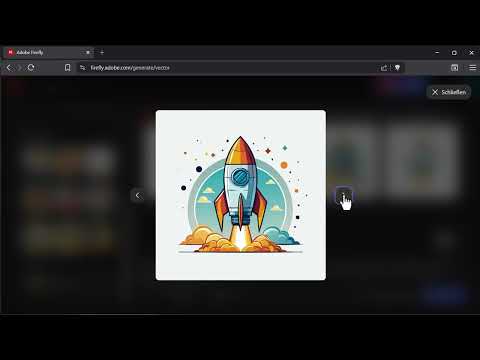
After a short time, Firefly displays four variants. Click on a preview to view it larger. Using the small arrow or the arrow keys on your keyboard, you switch between the drafts in a flash. This way you can compare the variants directly side by side without reloading each time, and choose the draft you like best.

Step 7: Download the result or keep working with it
Once you have found your favorite, you can download it. The file is saved directly as an SVG and can be used at any size without loss of quality. If you want to adjust the finer details, open the graphic in Adobe Illustrator. Alternatively, choose "Edit" and use the draft as a style reference. The next prompt will then be based on this look, which is especially helpful for projects with a consistent appearance.

Step 8: Create a scene with a second prompt
Want a more complex illustration? Then switch the content type to "Scene". Next, enter a new prompt, for example: "A futuristic, eco-friendly city from a bird's-eye view, hanging gardens on buildings, small flying electric cars, solar panels on the roofs, soft daylight." After generating, you will again get four variations, which you can review and download as before.

Step 9: Evaluate the results
Take your time looking at the results and compare them with your vision. Pay attention to clean edges, a clear visual language, and a coherent color scheme. If something is still not right, refine the prompt by adding details or naming specific colors and shapes, and generate again. Over time, you will develop a feel for which wording Firefly understands best.

Summary – Creating vectors with Adobe Firefly via prompt
With the "Text to Vector" module in Adobe Firefly, you create vector graphics directly from a text input. You set the content type, style, as well as color and tone, and describe precisely in the prompt what should be depicted. Firefly delivers four variations, which you can review in enlarged view. You download your favorite as an SVG, continue editing it in Illustrator, or use it as a style reference. For quick drafts and idea sketches, the workflow is an enormous relief, as the laborious setting of paths is no longer necessary.
FAQ
Do I need prior knowledge of Illustrator to create the vectors?No. The graphics are created entirely through text input and selection menus in Firefly. You only need Illustrator if you want to fine-tune the results later.
Which file format do I get in the end?The downloaded vectors are saved as an SVG file. This format can be scaled as desired without losing sharpness.
How many variations does Firefly show per run?Firefly shows four variations each time, which you can view one after another and compare with each other.
What is the difference between subject and scene?A subject is a single object, such as an icon or a character. A scene shows several elements that relate to one another, for example an entire cityscape.
Can I specify a style without describing it in the prompt?Yes. You can upload a reference graphic or choose a ready-made effect, such as the comic effect. Then you no longer need to formulate the style separately in the prompt.
How do I make sure no background is created?Explicitly state in the prompt that no background is desired, as in the example with the rocket icon.

