Your flash unit can do more than you might think. With TTL mode ("Through The Lens"), the camera takes over calculating the flash power, so you can concentrate on the subject and composition. The automatic mode is no guarantee of perfect images, but it saves you a lot of time and readjustment in fast, changing situations. In this guide, you will learn how TTL works, where its limits lie, and how to deliberately influence brightness with flash exposure compensation.
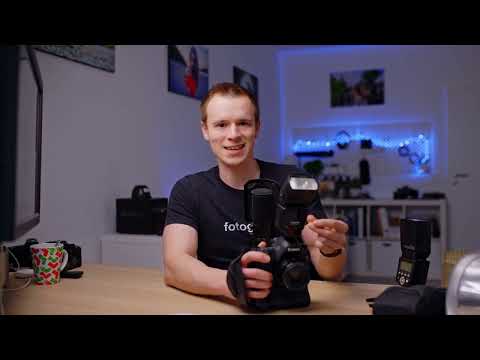
The video is only loaded from YouTube when you play it – data (including your IP address) is then transmitted to YouTube/Google. More in the privacy policy
Key Takeaways
- In TTL mode, the camera measures through the lens and automatically controls the required flash power.
- Before the actual flash, the flash unit emits an invisible pre-flash, on the basis of which the power is calculated.
- TTL does not automatically mean perfect exposure. Bright subjects such as wedding dresses or very dark areas can mislead the measurement.
- Flash exposure compensation is your most important tool for brightening or darkening the result by about one stop.
- With off-camera flash, TTL is more error-prone because the camera assumes the flash is mounted on the camera.
Step-by-Step Guide
Step 1: Activate TTL mode on the flash and the camera
The first step is quickly done, but you should pay attention to compatibility. Check whether your flash supports the TTL function. If it does, set the camera to TTL mode. The name varies depending on the manufacturer, and often it says something like "ETTL" or "TTL". However, the way it works is essentially the same across all brands. Make sure the camera and flash are compatible with each other, otherwise the measurement will not work reliably.

Step 2: Understand the pre-flash
As soon as you press the shutter button, the flash emits a pre-flash. It is so short that you do not perceive it with your eye. The camera measures how much light comes back from the subject. To you, the result looks like a single flash, although several light pulses are actually emitted. This understanding will help you later to better assess incorrect exposures.

Step 3: Understand how the flash power is calculated
From the pre-flash and the current camera settings such as aperture, ISO, and shutter speed, the camera calculates what power the flash actually needs. The distance determined by the autofocus is also factored in. The camera knows the flash's guide number and can use it to estimate how strongly the light falls off at that distance. It then performs the actual fine correction once more. For you, this means: you do not have to do every calculation yourself, but can leave most of the work to the automatic mode.

Step 4: Recognize the advantages and limits of TTL
TTL offers clear advantages, above all less mental effort. At the same time, the camera can get it wrong because it assesses the situation only on the basis of the pre-flash. It becomes especially critical with off-camera flash, that is, when the flash is not mounted on the camera. The camera assumes that the flash is attached directly to the body. There are ways to use TTL even then, but they are very error-prone. If you work off-camera, you should therefore check the result particularly carefully.

Step 5: Take the camera's limits into account
The camera always works within its technical limits. If you set a very small aperture, such as f/22, and the flash sync speed is 1/200 second, the flash power is often not sufficient. Even if the camera calculates the power correctly, the image can still turn out too dark. This problem is caused by the settings themselves, not by the measurement. Therefore, always check whether your aperture and your distance to the subject match the flash power.

Step 6: Deliberately test a dark result
Take a test image at f/22. You will notice that the result turns out too dark. This is exactly a typical problem with settings that are stopped down too much. The test shows you that TTL does not automatically deliver the right brightness in every situation. Such a trial run costs you only a few seconds and helps you recognize future mistakes earlier.

Step 7: Adjust the aperture and compare the result
Open the aperture to about f/4. The result will be noticeably brighter and already closer to the desired image. However, it may still remain a bit too dark, depending on the subject and distance. Compare your images directly on the display to assess the change. This way you learn how aperture and flash power influence each other.

Step 8: Correctly assess bright and dark subjects
The camera's exposure metering basically tries to bring the brightness to a middle gray tone. If you photograph a white wall, the image often looks too dark. A black surface, on the other hand, quickly appears too bright. This effect also affects TTL, because the metering follows the same logic. With subjects such as white wedding dresses, you should therefore expect deviations and check the image after the first shot.

Step 9: Use flash exposure compensation
If the automatic mode exposes too brightly or too darkly, you can give the flash an instruction. Flash exposure compensation is set on the camera or on the flash and specifically changes the flash power. With bright subjects such as wedding dresses, it has proven effective to work with -1 so that nothing is overexposed. The compensation only changes the flash power, not the basic settings of your camera.

Step 10: Fine-tune the compensation in stops
The compensation can usually be adjusted in third stops or full stops. One step corresponds roughly to one stop. Think of it this way: if your image is one stop too dark, you increase the compensation. If it is too bright, you decrease it. Test the compensation step by step until the result fits, and keep the setting in mind for similar situations.

Step 11: Know when to switch to manual settings
TTL works very well in most cases and delivers appealing results. However, if the automatic mode consistently fails, you should set the flash manually. In doing so, you determine the power yourself and have full control over the result. We will cover this method in more detail in the next step so that you are prepared for every situation.

Summary – Understanding TTL flash: Using the automatic mode on a hot-shoe flash correctly
TTL is a valuable aid that takes many decisions off your hands. The camera measures through the lens, emits a pre-flash for this purpose, and calculates the appropriate flash power from it. However, you need to know that the automatic mode can be off with bright or dark subjects, with off-camera flash, and with unfavorable settings. With flash exposure compensation, which you adjust in steps of about one stop, you correct the brightness precisely. If you combine both, you achieve reliable results in most situations.
FAQ
What does TTL mean in flash photography?TTL stands for "Through The Lens". The camera measures the flash power through the lens and controls it automatically.
Do I have to set the flash power myself with TTL?No, in TTL mode the camera calculates the appropriate power itself. If there are problems, you can adjust with flash exposure compensation.
Why does my image sometimes turn out too bright or too dark despite TTL?The metering is based on a middle gray tone. As a result, bright subjects often look too dark, and dark subjects often too bright.
What is flash exposure compensation?It is a setting with which you tell the flash to fire brighter or darker, usually in steps of about one stop.
Does TTL also work with off-camera flash?It is possible, but error-prone, because the camera assumes that the flash is mounted on it.
When should I switch to manual flash mode?If the TTL automatic mode consistently fails in your situation, manual setting offers full control over the flash power.


