Do you know this? The automatic mode decides how much light the flash emits, and exactly when it gets it wrong, you're left standing helplessly in front of the camera. Manual settings give that decision back to you. You set the flash power yourself and thereby determine how your picture looks in the end. That sounds like more effort, but it is easy to learn. In this guide, I'll walk you through the process step by step and show you how to coordinate flash and camera so that your results don't change from picture to picture.
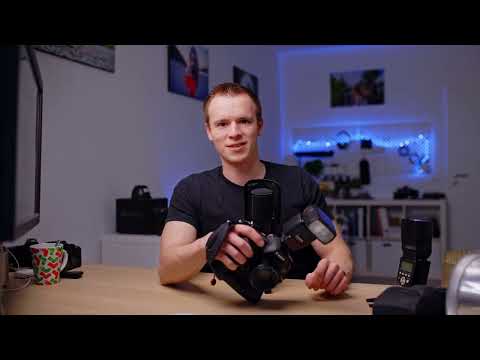
The video is only loaded from YouTube when you play it – data (including your IP address) is then transmitted to YouTube/Google. More in the privacy policy
Key Takeaways
- A flash only works within its power range. If the flash or camera is set too strong or too weak, the shot won't work.
- The flash mainly controls the subject in the foreground, while the camera settings (aperture, shutter speed, ISO) determine the brightness of the background.
- Once you have found the right distance and power, these values stay the same for similar subjects and constant ambient light.
- Start with a low flash power and adjust it step by step instead of working with maximum power right away.
- Flash exposure compensation with TTL is the faster way, but not every flash has TTL. The manual method is therefore an important alternative.
Step 1: Check the Starting Situation
First, switch off your flash and set it to manual mode. In the video, I set the power to 1/16, which is a good starting value. Then take a test photo using only the available light. This way you can see how bright or dark the scene looks without flash and whether additional light is needed at all. In the video, the picture was clearly too dark, so the flash was indeed needed.


Step 2: Prepare the Camera Deliberately
Now it's about the background. The darker you set the camera, the more the flash has to compensate, and the darker the background becomes. In the video, I opened the aperture to about 3.5, which was the widest opening of my lens, and gradually increased the ISO value until details in the subject and some of the background became visible.
You will notice that high ISO values quickly lead to image noise. At ISO 1600, the result was usable, but not ideal. A small aperture like 22 would take some load off the flash, but it would also require a lot of power and make it slower. The camera setup is therefore a compromise in which you weigh background, noise, and flash power against each other.

Step 3: Switch on the Flash and Control It Manually
Now switch on the flash. With a manufacturer's flash, you can often adjust the power directly via the camera menu. Open the flash function settings, check that the flash is set to "manual," and set the desired power. The advantage: you no longer have to make cumbersome changes on the flash itself, but control everything from the camera menu.
Also pay attention to the distance. Approach your subject slowly until the lighting is right. Distance is an important factor, because it determines how much light reaches the subject.

Step 4: Find the Distance and Fine-Tune the Power
Once you have found a suitable distance between flash and subject, keep it. As long as the ambient light doesn't change much, you can then shoot everything within a similar range without having to measure anew each time. This saves an enormous amount of time, especially for portraits or product shots.
After the first shot, make a critical assessment. In the video, the picture was far too bright after the first test photo. I then reduced the power from 1/32 to 1/64. Take another photo after each change until the result is right. If the flash is too strong, it can overexpose the scene; if it is too weak, the light isn't sufficient. Both are part of the learning process.

Step 5: Coordinate Camera and Flash
If the background still looks too bright despite the right flash power, you need to readjust the camera. In the video, I first lowered the ISO value to 640 and then to 320. This made the picture noticeably better, the background looked calmer, and the subject remained well lit.
The flash does not necessarily have to be changed in this step. Often it is enough to adjust just the camera. Watch the display to see whether the background moves in the desired direction, and correct in small steps.

Step 6: Choose the right strategy for your situation
There is no fixed formula that fits every situation. However, a simple rule of thumb will help you: more light from the flash means a darker background. If you want to make more of the background visible, you open the aperture, increase the ISO value, or choose a longer exposure time, as long as you don't risk motion blur. Then the flash can be set correspondingly weaker.
When you have to be quick, the background is often secondary. If you have more time, however, targeted fine-tuning is worthwhile. A proven approach is to first take a picture with ambient light only, then switch on the flash and keep readjusting until the subject and background match. Important here: make sure your subject is within the flash's power range, otherwise the shot won't work reliably.
Keep this in mind as a guideline: the camera settings tend to shape the background, the flash settings tend to shape the foreground. You can combine both; which mix works best depends on the situation.

Step 7: Flash exposure compensation with TTL as an alternative
In most cases, I work with TTL myself and correct the result via flash exposure compensation. This is much faster because the camera takes care of the base power and you only have to fine-tune. However, not every flash supports TTL. If your flash has no TTL control or the automatic mode fails, manual setting is the reliable solution.

Summary – Manual flash setting for consistent results
Manual flash setting gives you full control over your light. You start with a fixed power, find the right distance to the subject, and then coordinate the camera and flash with each other. The flash mainly determines the subject, the camera the background. With a bit of practice, you develop a feel for which setting makes sense in which situation. Test the method under different conditions, note down values that work, and use them as a starting point for your next shots.
FAQ
Why should I set the flash manually even though TTL exists?Manual setting delivers reproducible results because the flash power is not recalculated for every image.
How do I choose the right starting power?Start with a low power, for example 1/16, and increase it step by step until the subject is well lit.
What do I do if the background is too bright?Lower the ISO value or close the aperture a bit so that less ambient light gets into the image.
Why is my shot too dark despite the flash?Either the power is not sufficient, or the distance to the subject is too great. Check both and adjust the distance or the flash power.
Do I have to measure again after every change?As long as the ambient light and your distance to the subject do not change significantly, you can keep the settings you have found.


