A clip-on flash directly on the camera often looks flat and unnatural. The light comes from the front, the face is evenly lit, and harsh shadows appear under the eyes and on the chin. This is exactly where off-camera flash comes in. You detach the flash from the camera and place it so that it lights the subject from a different direction. The result has more depth and more interesting shadow work.
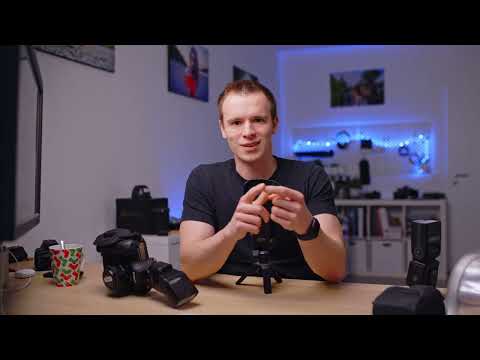
The video is only loaded from YouTube when you play it – data (including your IP address) is then transmitted to YouTube/Google. More in the privacy policy
In this tutorial, you will learn how to aim the flash, which surfaces are suitable for reflecting, which accessories you need, and how to trigger the flash reliably.
Key Takeaways
A flash on the camera axis produces flat light that hides shadows behind the subject.
By turning the flash head to the left, right, or upward, you immediately gain more directionality in the light.
Bounce surfaces such as a ceiling or wall distribute the light more softly, provided they are color-neutral and not too far away.
Clip-on flashes work best at a distance of about 2 to 5 meters.
A radio trigger is the most reliable method for separating the flash from the camera.
The photocell is an inexpensive alternative, but it depends on another flash that fires first.
TTL should preferably not be used with off-camera flash, as it can lead to incorrect measurements and underexposed images.
Step 1: Recognizing the Problem with Frontal Light
Before you move the flash, you should understand why it usually looks unflattering on the camera. Look at your subject and pay attention to the shadows. With frontal light, the brightness falls evenly on the face, and the shadows lie directly behind the subject. As a result, depth disappears from the image. A small clip-on flash intensifies this effect even more, because it sits slightly below the lens axis and the light therefore falls in from below.
Photograph your subject once from the front with the flash on the camera and once from the side with a light source from a different direction. You will notice the difference in facial modeling immediately.

Step 2: Turning the Flash Head and Redirecting the Light
The easiest way to get started with off-camera flash is to turn the flash head. Many clip-on flashes can be swiveled to the right, left, and upward. Downward is usually not possible. But with these three directions you can already get far.
If you tilt the head upward, the light first hits the ceiling and is reflected from there back onto the subject. This technique is called bouncing. It is particularly suitable in situations where you don't have a radio trigger with you or where a radio trigger would look out of place at a wedding. A flash that is mounted on the camera with its head pointing upward usually doesn't draw attention.

Step 3: Choosing a Suitable Reflective Surface
What is decisive for the result is the surface from which the light comes back. A ceiling is often the first choice, because the light spreads across the entire surface and softly illuminates the subject from above. However, if the ceiling is very high or made of glass, too much light is lost and hardly anything comes back. This was demonstrated at a wedding celebration where the ceiling was over 20 meters away and the flash remained effectively useless.
A wall is a good alternative. If you turn the flash head to the side, the light comes back from the wall and provides a lateral light direction. You set the angle by feel until the light looks right.
Pay attention to the color of the surface. A green wall tints the light green, and that looks unnatural on skin. Eggshell-colored walls are usually unproblematic. Wooden ceilings, on the other hand, contain a lot of orange, and that quickly looks too warm. So choose a surface that is as neutral as possible.

Step 4: Maintaining the Right Distance
Light loses strength with increasing distance. The longer the light path, the more power the flash needs to bring the reflection back to the subject. At some point the power is no longer sufficient, and the subject remains dark.
On-camera flashes work best at a distance of about 2 to 5 meters from the reflecting surface. You can move a bit above or below that, but you shouldn't overdo it. The same applies to the position of the subject: the closer the reflecting surface is to the subject and the camera, the better.

Step 5: Remote-controlling the flash with a radio trigger
If you really want to position the flash freely, you need a radio link. The camera and the flash have to communicate with each other, and without accessories that is not possible. The simplest and most reliable solution for on-camera flashes is a radio trigger. It consists of a transmitter that you place on the camera's hot shoe and a receiver that you attach to the flash.
A radio trigger is not necessarily expensive. Models with more channels or TTL support cost more, but a simple model is enough for getting started. Set both devices to the same channel. The receiver must be set to "Receive" and the transmitter to "Transmit". When both devices are switched on and communicating, you can press the shutter release on the camera, and the flash fires wirelessly along with it.
With multiple receivers, you can use additional flashes at different positions, for example from the front, from the side, or from above.

Step 6: Using the photocell as a simple alternative
An inexpensive option is the photocell. It is inserted into the flash and detects light pulses. As soon as another flash fires, your flash fires too. This works with small on-camera flashes as well as with large studio flashes. So you always need a triggering flash that is mounted on the camera or serves as the main light.
The photocell must be able to see the triggering flash. You can therefore place it almost anywhere, as long as it has a clear line of sight to the main light. I like to use it in the studio or for outdoor shots. Make sure that the photocell is able to respond reliably even in daylight.

Step 7: Avoiding TTL and preventing incorrect measurements
When flashing off-camera, you should turn off TTL if possible. TTL measures the light automatically via the flash on the camera. But if the flash is positioned somewhere else, it measures incorrectly. In addition, multiple flash triggers cause the flash to fire several times in quick succession, and this often leads to dark or unusable images.
Therefore, set your flash to manual mode and adjust the power. With a few test shots, you will quickly find the right setting. Even though some radio triggers support TTL, the experience remains: it is usually not worth it.

Step 8: Working with a cable or tripod
Besides radio and photocell, there is the option of connecting the flash via a cable. However, this solution is not ideal because most cables are quite short and you quickly trip over them when moving around. A more practical alternative is a tripod. Many flashes have a tripod screw on the bottom, with which you can mount them on a camera tripod. This way the flash stands stably at any position.
On some models, the tripod screw is located on a plastic part. Therefore, be careful not to use too much force when mounting the flash.

Summary ??? Off-camera flash: Guide to radio, photocell, and bounce
You have now seen how to detach the flash from the camera and thereby create more three-dimensional images. Start by turning the flash head and bouncing the light off the ceiling or wall. Pay attention to neutral colors and a distance of 2 to 5 meters. A radio trigger is best suited for reliable triggering. The photocell is an inexpensive addition, and the cable or tripod offers additional flexibility. Do without TTL so that your images remain evenly exposed.
FAQ
Why does the flash on the camera often look unflattering?The light comes directly from the front and slightly from below. This results in flat faces and harsh shadows behind the subject.
Can I use the flash off-camera even without a radio trigger?Yes, by turning the flash head upward, to the right, or to the left and letting the light reflect off the ceiling or wall.
Which wall color is suitable for bouncing?Neutral colors such as eggshell white are ideal. Green walls tint the light, and wooden ceilings can look too warm.
What distance to the reflecting surface makes sense?On-camera flashes work best at a distance of about 2 to 5 meters. At greater distances, the power is often no longer sufficient.
How does a radio trigger work?The transmitter sits on the camera, the receiver on the flash. Both must be set to the same channel. The transmitter is set to "Transmit", the receiver to "Receive".
What is a photocell?A photocell detects light pulses and triggers the flash as soon as another flash fires. It therefore always requires a triggering flash.
Why should I avoid TTL when using off-camera flash?TTL measures via the flash on the camera. If the flash is positioned somewhere else, incorrect measurements occur and often dark images result.
Can I also trigger a flash via a cable?That is possible, but cables are usually short and restrict freedom of movement. A tripod is often the more practical solution.


