
A seven-minute tutorial is quickly recorded, but hardly anyone these days watches a clip for seven minutes straight. This is exactly where HeyGen's Instant Highlights feature comes in. It automatically cuts short excerpts out of a long video that are suitable for YouTube Shorts, TikTok or Instagram. In this guide, I'll show you how to use the quick variant step by step, which settings really matter and where the tool still has limits.
The video is only loaded from YouTube when you play it – data (including your IP address) is then transmitted to YouTube/Google. More in the privacy policy
Key Takeaways
- Instant Highlights automatically creates several short clips from a video file or a YouTube link.
- Before starting, you set the language, desired clip length and aspect ratio.
- Portrait format and displayed subtitles make the clips immediately suitable for social media.
- The AI determines the image framing. Manual adjustment is not possible.
- The option for PDF or PowerPoint files can also be used to convert presentations into videos with a presenter.
Step-by-Step Guide
Step 1: Open Instant Highlights
You get started via the HeyGen home page. Click "Home" at the top and select the "Instant Highlights" function on the far right. This is where the conversion of your videos begins.

Step 2: Select the video source and start the analysis
You have two options: Either you upload a video file from your hard drive, for example an MP4 file, or you use a YouTube link directly. Especially for your own publications, the link is the fastest way. In the tutorial, a seven-minute video training on creating images with ChatGPT is used. Paste the URL into the input field and then click "Get Highlights".
Step 3: Set the language
By default, the "Autodetect" option is selected, in which the tool recognizes the language itself. If you are unsure whether the AI understands the content correctly, manually select "German" instead. This prevents the analysis from losing quality due to a wrongly detected language.
Step 4: Enter hints for the AI
In the field for additional hints, you can tell the AI what it should pay particular attention to. A short, concrete wording is worthwhile here, for example which topics are central in the video or which statements absolutely belong in the clips. The clearer the instructions, the better the excerpts fit your goal.
Step 5: Determine the clip length
Now you define how long the individual pieces should be. The options are under 30 seconds, 30 to 60 seconds, up to one minute or more than three minutes. For YouTube Shorts, the option under 30 seconds is recommended, as it best meets the platform's requirements.
Step 6: Activate portrait format and subtitles
Choose portrait as the format so that the clips appear on the smartphone without black bars. You should also activate the subtitles. Especially with muted feeds, a subtitle significantly increases viewing time. The recognition of the spoken words worked very reliably in the tutorial.
Step 7: Submit the analysis and view the result
Click "Submit" to start the creation. After a short wait, the individual clips appear in an overview that also shows the respective duration in seconds. This makes your selection easier, because you can see at a glance which excerpts fit your time window.

Step 8: Check the clips in the preview
Open a clip via the play button to watch it in the preview. You close the view again with the Escape key or the X at the top left. In the preview, check above all whether the content is complete and whether the subtitles were correctly recognized.

Step 9: Download the clip
You download the desired clip via the small arrow. Be careful not to accidentally click the neighboring icon, which only scrolls the clip further down. The download gives you a finished video file that you can upload directly to YouTube, TikTok or Instagram.

Step 10: Be Aware of the Limits When Choosing the Image Crop
In portrait format, the AI crops the image automatically. This means the crop is not always exactly where you want it. Manual correction is not provided in the tool. So you have to take the clip as it was created, or, if necessary, adjust the source video and have it analyzed again.

Step 11: Test the Landscape Format
If you also need your clips for YouTube in the classic format, it's worth taking a look at landscape format. The clips are then cropped differently, and you can directly compare which version suits your channel better.

Step 12: Convert Your Own Documents into Videos
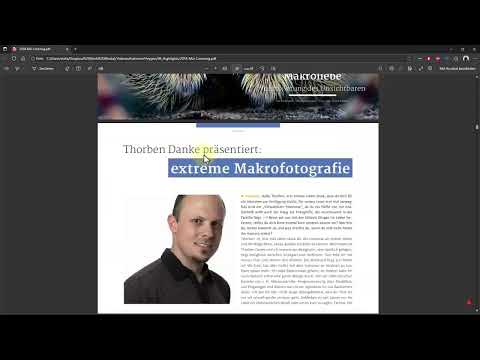
In addition to videos, the tool also accepts PDF and PowerPoint files. To do this, select the corresponding option and upload the document. In the tutorial, an online magazine with picture features was used. The tool automatically creates a separate slide for each page, so you can directly adopt the structure of the document.


Step 13: Enter Speaker Texts for Each Slide
The slides are created, but they don't yet contain any text for the speaker to deliver. You have to take care of that yourself. For each slide, write in the text field what should be spoken. The AI doesn't know your content and therefore cannot generate meaningful text. So the work at this point remains yours.

Step 14: Select a Voice and Preview the Text
In the menu, you can select a speaker or use your own voice, provided you have created it beforehand. One click is enough, and the text can be read aloud right away. Listen to the result and adjust the text if necessary before continuing. In the tutorial, the own voice sounded convincing.
Step 15: Insert an Avatar and Remove the Background
Optionally, you can insert an avatar that you created beforehand. Shrink it and place it at a suitable spot in the frame. In the preview, note that the lip sync only becomes visible after a calculation. With the Background Remover, you remove the avatar's background so that only the person is visible and blends inconspicuously into the video.


Step 16: Add Animations and Generate the Video
Finally, you can add texts, animations, images, music, or your own video files. Once you are satisfied with the result, click "Generate". The tool then renders the entire project. Afterwards, you download the finished video file and publish it on YouTube, TikTok, or another platform.

Summary ??? HeyGen Instant Highlights: Automatically Turn YouTube Videos into Shorts
With Instant Highlights, you turn long YouTube videos or your own files into short clips suitable for social media. Select the language, length, portrait format, and subtitles in advance, then download the clips, and keep in mind that the image crop is determined by the AI. In addition, PDF and PowerPoint files can be converted into videos with a speaker, for which, however, you have to write the texts yourself.
FAQ
Which video sources can I use with Instant Highlights?You can use a video file from your hard drive, for example an MP4 file, or a YouTube link.
How long can the generated clips be?You select the length in advance, for example under 30 seconds, 30 to 60 seconds, up to one minute, or more than three minutes.
Can I adjust the image crop in portrait format myself?No, the AI selects the crop automatically. You can only view, download, share, or delete the clips.
Can I change the size, color, or position of the subtitles?At the time of the tutorial, this was not possible. You can only turn the subtitles on or off.
How do I create a video from a PDF file?Upload the document. The tool automatically creates a slide for each page, into which you enter the speaker text.
Do I have to write the speaker text myself?Yes. The AI doesn't know your content and cannot generate suitable text, so you enter the text for each slide yourself.
What is the Background Remover for with the avatar?It removes the avatar's background so that only the person remains visible and blends inconspicuously into the video.

