
Imagine a visitor to your website is not greeted by a sober text box, but by a realistic-looking person who answers their questions. That is exactly what HeyGen makes possible with its interactive avatars. In this guide, I will walk you through all the steps: from choosing an avatar and setting up a knowledge base to embedding the finished chatbot into your own website. It is based on a tutorial of around nine minutes, whose content I have prepared here in a structured way for you.
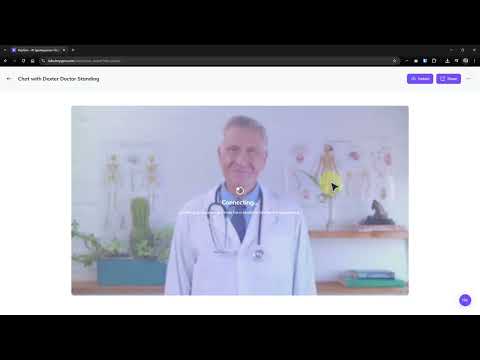
The video is only loaded from YouTube when you play it – data (including your IP address) is then transmitted to YouTube/Google. More in the privacy policy
Key Takeaways
- You can find interactive avatars in the "Interactive Avatar" section of the home page. Public avatars, your own avatars (My Avatars) and examples are available there.
- Your own avatar requires a recording video with clear requirements: at least two minutes in length, of which at least 90 seconds speaking into the camera and about 15 seconds without speaking.
- The most important lever for good answers is the prompt. The more detailed it is, the more targeted the avatar's answers will be.
- You embed the chatbot into your website using a code snippet. For more in-depth solutions, an API interface is available.
- The platform has limits: in the example, the conversation duration is limited to 12 minutes, and under heavy load the connection can become unstable.
Step-by-Step Guide
Step 1: Open the interactive avatar
Log in to HeyGen and open the "Interactive Avatar" section on the home page. From here you can reach all the functions you need for a chatbot with an avatar. First, click through the sections calmly so that you know where to find which setting later.

Step 2: Distinguish between public avatars, your own avatars and examples
In the avatar section, you distinguish between three categories. Public avatars are ready-made figures that you can use immediately. Some of them are already assigned to specific fields, such as medicine or tax consulting. Under "My Avatars" you will find all the avatars you have created yourself. The examples show you finished configurations, from which you can see exactly how a chatbot is built.

Step 3: Meet the requirements for your own avatar
If you want to use your own likeness as a chatbot, you upload a video that must meet precise requirements. The video should be at least two minutes long. Of that, you speak directly into the camera for at least 90 seconds. In addition, you need about 15 seconds in which you look silently into the camera and do not speak. In the tutorial, it turned out that older recordings did not meet these conditions and therefore did not work. So plan the recording deliberately instead of just uploading any video.

Step 4: Select a public avatar and start the chat
Now select any public avatar and click on "Chat". Then you set the language, German in the example. After that, you select the desired knowledge base and confirm with "Chat now". The start takes a short moment, then the avatar begins the conversation.

Step 5: Switch between voice and text mode
In the chat window, you can switch from voice mode to text mode and vice versa at any time. In voice mode, you speak directly with the avatar; in text mode, you type your input. Especially when you demonstrate the chatbot during a screen recording, writing is often the more practical choice, because you do not have to rely on speech recognition.

Step 6: Specialize the avatar with a knowledge base
Here you determine in which field the avatar should answer. Via the knowledge base, you can create your own entries and describe whether your avatar should be, for example, a doctor, a trauma surgeon or a tax advisor. Based on this information, it formulates its answers. Formulate the details concretely so that the chatbot stays precise within its subject area and does not drift into generalities.

Step 7: Set the avatar's background
An avatar can be displayed either cut out or with a background. With a background, the scene feels like a real conversation, and the person gains presence. A cut-out avatar, on the other hand, is better suited if the avatar is meant to blend seamlessly into the design of your website. Choose the option that fits your page layout.

Step 8: Embedding the code into the website
When the chatbot works as desired, copy the avatar code. The platform shows you where in the HTML the code should go. In the tutorial, this was the position after the body section. Paste the code into your website or into your code snippet, save the change, and reload the page. Afterwards, a chat icon appears at the bottom of the page, through which visitors can open the chat.

Step 9: Testing the embedded chatbot
Open the chat icon on your website, select the language, and start with "Chat now". In the example, the avatar conducted an English vocabulary training on the topic of cars. It asked about known words, gave feedback, and built on that. This shows you how a chatbot can be used for learning purposes. However, note the limitations: in the test, the conversation duration was limited to 12 minutes, and under high load the chat did not always work reliably. Therefore, test early and, if necessary, plan an alternative way for your visitors to get in contact.

Step 10: Using your own avatar in the chatbot
Once your recording video meets the requirements and has been uploaded, you can create your own avatar from it. You then talk to a digital version of yourself. This is particularly suitable for websites with a personal connection, such as for coaches, consultants, or self-employed people. The process is the same as with the public avatars: you select your avatar, set the language, and start the chat.
Step 11: Writing detailed prompts
The quality of the responses depends heavily on the prompt. In the "Interactive Avatar" section, open one of the existing examples and edit it to see the structure of an extensive prompt. It states, among other things, what role the avatar takes on, how the conversation begins, and how the AI should react in certain situations. A single sentence often leads to results you did not expect. The more precisely you describe the framework, the better the result will be. If you get stuck, the "Tips" button helps you, as it displays a short guide on formulating prompts.

Step 12: Using the API interface for deeper integration
For more comprehensive integration, HeyGen provides an integration guide with an API interface. There you copy your personal API key. Treat this key confidentially and hand it over to a programmer on your team who will integrate the avatar directly into your application. This step is worthwhile if you want more control over behavior and design than the code snippet offers.

Step 13: Using ready-made examples as templates
Under "Avatars" and the "Examples" tab, you will find ready-made examples, such as a tax professional. Open it and ask a question about your tax documents. The avatar then responds in the conversational style specified by the knowledge base. Such examples are excellent templates for your own chatbots, for instance for tax season, in which an avatar helps you meet deadlines and keep track of the next steps.

Summary ??? HeyGen AI Chatbot with Avatar: Designing a Website Interactively
With HeyGen, you can create a chatbot with a realistic avatar in just a few steps and embed it on your website. You choose a public or your own avatar, specialize it using a knowledge base and a detailed prompt, and add it to your page via a code snippet or API. Pay attention to the requirements for your own recordings, the conversation limit, and possible load issues so that your chatbot runs reliably in everyday use.
FAQ
How long must a video for your own avatar be at minimum?The video should be at least two minutes long, including at least 90 seconds of speaking to the camera and about 15 seconds without speaking.
Why does my uploaded video not work?It probably does not meet the requirements. Pay attention to the minimum length, the speaking time, and the 15 seconds without speaking, during which you only look into the camera.
Can I run the chatbot in German?Yes, you simply select German as the language when starting the chat.
How long can a conversation with the avatar last?In the tutorial, the conversation duration was limited to 12 minutes.
What do I do if the chatbot does not respond?The capacity may be fully utilized. Try again later and plan an alternative way for your visitors to get in contact.
What is the knowledge base for?It determines in which field of expertise the avatar responds, for example as a doctor or tax advisor.
Why should I write a detailed prompt?An extensive prompt gives the avatar a clear framework. As a result, the answers are more targeted and deviate less often from your expectations.
Where can I find help with formulating prompts?Via the "Tips" button in the avatar's area, you get a short guide on creating good prompts.
What do I need the API key for?With the API key, a programmer can integrate the avatar more deeply into your application than the code snippet allows.
Can I also operate the chatbot by voice?Yes, you can switch between voice mode and text mode.

