
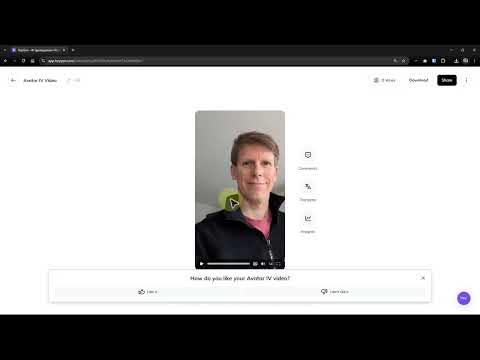
Imagine that on your photo your face blinks, your hand moves and it speaks with your own voice. That is exactly what HeyGen makes possible. You upload a static image, add an audio file or a text and receive a talking avatar video. In the tutorial, the instructor shows the complete process, once with his own portrait photo and once with an image created with Midjourney. In this guide, I walk you through the process step by step, explain the settings and point out limitations you should be aware of.
The video is only loaded from YouTube when you play it – data (including your IP address) is then transmitted to YouTube/Google. More in the privacy policy
Key Takeaways
You only need a photo and an audio file or a text to create a talking avatar video. You set the settings for format, image fill, export and gestures before generation. Creation takes a few minutes, and additional instructions such as taking off glasses are not always carried out. Background sounds currently still have to be added separately.
Step-by-Step Guide
Step 1: Open the Photo to Avatar Video Section
Log in to HeyGen and click "Home" in the left menu. There you will find the entry "Photos to Avatar Video". With this item you start creating your video from a still image. Make sure you do not switch to another area such as Video Translation, as the interface will look different otherwise.

Step 2: Upload Your Photo
In the next window you select an image. HeyGen offers pre-made sample images, but you can also upload your own file. In the tutorial, a portrait photo of the instructor is used. However, you can also use AI-generated images, like the fisherman from Midjourney, which is used in the second example. It is important that the face is clearly recognizable, because the animation is based on it.

Step 3: Set Format and Image Fill
First decide whether your video should appear in landscape or portrait format. Having taken the original image in portrait format is a good indication that you should create the result in portrait format as well. Then you determine how the image is displayed in the frame. With the "Fill Screen" option, the avatar fills the entire area. This usually works best on social networks because no black borders appear.
Step 4: Add Audio
Now you need the sound for your video. You have two options: Either you write a text that HeyGen reads aloud, or you upload your own audio file. For a recording with your own voice, the second option is suitable. Speak for a few seconds beforehand into any audio program, export the file as an MP3 and then upload it. A smartphone recorder is often enough for this. Make sure the recording is quiet and free of background noise, since HeyGen uses the voice directly for the animation.
Step 5: Adapt Movements to the Voice
HeyGen can design the avatar's gestures to match the voice. Activate the corresponding option for this. If your avatar seems too lively, you can tone down the movements. This is exactly what is done in the tutorial: the gestures are set to be calmer so that the avatar does not seem too hyper. Try out different levels until the movements match your speaking style.

Step 6: Choose Export Settings
Click "Add Audio" and then set the export options. You can choose between a fast output and maximum quality. However, high quality takes about twice as long. For tests, the fast option is enough. For publication, you should choose the better quality. You also define the resolution. In the example, a resolution of 720p is perfectly sufficient for a test version.

Step 7: Enter Additional Instructions for Gestures
In the text field you can give the avatar instructions, for example that it should move its hand or wave. These inputs influence body language, but they are no guarantee that every movement will be carried out exactly that way. Phrase them briefly and concretely. You can find out more in the section on the limitations of the feature further below.
Step 8: Generate the video and check the result
Click "Generate Video". In the tutorial, creation takes about ten minutes. Plan for this waiting time and work on other tasks in the meantime. After rendering, you can play the result in the preview window. Pay attention to lip movements, gaze direction, and transitions. Only when everything looks consistent should you download the video.

Step 9: Alternative – Use text instead of an audio file
If you don't want to make your own recording, write the text directly into the input field. Then choose a voice. HeyGen offers several voices in different languages. In the example, German is selected. The voice sounds synthetic, but is often sufficient for explainer videos or product presentations. Before generating, check carefully whether the emphasis and pronunciation fit, as otherwise you will have to adjust the text.


Step 10: Recognize the limits of the feature
In the tutorial, the instruction for the avatar to take off their glasses during the conversation is not carried out. This shows that additional commands do not yet work reliably. According to the instructor, the feature is still in the beta phase. If it's important to you, you can enter the text in English and try out whether that delivers better results. For important projects, therefore, always plan a test run.

Summary – Creating a HeyGen Photo to Avatar Video: Step-by-Step Guide
With HeyGen, you can turn a photo into a talking video in just a few steps. You select the "Photos to Avatar Video" area, upload your image, set the format and image fill, and add an audio file or a text. Then you adjust the gestures and export quality and have the video generated. Creation takes a few minutes. Additional commands do not always work reliably yet, and you have to add ambient sounds separately. With a bit of practice, you can still achieve impressive results that are suitable for explainer videos, memorial photos, or creative projects.
FAQ
Can I use any photo?The best choice is an image in which the face is clearly visible and well lit. AI-generated images such as the fisherman from Midjourney also work.
How long does it take to create a video?In the tutorial, generating took about ten minutes. The duration may vary depending on load and export quality.
Does the audio file have to be in MP3 format?In the tutorial, the recording was exported as an MP3. However, you can use any audio program of your choice and export the file accordingly.
Why were the glasses not taken off in the example?According to the instructor, the feature is still in the beta phase. Additional instructions are therefore not always carried out.
Can I add background noises directly in HeyGen?The tutorial mentions that ambient sounds currently still have to be added separately.
