
An avatar can look as convincing as you like: if the voice doesn't fit, the whole video quickly looks artificial. This is exactly where this guide comes in. You'll learn how to select a voice from the public library in HeyGen, how to clone your own voice using an audio or video file, and how to achieve even better results with an external voice technology like ElevenLabs. In the end, your digital twin can not only look realistic, but also speak the way you imagine.
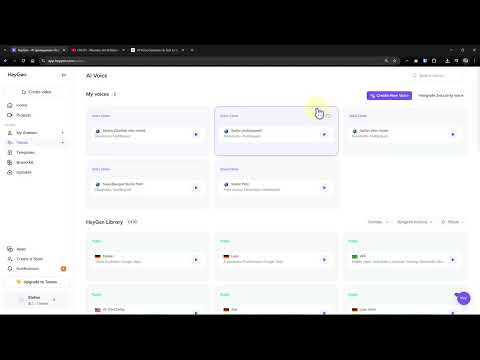
The video is only loaded from YouTube when you play it – data (including your IP address) is then transmitted to YouTube/Google. More in the privacy policy
Key Takeaways
- Public voices can be filtered by language and listened to directly before use.
- For your own voice, you need audio or video material as well as your explicit consent. In the video, about two minutes of material is mentioned as a good guideline; for a more precise result, almost two hours were uploaded in the example.
- The options "Keep background noise" and "Normalize volume" help if your recording is uneven or noisy.
- The choice of engine has a big influence on the result. Try several and compare them using the same test sentence.
- Via an API key, you can integrate voices from ElevenLabs, which in the example sound significantly more similar than the standard voices.
Step-by-Step Guide
Step 1: Open the Voices section and filter the list
Open the Voices section in the menu. There you'll find a large selection of publicly available voices. Since the list quickly becomes confusing, first set a filter for German voices. Even then, there are still many options, and many of them sound very similar. So plan some time for comparison.

Step 2: Listen to and compare voices
Click the play button on each voice to listen to it. A simple test sentence like "Hello, this is how I sound" quickly shows you whether tone, timbre, and speaking pace suit your project. In the example, several candidates were compared one after another until one voice was convincing. With this approach, you can often find a usable solution without having to create your own voice.

Step 3: Clone your own voice and confirm consent
If none of the standard voices fit, choose the option to create your own voice. The dialog guides you through the process. First, you must confirm that you agree to your voice being recorded and that you are aware a synthetic version will be created from it. Read this notice carefully, because you cannot proceed without this confirmation. You may use the function exclusively with your own voice or with material for which you hold the rights.

Step 4: Upload an audio or video file
In the next step, you choose whether to upload an audio file or a video. In the example, an audio clip was chosen, but videos are also possible. As a guideline, about two minutes recorded in a quiet environment is recommended. Common formats such as MP3 or WAV are supported. Make sure that only your voice can be heard, because other speakers distort the result. Upload the file and wait until processing is complete. You'll need a bit of patience for this.
Step 5: Adjust background noise and volume
After the upload, two options appear. With the first, you can specify that background noise is retained. This makes sense if your recording comes from a real environment and the atmosphere should be preserved. With the second, you activate volume normalization. It balances out passages where you spoke sometimes quietly and sometimes loudly. For clean studio recordings, you can turn the noise off; for loud rooms, normalization is usually helpful. Confirm your settings and have the voice created.
Step 6: Check the finished voice and set the language
As soon as the voice is available, play a test sentence. In the example, the voice was initially in English, even though the material was in German. That's why you explicitly select German for the language. Only then does the pronunciation match your content. Listen closely to the results and pay attention to emphasis, pauses, and pace.

Step 7: Choose the right engine and fine-tune
Next, you decide which engine should be used. You can keep the automatic selection or specifically choose an engine like ElevenLabs. Compare the results using the same test sentence. There are also advanced settings that let you adjust the sound further. This takes a bit of experimentation, because small changes can noticeably alter the effect. Only move on once you are satisfied with the result.

Step 8: Save and rename the voice
Save the voice using the Save button. A descriptive name will help you later, especially if you create several voices. So use the Rename function and assign a clear name, for example with the addition "Medium" for the engine or the project. After saving, the voice is available in all your avatars. Once created, you can reuse it at any time.

Step 9: Integrate ElevenLabs via an API key
If you are not satisfied with the quality of the built-in voices, you can integrate external providers. In the example, ElevenLabs was chosen, which requires a subscription with API access. You create the API key directly in your ElevenLabs account using the Create API Key option. Pay attention to the permissions when creating it. In the example, there were initially problems because the access was too restricted. If the error message persists, you can temporarily give the key comprehensive permissions. Then assign a name and paste the key into HeyGen. After that, you have access to all the voices you have created at ElevenLabs.

Step 10: Select the voice in AI Studio
When you create a new video or open an avatar, you go to AI Studio and select the voice there. Under My Voices you will find the voices you have created. In the example, the professional voice from ElevenLabs was selected, which is marked as such. Note that this voice cannot be limited to a single language. It can be used for all supported languages.

Step 11: Check the result with a test sentence
Finally, enter a short text, for example "Hi, my name is ... and I am an AI avatar", and play it back. Compare the result with your real voice and decide whether you want to adjust it further. In the example, the ElevenLabs voice sounded so convincing that it was barely distinguishable from the original voice. So with a combination of cloning and fine-tuning, very good results can already be achieved today.

Summary – HeyGen AI voice cloning: Avatar with your own voice
You have seen that an avatar voice can be created in two ways. Either you choose a suitable public voice from the library, or you clone your own voice using audio or video material. Important here are consent, clean recordings with the right settings for background noise and volume, and comparing different engines. With an API key, you can additionally integrate voices from ElevenLabs and thus achieve even more realistic results. Test each voice with the same sentence before using it in your project. That way, your avatar will truly sound like you in the end.
FAQ
How much audio material do I need for my own voice?The video gives about two minutes as a guideline; for an even more accurate voice, almost two hours were uploaded in the example.
Which file formats can I upload?Common audio formats such as MP3 or WAV are possible, and you can also upload a video.
Why does my voice sound English even though I spoke German?After creation, the language must be explicitly set to German, otherwise the pronunciation will not be adjusted correctly.
What do I do if the API key doesn't work?Check the permissions when creating the key. If the key doesn't grant enough access, it cannot access the desired voices. In the example, it helped to give the key comprehensive permissions.
Can I use an ElevenLabs voice in all languages?Yes, the voice can be used for all supported languages. Restricting it to German is not possible.

