
Your own digital twin is no rocket science. With a single video recording of yourself, you create an avatar in HeyGen that looks deceptively like you and speaks with your lip movements. I'll show you step by step what you need to pay attention to so that the result is convincing.
The video is only loaded from YouTube when you play it – data (including your IP address) is then transmitted to YouTube/Google. More in the privacy policy
Introduction
An avatar from a photo is quickly made, but the results often look stiff. It becomes much more realistic with a video of yourself. HeyGen uses this material to learn your facial expressions, your gestures, and your lip movements. You don't need a studio for this, just a quiet room, good lighting, and about a minute and a half of time. The guide takes you from the first click on "My Avatars" to the finished test video.
Key Takeaways
A video delivers better results than a photo, and the source material determines the quality. At least 30 seconds, short pauses, and natural movements are important. Verification via a read-aloud code is mandatory. 4K is only available with a Team subscription. The voice in its default state often still sounds like AI and has to be optimized separately.
Step 1: Start the New Avatar
In HeyGen, open the "My Avatars" item in the menu on the left. There you will first see publicly available avatars that can be used by everyone. Since you want your own likeness, however, click on "Create new Avatar".

Step 2: Choose Creation via Video
Next, you are offered the option to create the avatar from a photo or from a video. A photo is faster but usually delivers a stiff result. Therefore, choose the video option, because it reproduces your movements and facial expressions much better.

Step 3: Read the Instructions and Get Started
HeyGen now shows you an introduction with explanations about lighting, sound, and recording position. Take the time to watch it, because many later problems arise from an unsuitable recording. Then click on "Get started".

Step 4: Prepare the Right Source Material
The requirements for your video are clearly defined. It should be at least 30 seconds long. A short speaking pause of one to two seconds helps the AI to cleanly recognize the beginning and end of your sentences. Move calmly, show your hands from time to time, and speak naturally. The more movement there is in the video, the more lively your avatar will look later. It's best to record your video with a smartphone or a camera in good light and without image editing, so that the original recording is preserved.
Step 5: Upload the Video
Click on "Next" and drag your video into the upload field or select it via the file dialog. Up to 10 GB is possible, so even longer original recordings are no problem. It is important that you use an unedited recording.

Step 6: Set Background and Ambient Noise
HeyGen offers you the option to remove the background. This makes sense if you want to appear in different environments later. If your room is supposed to stay as it is, however, simply leave the option off. Afterwards, you decide whether ambient noise should be kept. A quiet, well-damped room doesn't need any noise here. Reverb or background noise, on the other hand, can make the avatar look unnatural.
Step 7: Select the Resolution
The 4K option is tempting, but it is only available with a Team subscription. This is significantly more expensive. If you aren't willing to pay for it, you work with the standard resolution. It is entirely sufficient for many use cases such as explainer videos or social media posts.
Step 8: Verify Your Identity
To make sure nobody creates your avatar without your consent, HeyGen requires verification. For this, you have to read your voice and a given text aloud in front of the camera. You receive the text in the verification screen. Make sure that the access code is easily legible, because faded writing means the code will not be recognized. For me, the first attempt therefore didn't work. The second time, everything was fine.


Step 9: Quality Check and Submission
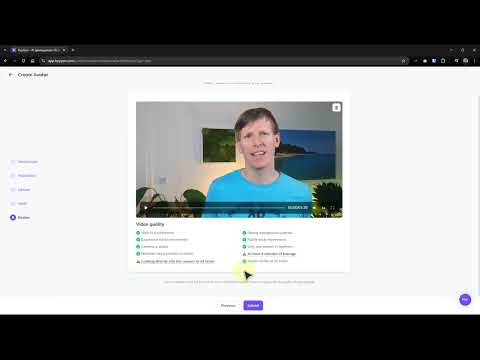
After the verification video, HeyGen runs a check. It may give you notes, for example that you did not look into the camera the whole time. You should take such notes seriously, but you don't necessarily have to implement every point. Then click "Submit". Creation takes a few minutes, and you can see the progress as a percentage.

Step 10: Testing the Finished Avatar
As soon as the avatar is finished, you will receive a notification. Play the preview and check the lip sync. Mine really looked good. You can also test how the avatar looks with different gestures, such as with fingertips put together, a wave-like hand movement, or a fist. Hand movements in particular show whether your source video provided enough material.


Step 11: Implementing a First Text in the AI Studio
With "Create AI Studio" you can now enter texts that your avatar should speak. I entered a short notice text for a video and looked at the result. Overall it is appealing, but the voice still sounds too much like artificial intelligence and not one hundred percent like you. However, the voice can be optimized, which I will show you in the next part.

Summary – Creating a Hyper-Realistic HeyGen Avatar from a Video
You have now learned all the steps to create your own avatar in HeyGen. The video is the best foundation, and a quiet room with good lighting determines the quality. Make sure you have at least 30 seconds of material, natural movements, and a legible verification. The 4K option costs extra; for many projects the standard resolution is sufficient. The voice is the point where you should still make improvements.
FAQ
How long should my source video be at minimum?At least 30 seconds, ideally with small pauses of one to two seconds.
Can I use a photo instead of a video?Yes, that works, but the results are usually less lively than with a video.
Why was my verification rejected?Often it is because the access code you had to read aloud was hard to read. Simply record the code again and make sure it is clearly legible.
Do I need a Team subscription for 4K?Yes, 4K resolution is only available with the Team subscription.
Do I have to remove the background?No, you can also keep it if your room works as an environment.
Why does my voice in the avatar still sound artificial?The default voice is often not yet optimal. With additional settings, the sound can be improved significantly.

