
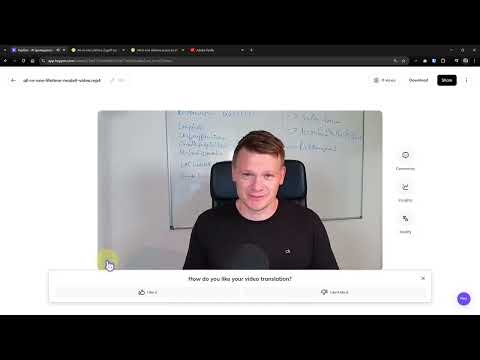
Your explainer video is finished in German, but it actually deserves an international audience? With HeyGen, you can translate your videos into another language without having to speak a foreign language yourself. The special feature: the speaker's mouth movements are adapted to the new language, so the video doesn't look like a soundtrack that was added afterwards.
The video is only loaded from YouTube when you play it – data (including your IP address) is then transmitted to YouTube/Google. More in the privacy policy
I tried this method myself, and the path to get there wasn't straightforward. At first I tried it with Adobe Firefly Translate. The result was disappointing because the lips didn't match the spoken English and the translation partly cut off before the end of the footage. Only HeyGen's translation function, which affects the lip movements in the "Hyperrealistic Translation" mode, delivered a usable result. I'll show you exactly this process step by step in this tutorial.
Key Takeaways
- You can find the "Translate Video" function on HeyGen's home page.
- Only the "Hyperrealistic Translation" mode adjusts the lip movements. A pure audio change is only sufficient if no speaker is visible in the video.
- Under "Advance" you determine whether lip sync, subtitles, background removal, and voice enhancement should be active.
- Processing takes about 5 to 10 minutes depending on the video length, and you can follow the progress in percent.
- The automatically generated transcript cannot be edited. Incorrectly recognized words therefore remain.
Step-by-Step Guide
Step 1: Open the "Translate Video" function
Log in to HeyGen and open the home page. There, under the "Home" item, you will find the "Translate Video" option. Click on it to open the translation area. From there you control the entire process, from uploading to the finished result.

Step 2: Upload your original video
In the next window, you insert your video. Make sure the speaker is clearly visible in the frame and speaks as directly into the camera as possible. The more clearly the face is recognizable, the more precisely the AI can reproduce the lip movements. A video with a shaky image or a head turned strongly to the side, on the other hand, tends to deliver unsatisfactory results.

Step 3: Set the source and target language
Now you set the languages. In my example, the source language was German and the target language was English. Select both options from the selection lists before you continue. A wrong source language causes the transcript to be created incorrectly, and the entire translation suffers as a result. So check this setting carefully.
Step 4: Choose the right translation mode
This is where it is decided whether your result will be lip-synced. You have two options: either HeyGen only changes the audio track, or you choose "Hyperrealistic Translation", in which the lip movements are additionally adjusted. The first option only makes sense if no speaker is visible in the video, for example in a slideshow with a voiceover. As soon as a face appears in the frame that speaks true to the original, you should definitely use the hyperrealistic mode. That is exactly where my first attempt failed: the standard translation left the lips unchanged, and that quickly looked unconvincing in the video.

Step 5: Use advanced settings under "Advance"
Via the "Advance" button you open further options. Here you decide whether the lips should actually be synchronized, whether the background is removed, and whether subtitles are displayed. There is also the option to enhance the voice. This is especially helpful if you didn't use a high-quality microphone during recording, because the function optimizes the sound so that it sounds more like a professional recording studio. Only tick the boxes you actually need here, because every additional function can increase the processing time and the consumption of your credits.
Step 6: Start the translation and follow the progress
When all settings are right, you click on "Translate". In my test, processing takes about 5 to 10 minutes. The progress is displayed in percent, for example with a display of 2 percent shortly after the start. During the calculation, you don't have to wait idly. You can pause the window and pick it up again later, and the result then appears in your project. Also keep an eye on how many credits the translation consumes, as this information is displayed directly.

Step 7: Check the finished video and enable subtitles
Once the translation is finished, open the video and check it carefully. First, pay attention to the lip sync, because it determines whether the video looks convincing. Then listen to the voice. It won't sound exactly like your own, but it should be natural enough. If you enabled subtitles, you'll find them below the video and can show or hide them using the corresponding switch. This way you can compare your result directly against the original and decide whether you want to publish it as is.

Summary – Translating HeyGen videos and bringing them into other languages with lip sync
With HeyGen, you can convert your German-language videos into another language while adapting the speaker's lip movements. The key point is the "Hyperrealistic Translation" mode, because only it ensures believable lip sync. Under "Advance," you can additionally enable subtitles, background removal, and an enhanced voice. Allow about 5 to 10 minutes for processing and make sure your source video is well lit and clearly shows the speaker's face. You can't edit the automatically generated transcript, so it's worth critically reviewing the result before publishing.
FAQ
Can I also translate videos without a visible speaker with HeyGen?Yes, in this case the audio change alone is sufficient without adjusting the lips, since no mouth movements are visible.
How long does a video translation with HeyGen take?In my test, processing took about 5 to 10 minutes. The progress is displayed as a percentage during the process.
Why is the standard translation not sufficient when the speaker is visible on screen?With audio-only translation, the lip movements remain unchanged, so the sound and picture don't match. That's why you should choose the "Hyperrealistic Translation" mode.
Can I correct the automatically generated transcript before the translation?No, the transcript can't be edited. Incorrectly recognized words are therefore carried over, which is why you should check the result carefully at the end.
What is the voice enhancement option for?It optimizes the sound of the recording and is helpful if you didn't use a high-quality microphone.

