If you want to combine several portrait photos, the precise alignment of the faces is crucial. In this guide, you will learn how to optimally align two different faces using guidelines and masks in Photoshop. You’ll discover the steps needed to minimize color and shape differences and achieve a harmonious blending of the portraits.
Key Insights
- Using guidelines for exact face alignment.
- The importance of proportional scaling when transforming images.
- Adjusting the mask to ensure the best fit between the faces.
Step-by-Step Guide
Step 1: Selecting the Reference Image
Start by deciding which face will serve as the reference. In this case, the image of Daniel was chosen, as the shoulders must be considered in the composition. Select an image that you like best and want to work with.
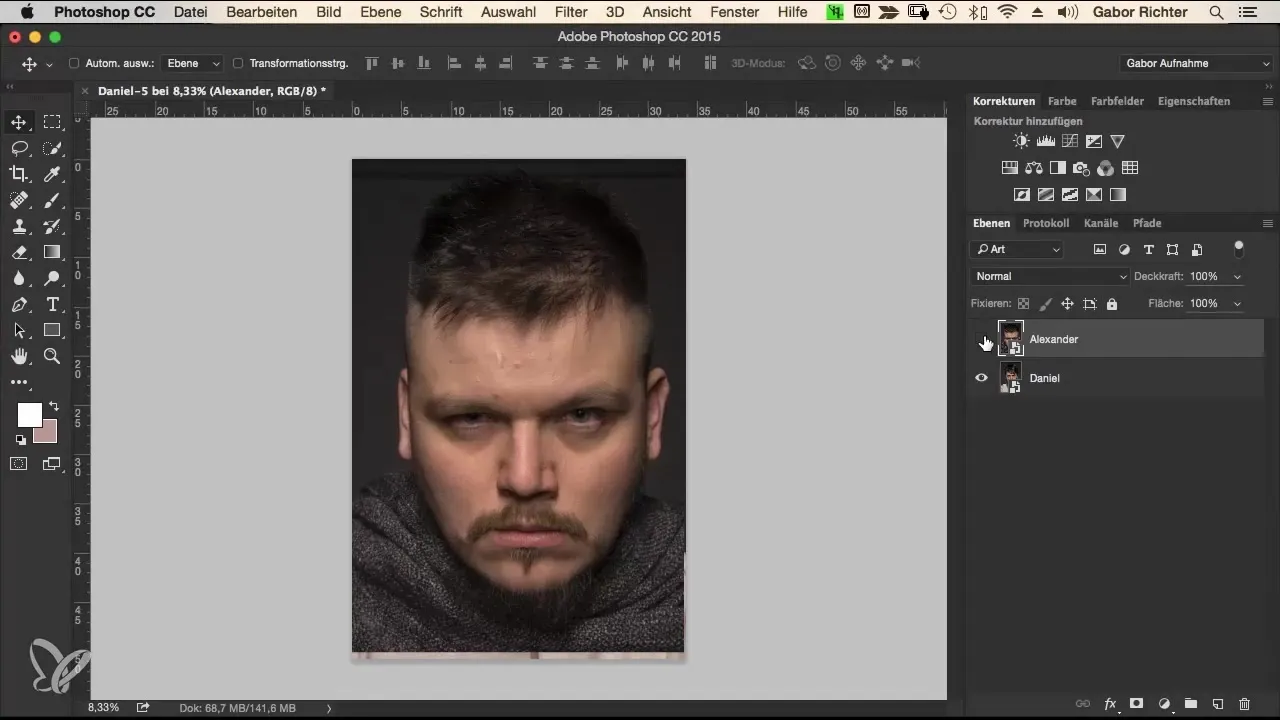
Step 2: Insert Guidelines
To align the faces precisely, draw guidelines in your workspace. If the ruler is not activated, you can do this by pressing Command + R (Mac) or Ctrl + R (Windows). Once the ruler is visible, you can create guidelines by clicking and dragging.
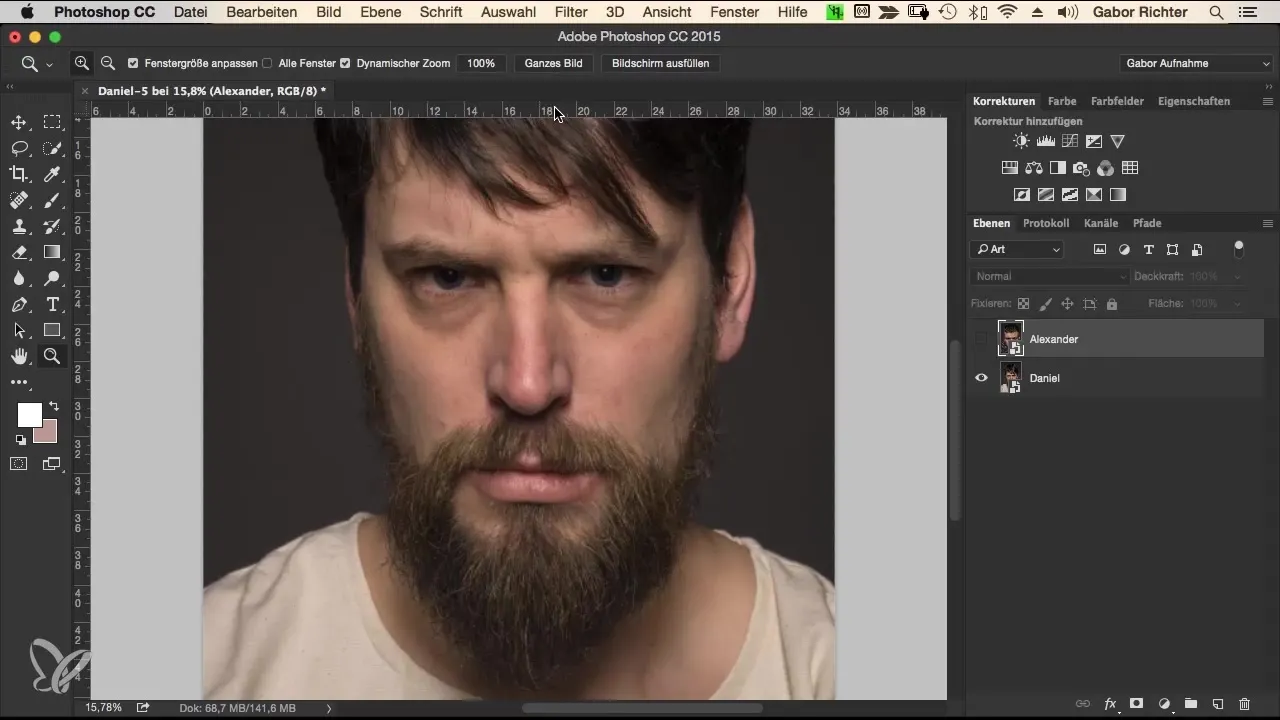
Step 3: Setting the First Guidelines
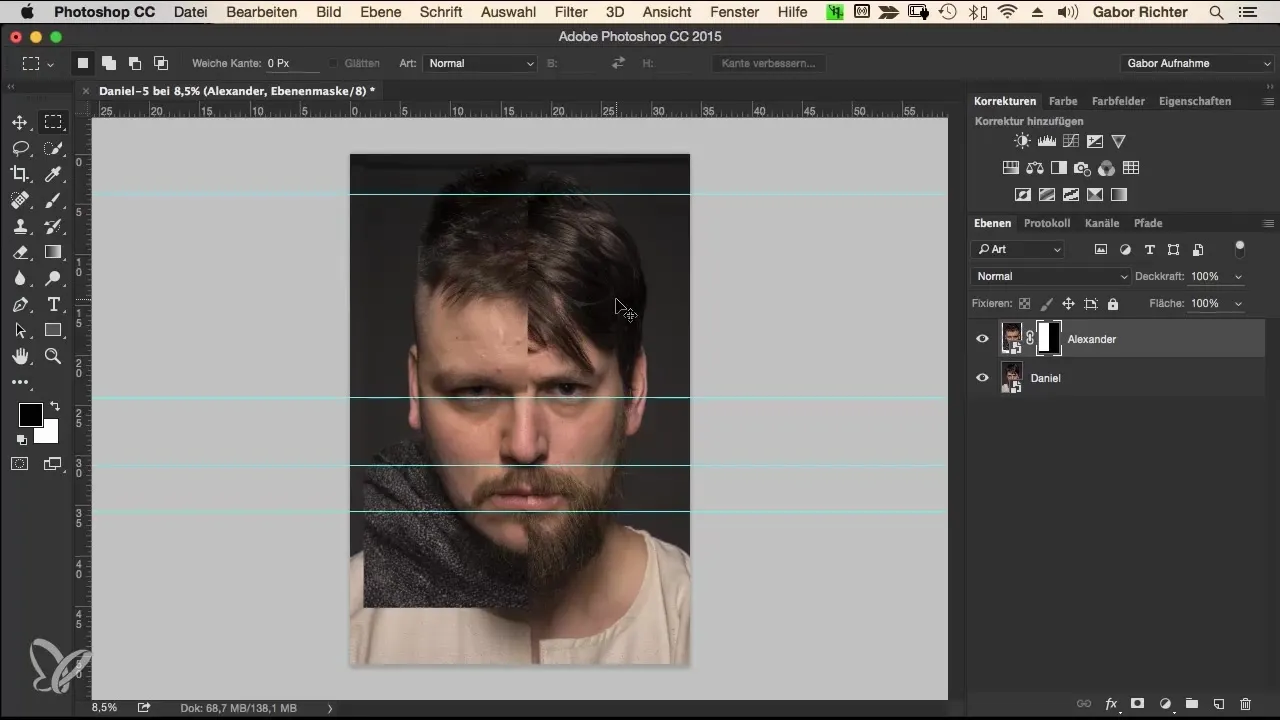
Place your first guideline at the tip of Daniel's nose. This line serves as a scale for the height of Alexander's image. Next, place another guideline below the lips and then a third at the eyes. These steps will help you adjust the faces in relation to the individual features.
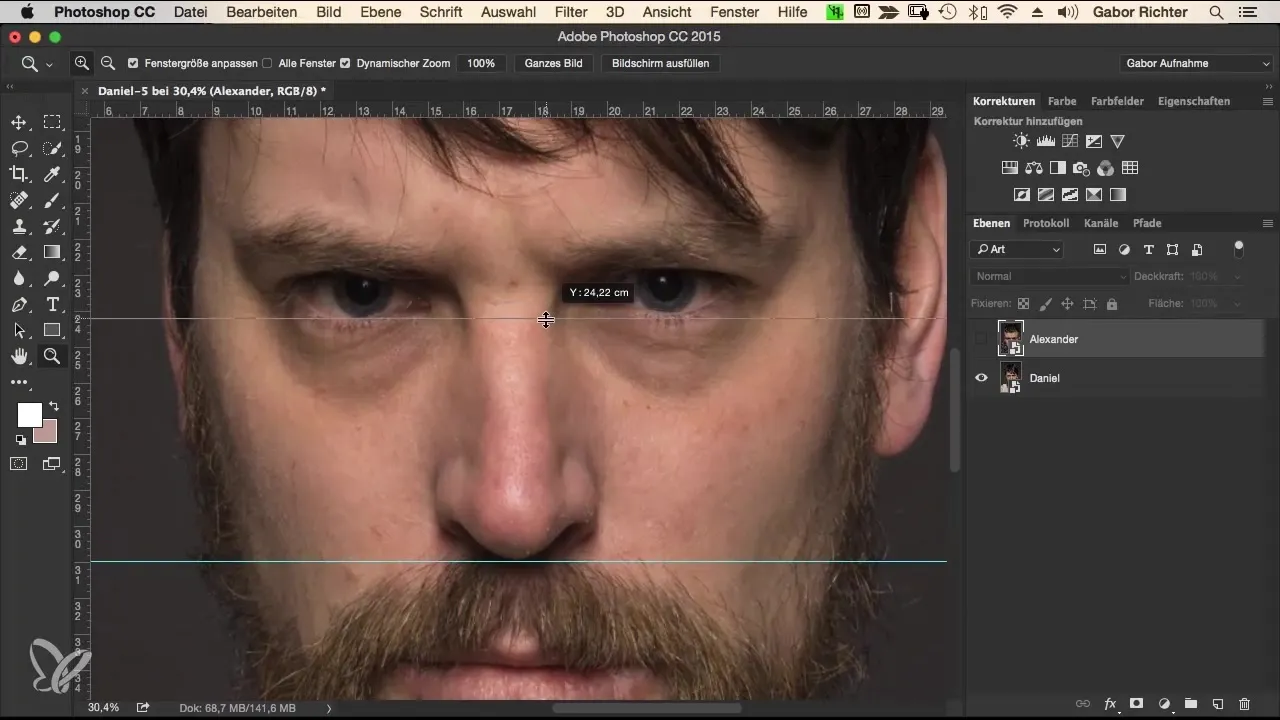
Step 4: Adjusting the Top of the Head
In the next step, draw a guideline at the top of the head. You can use the end of the hairline as a reference point. It is not necessary for everything to be perfectly symmetrical, as many people display natural asymmetries.
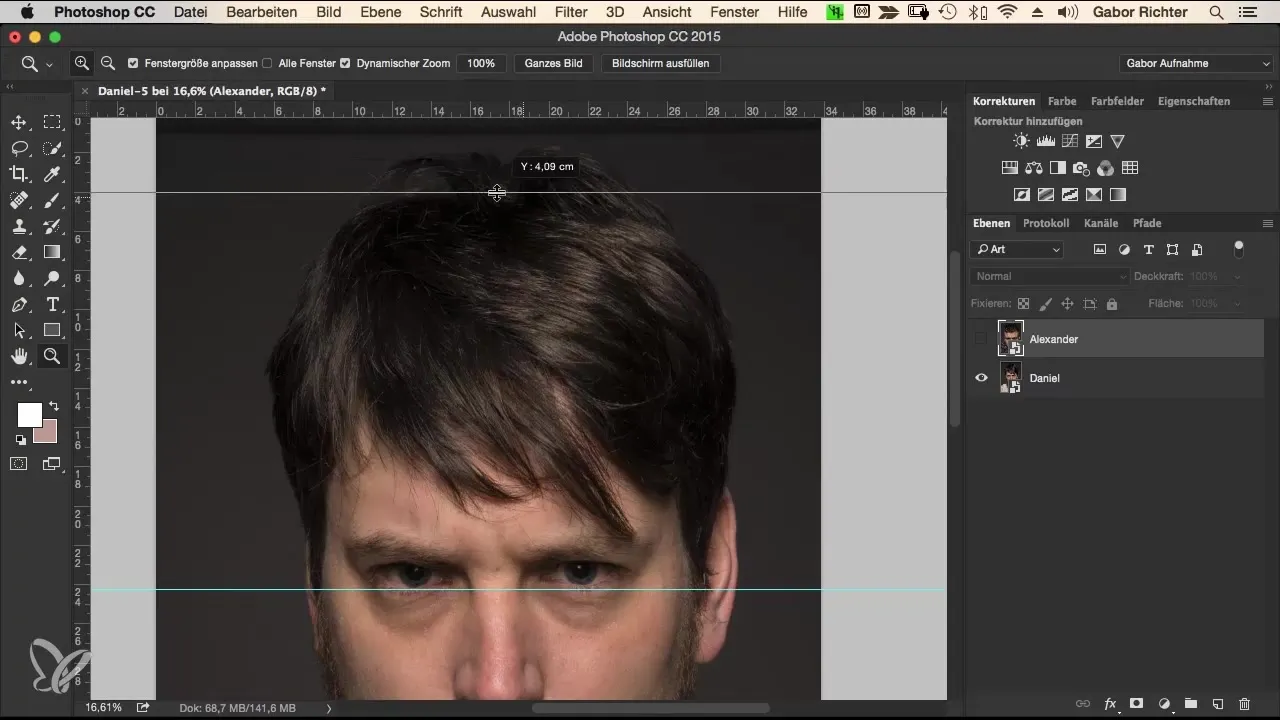
Step 5: Activating Alexander's Image
Now it’s time to activate Alexander's image. Use the transformation (Command + T or Ctrl + T for Windows) to adjust its size. Make sure to hold down the Alt and Shift keys to ensure proportional scaling.
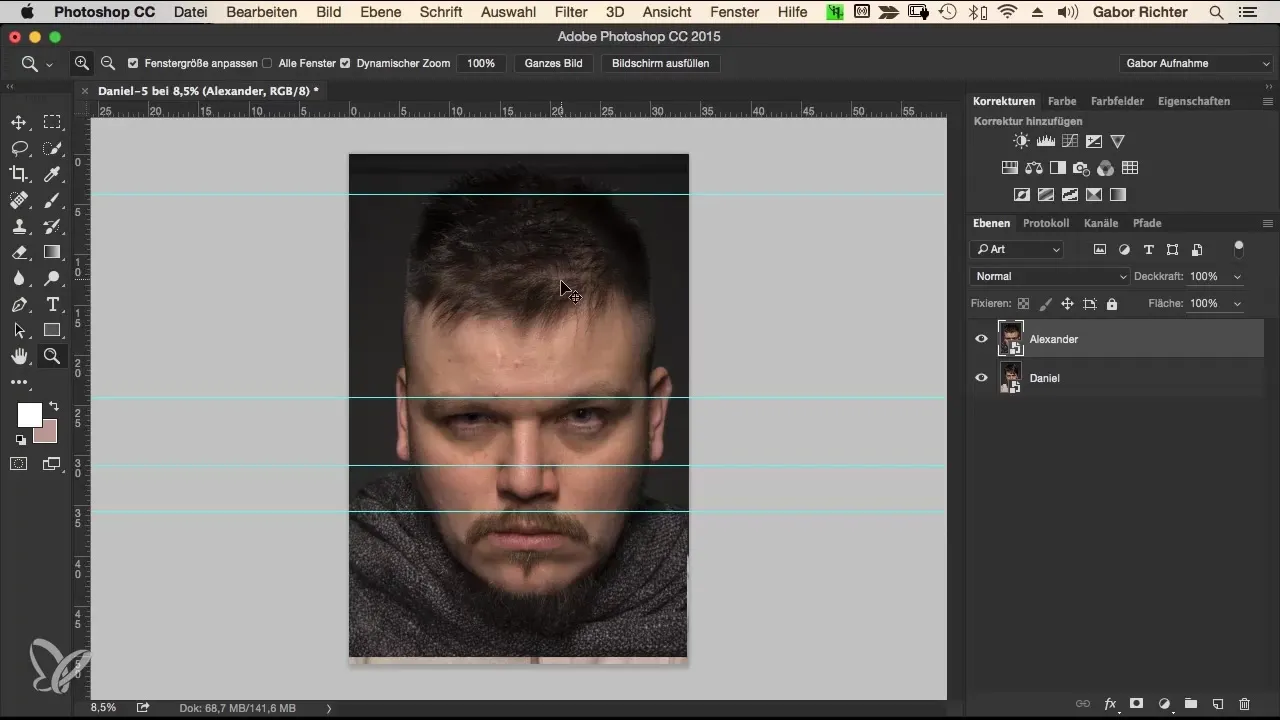
Step 6: Proportional Scaling
Reduce the size of Alexander's image so that it approximately matches Daniel's size. Ensure that the eyes, lips, and the tip of the nose of both faces align as closely as possible. Move the image until the faces match harmoniously.
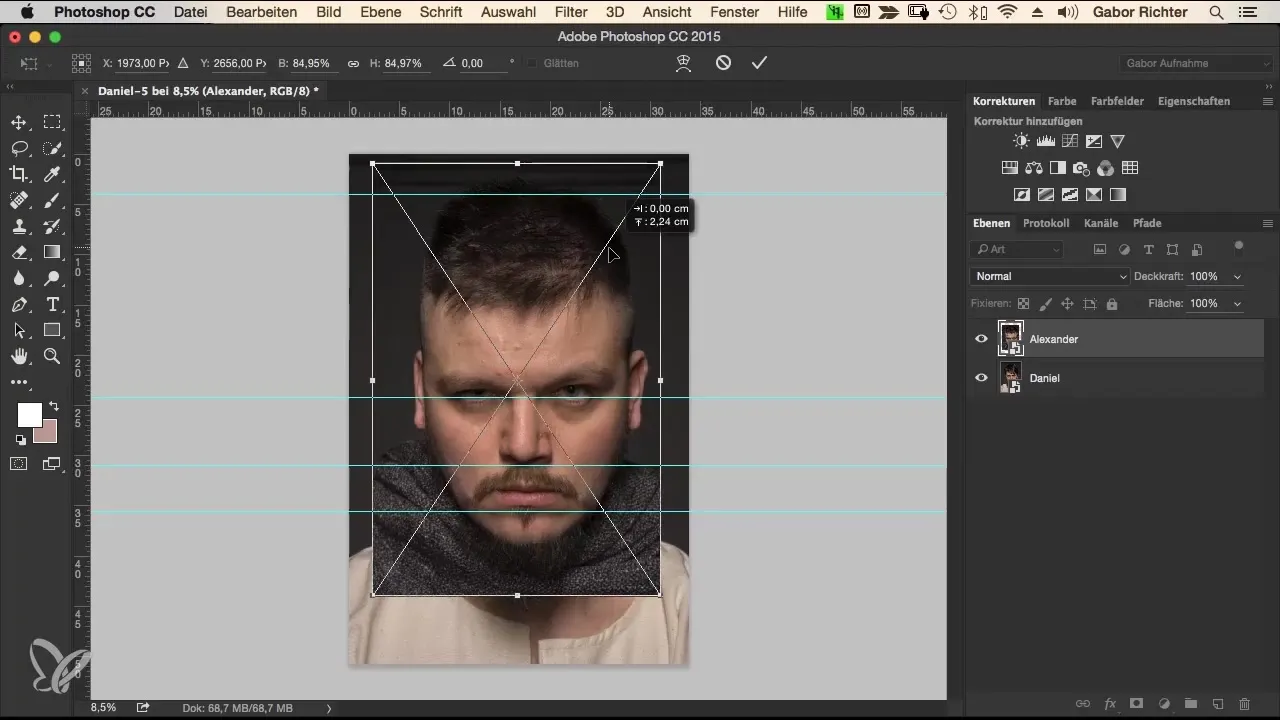
Step 7: Aligning Features
Look at the position of the eyes, lips, and the tip of the nose. Compare them critically and ensure they are well aligned. It’s okay if everything does not match perfectly, as small irregularities are normal.
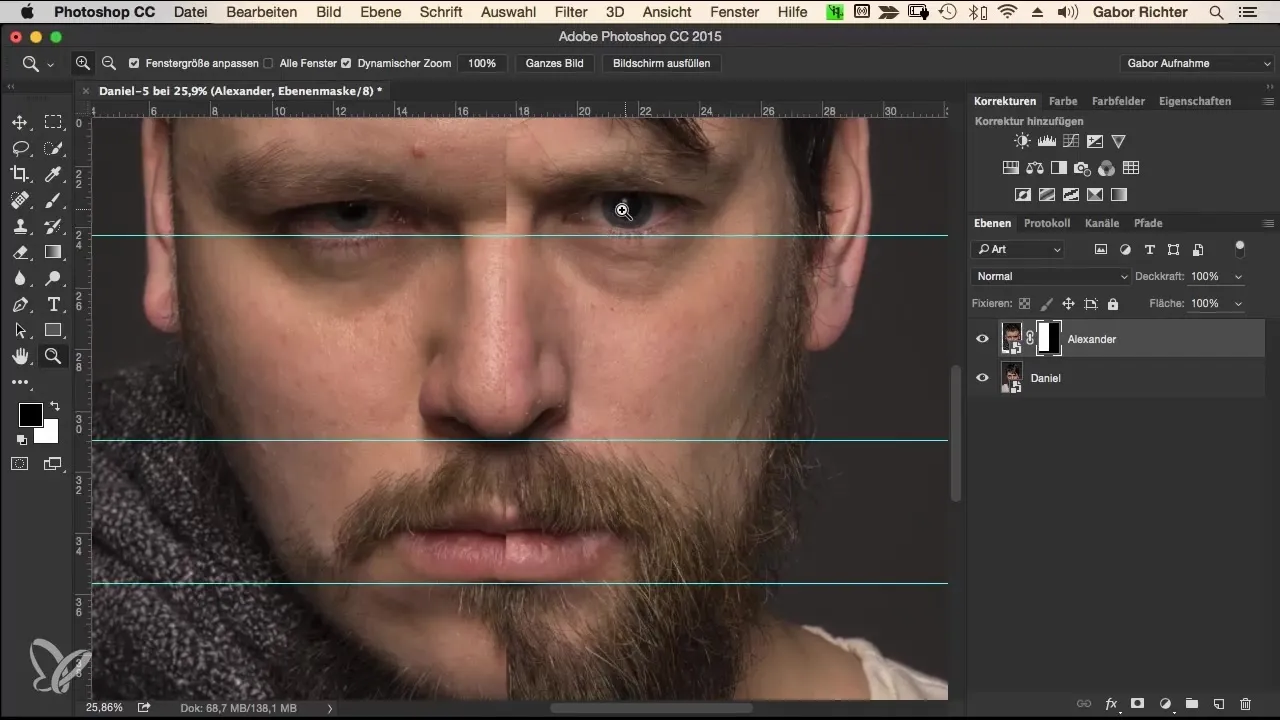
Step 8: Using Masks
To achieve the best results, draw a selection around the center of Alexander's face and create a mask. This will allow you to control and adjust the transition between the two images.
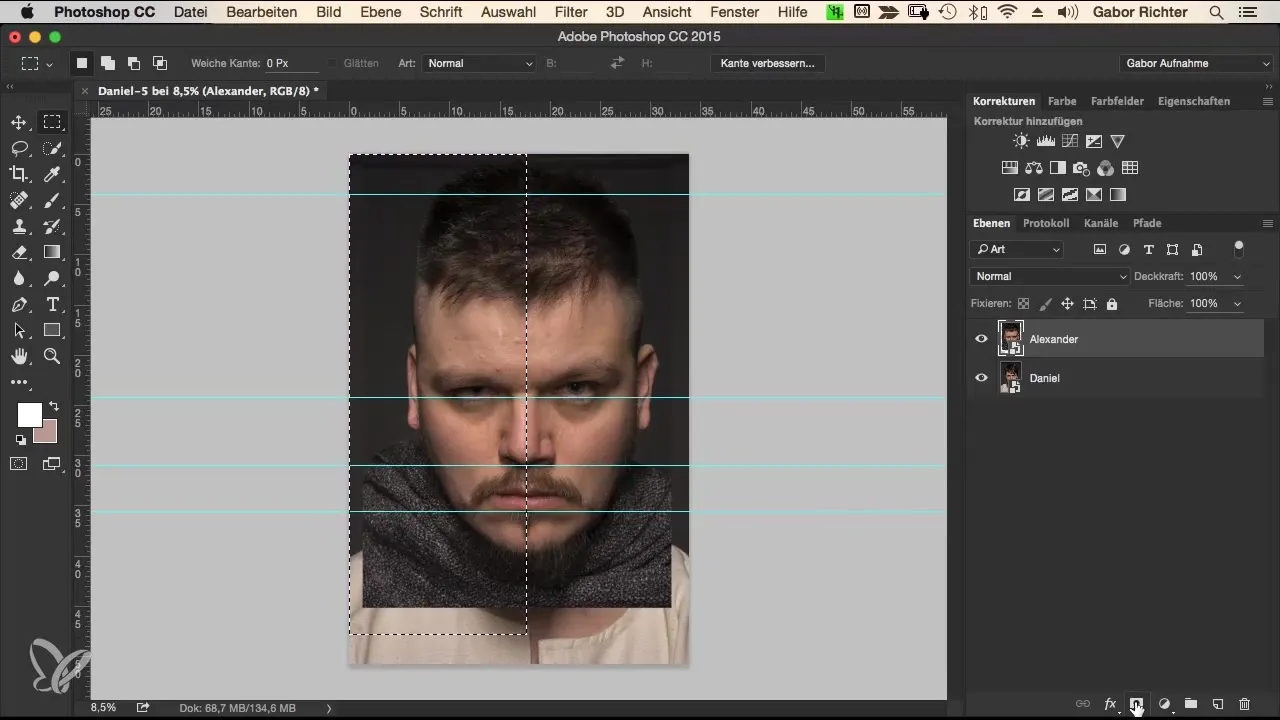
Step 9: Adjusting the Mask
If the guidelines bother you, you can hide them using Command + Comma (Mac) or Ctrl + Comma (Windows). Now you can adjust the mask again to ensure that the faces harmonize well.
Step 10: Fine Tuning
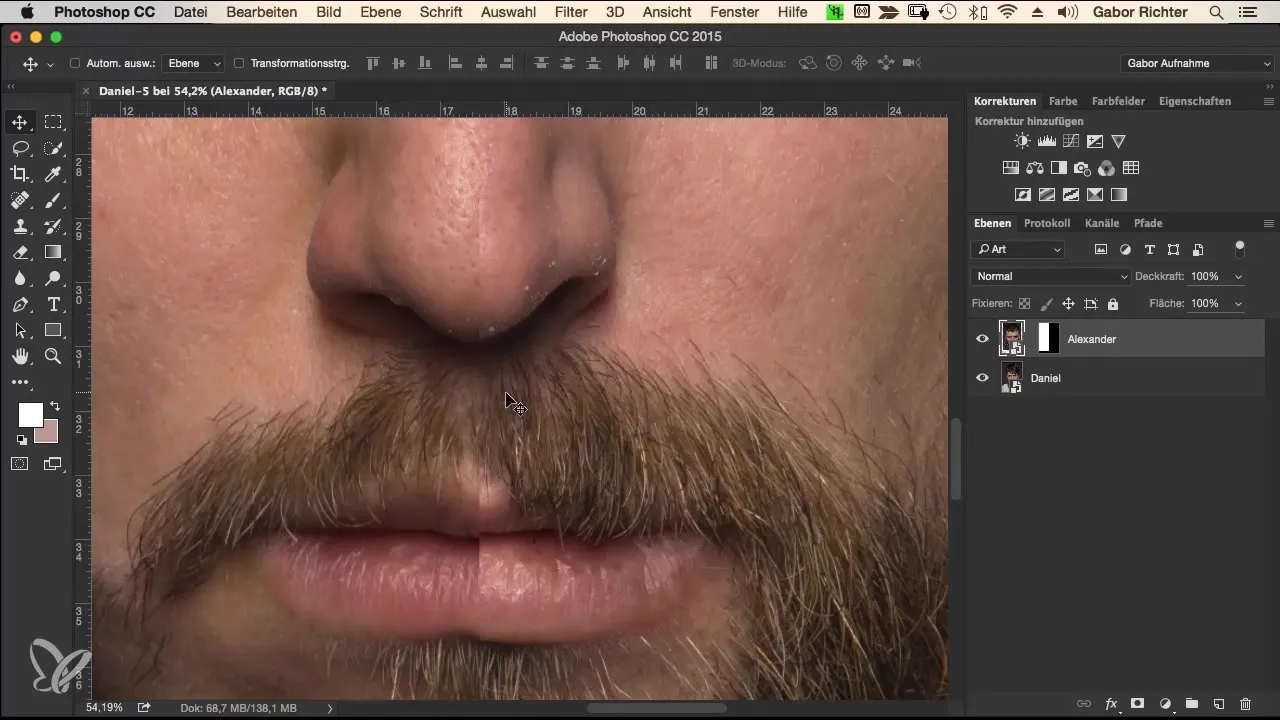
Now you can make minor adjustments. Check the placement of the faces and move them if necessary. Ensure that the lips, eyes, and chin match well.
Step 11: Final Review
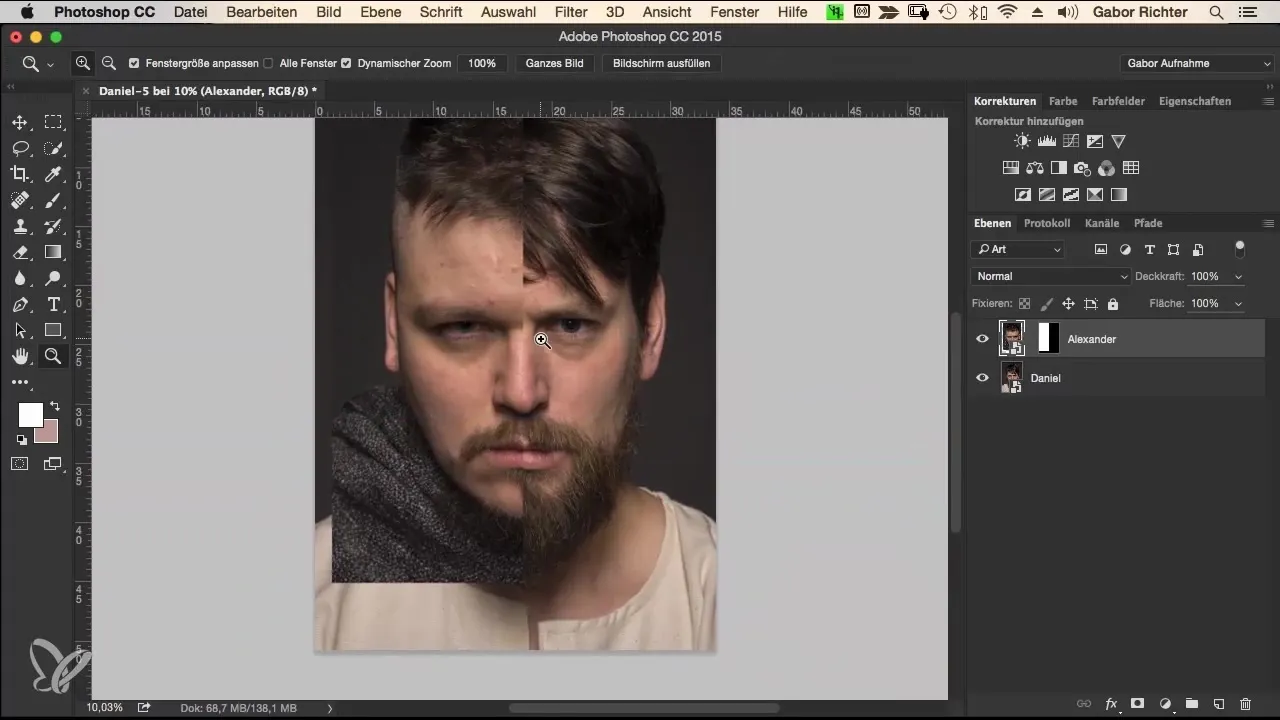
In the final phase, you should review the entire image again and ensure that the adjustments are cohesive. Pay particular attention to the details of the faces and hairlines to achieve a harmonious final result.
Summary – Portrait Morphing in Photoshop: Efficiently Aligning Faces
By carefully aligning your portraits using guidelines, masks, and proportional scaling, you can seamlessly adjust the faces of Daniel and Alexander in Photoshop. Attention to detail and the ability to accept small irregularities are crucial in this process.
Frequently Asked Questions
What are guidelines in Photoshop and how do I use them?Guidelines are lines that help you align objects precisely. You can create them by clicking and dragging from the ruler.
How do I scale an image proportionally?Hold down the Alt and Shift keys while dragging the image to ensure proportional scaling.
What do I do if the guidelines are distracting?You can hide the guidelines with the keyboard shortcut Command + Comma (Mac) or Ctrl + Comma (Windows).
How can I finalize the alignment of the faces?Check the position of the eyes, lips, and chin and adjust the mask until the faces match well.
How do I make a mask selection in Photoshop?You can draw a selection and then select the "Add Mask" option in the "Layers" menu.


