The final editing of a portrait in Photoshop can be both exciting and challenging. The right finishing touches are crucial to achieving the desired result. In this guide, you will learn how to make your image shine using just a single filter and a single layer. Step by step, I will explain the process of adjusting light, clarity, and colors to achieve the perfect look for your portrait.
Key Insights
- The final editing occurs on a single layer.
- The use of the Camera RAW filter allows precise adjustments.
- Sharpness values can significantly affect the appearance of the portrait.
Step-by-Step Guide
Start your workflow by merging the entire image to bring all necessary layers into a single layer. Use the keyboard shortcut Command + Alt + Shift + E for Mac or Control + Alt + Shift + E for Windows. Make sure you are on the topmost layer before performing the merge. A new image named “Camera RAW” should be created.
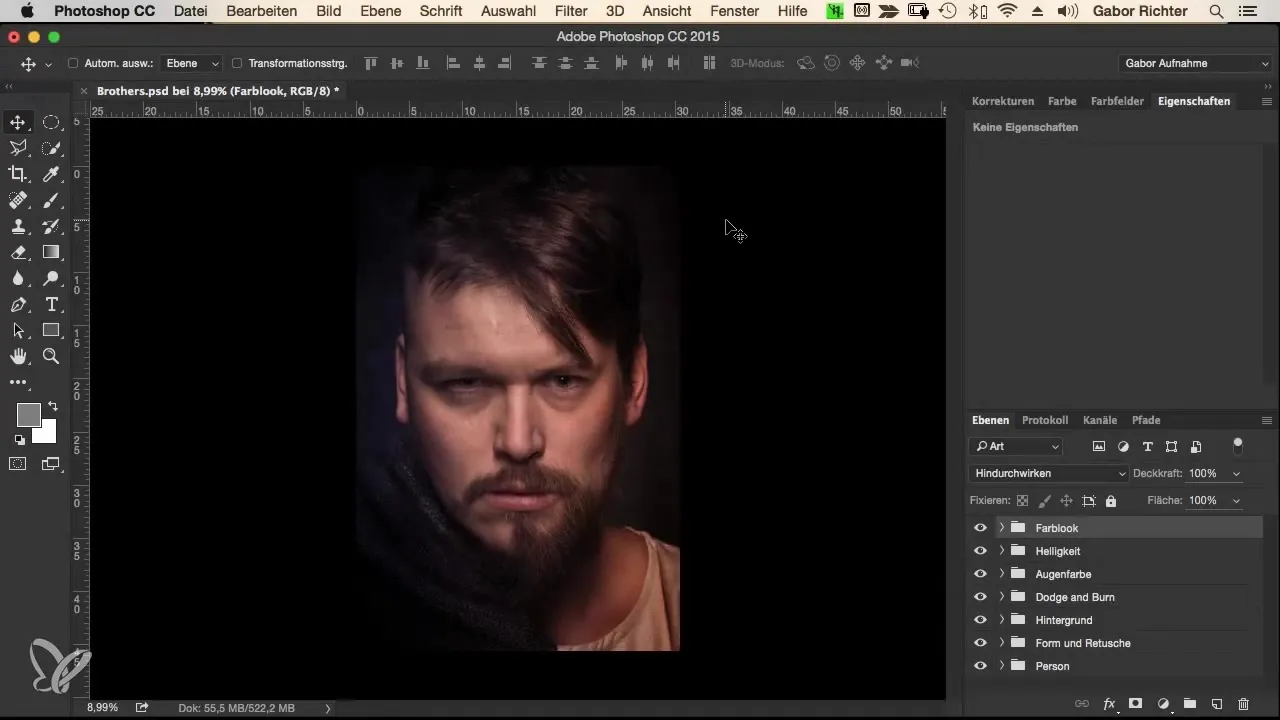
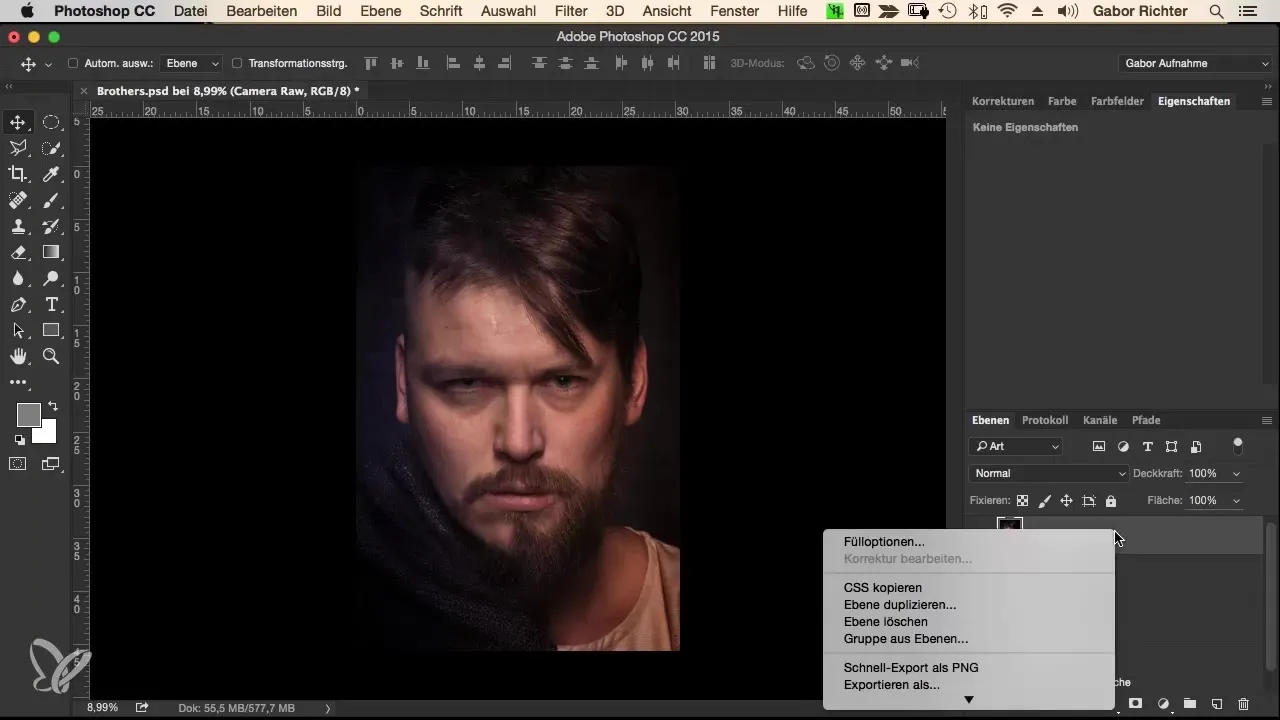
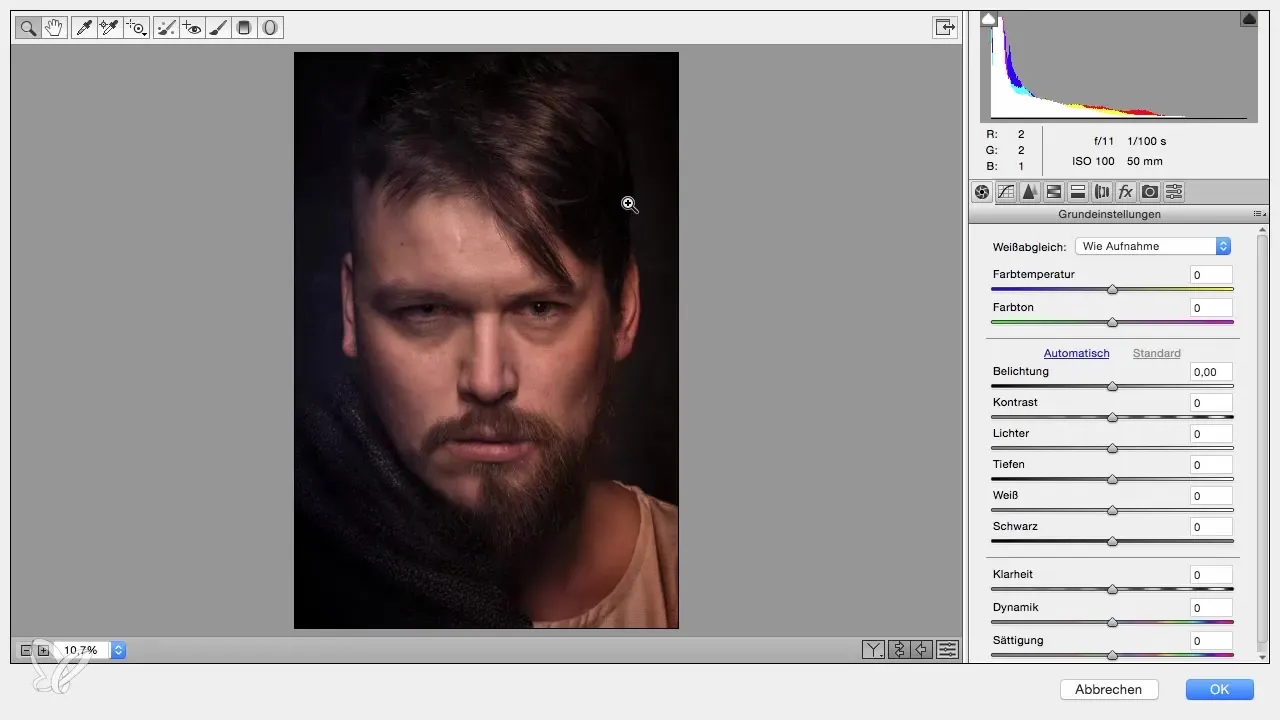
Now convert this image into a smart object. This is important because you do not want to apply different filters destructively. Go to the menu and choose the option “Convert to Smart Object.” Then we will apply the “Camera RAW” filter, which you usually know from RAW data.
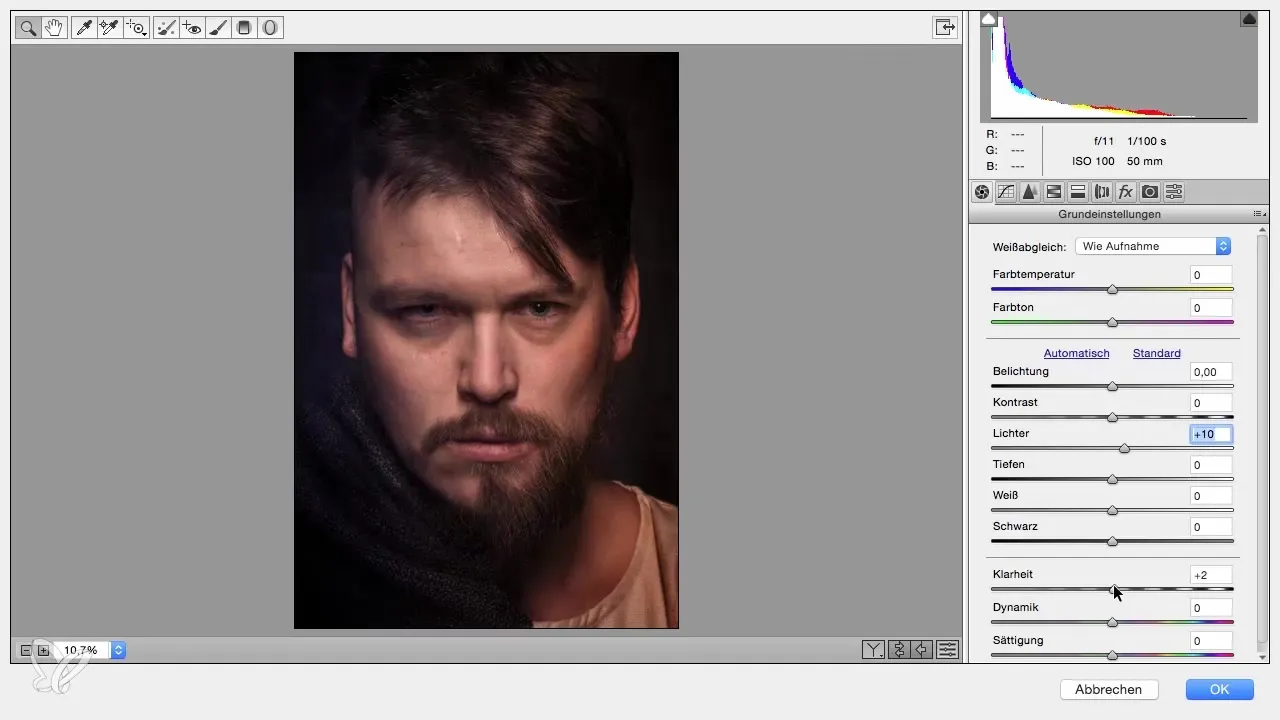
Once the filter has been applied, you can make the first adjustment. We start with the lights. Look at the sliders in the Camera RAW window and slightly move the lights slider to the right to increase the highlights. A value of +10 should be sufficient here to achieve a subtle enhancement.
Next, we focus on clarity. This slider enhances the contours in the image. Slide the clarity slider to the right and observe how the image changes. You should feel that the contours are being sharpened. A value of about +30 should be optimal here to give the image more depth.
Another important adjustment concerns the colors. To increase color intensity, slide the vibrance slider to the right to about +20. To achieve a balanced color image, you could also reduce the saturation – but consider whether this is necessary. For this step, simply leave the saturation unchanged.
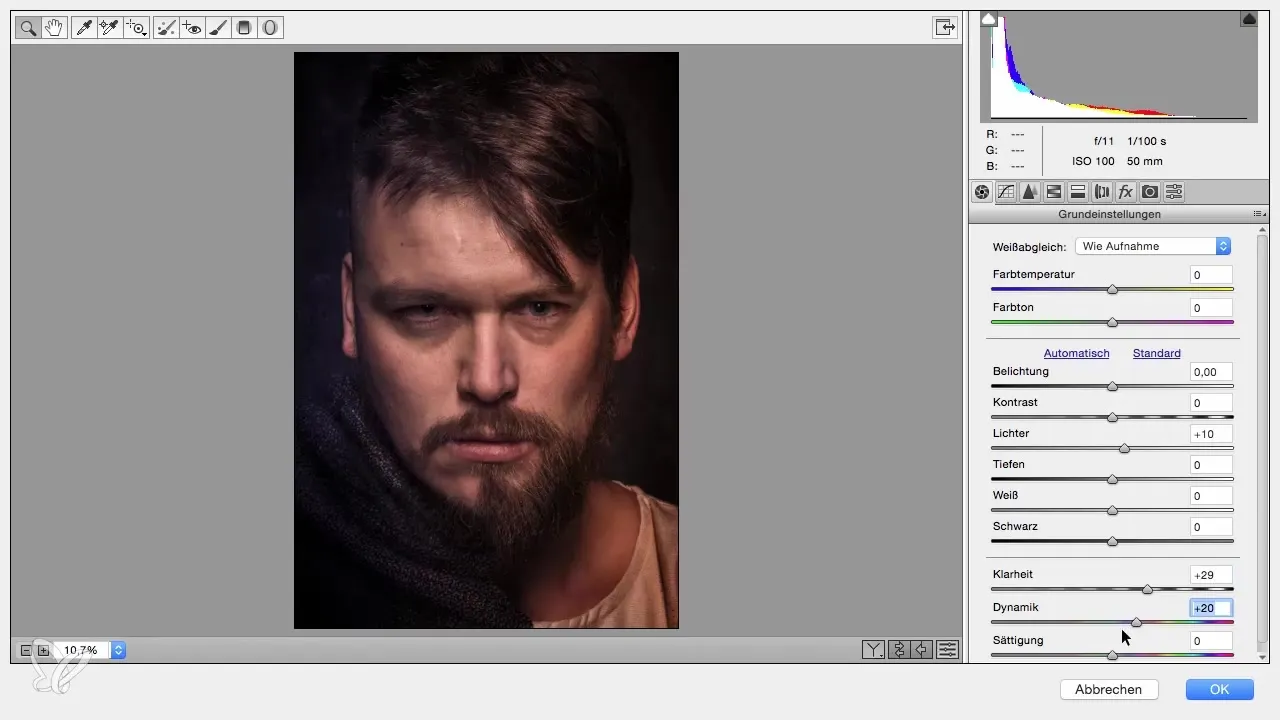
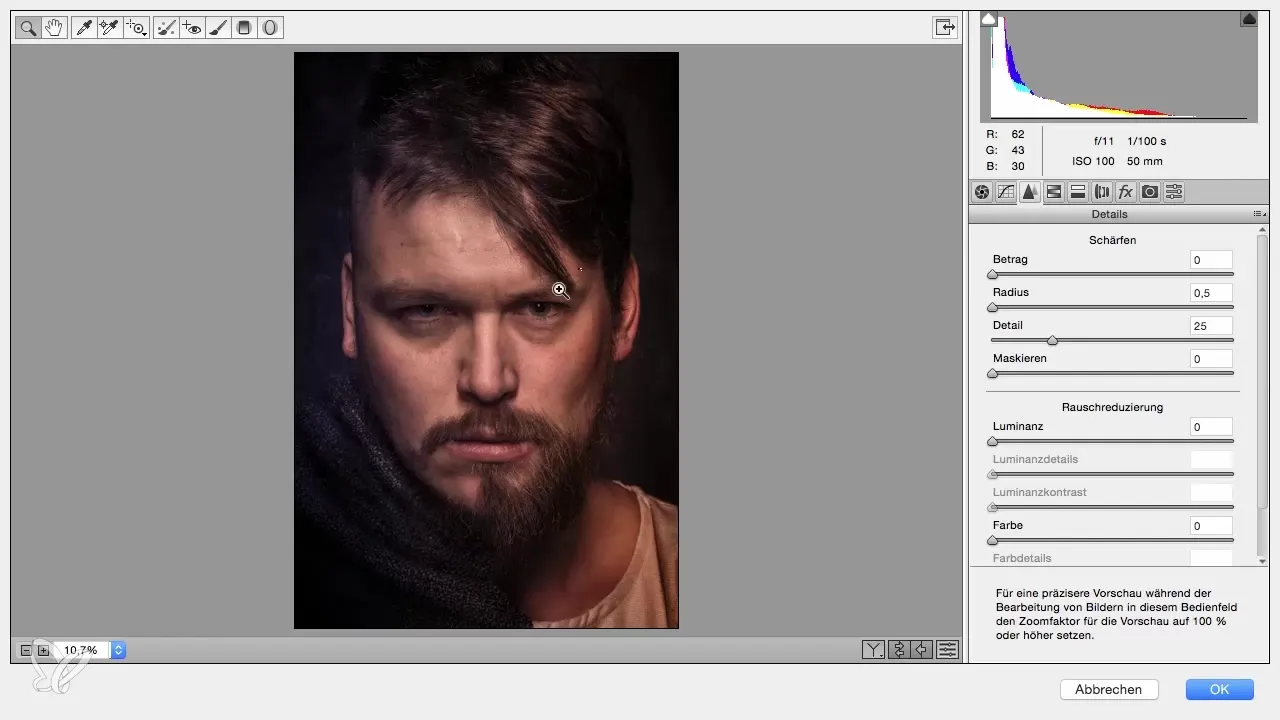
Now go to the third tab in the Camera RAW filter and set the sharpness radius to 0.5. This allows you to better assess the sharpness of your portrait. Then slide the amount to about 70 or 80 to ensure a crisp sharpness in the end.
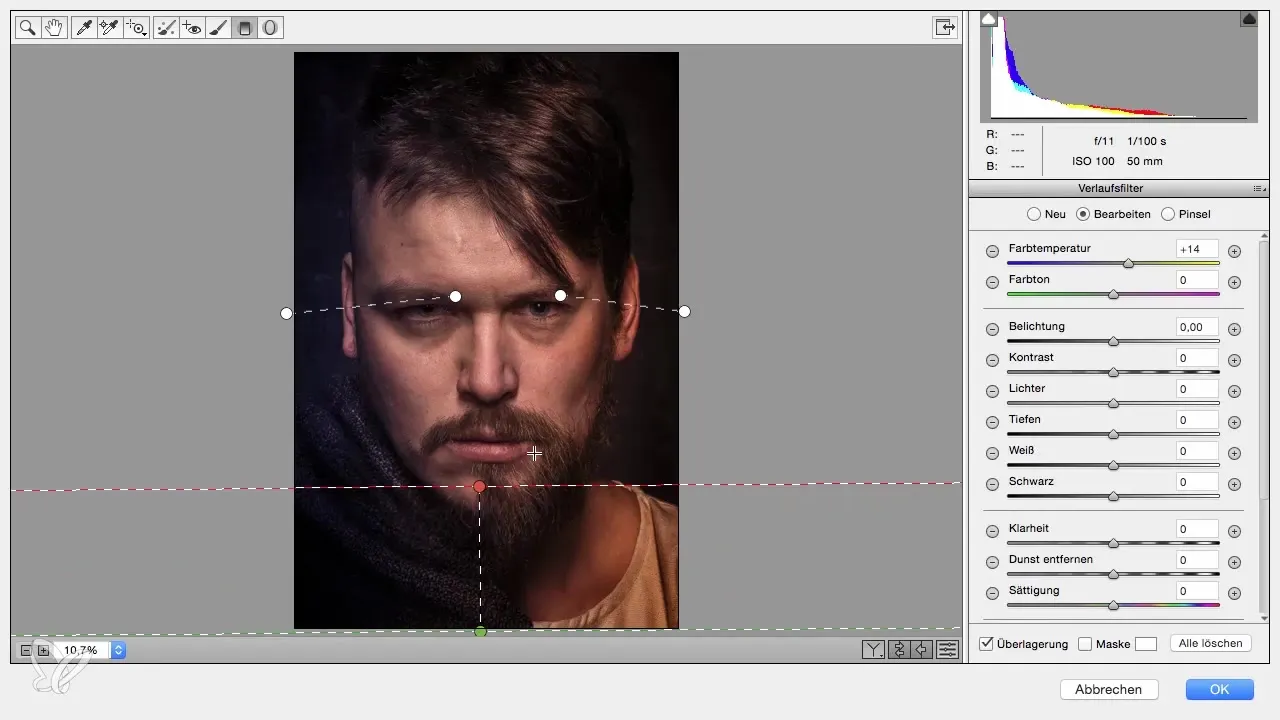
Now you want to adjust the color temperature in your image to make the different color tones harmonize. Use the gradient filter to draw a gradient over the desired area. Ensure that the color temperature remains cool at about -20 for the left area and warm at about +15 for the right area.
When reviewing the image, note that the lower area might be a bit too dark. Consider whether an adjustment of the exposure makes sense. However, correct the exposure only slightly to achieve a harmonious result.
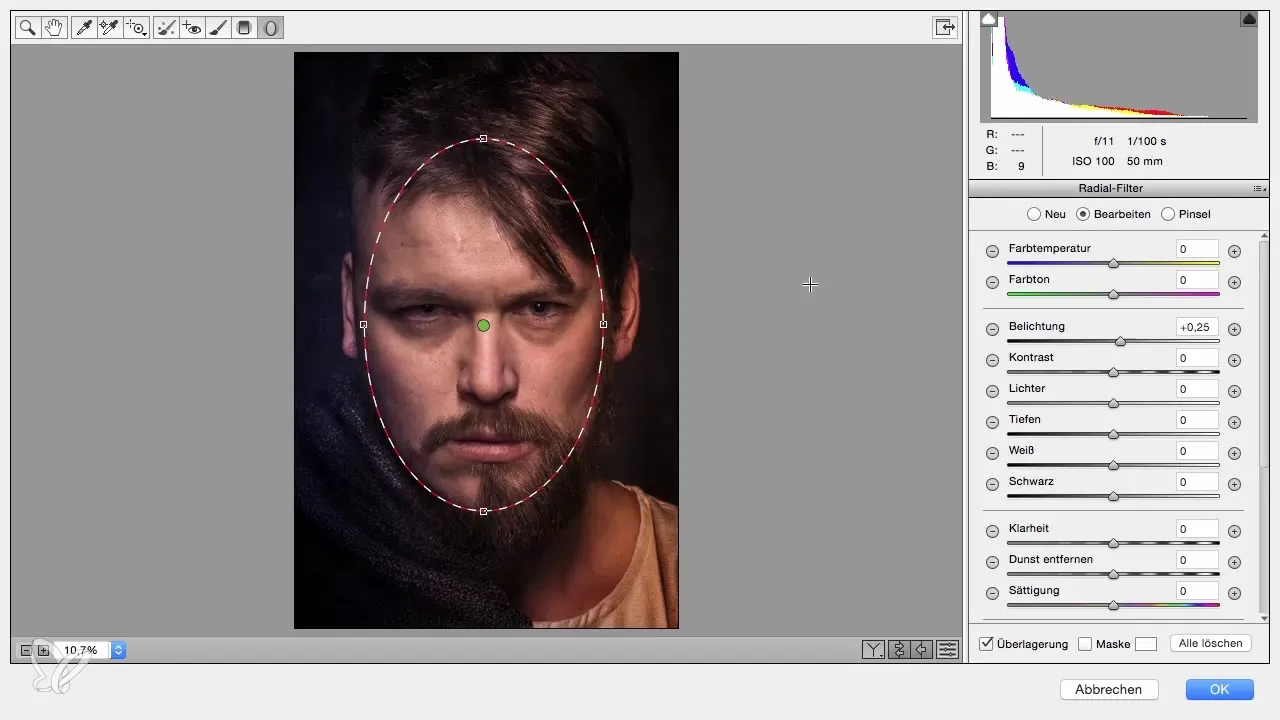
Now you can focus on another adjustment in the face. Use the radial filter to highlight the face without drastically changing the exposure. Here, you should push the clarity slider up a bit to emphasize the facial features.
In the final phase, make a before-and-after comparison to ensure you are satisfied with the result. The best thing about this workflow is that you can make adjustments at any time. If you are not satisfied with the color depth or contrast, you can adjust these values later before finalizing the project.
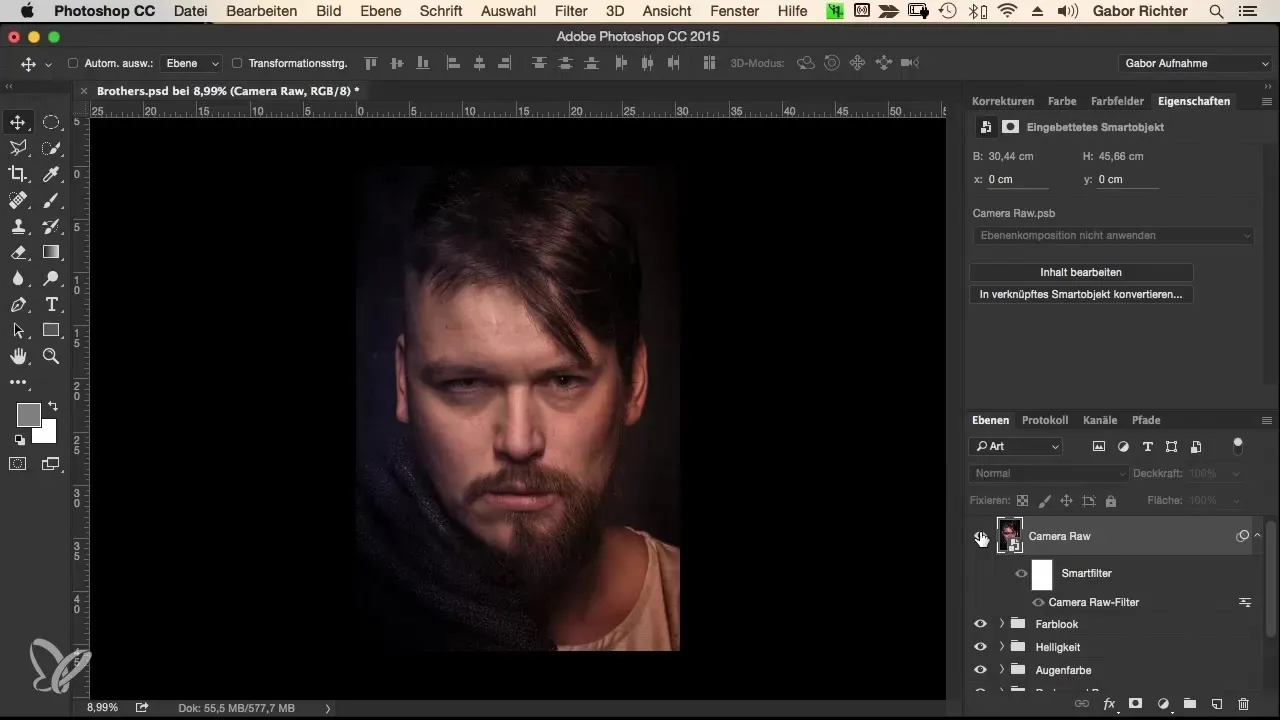
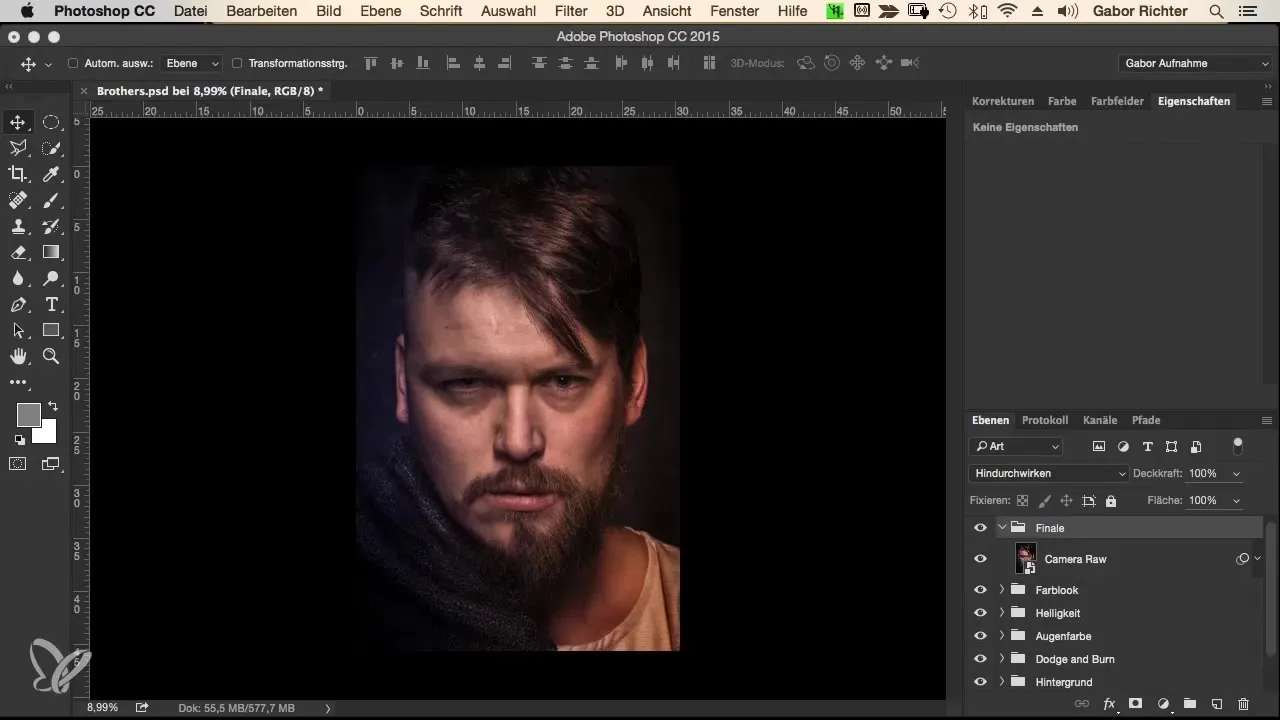
After you have made all the desired adjustments, you can pack this layer into a folder and save the final version of your portrait. Review it again to ensure it meets your expectations.
Summary – Fusion – The Morphing Workflow in Photoshop – 14 Finals
This guide provides you with a detailed insight into how to edit a portrait effectively on a single layer in Photoshop. You will learn how to use the “Camera RAW” filter to highlight the unique characteristics of your image while making valuable adjustments to light, clarity, and color temperature.
Frequently Asked Questions
How do I convert an image into a smart object?Right-click on the layer and select “Convert to Smart Object.”
What should I do if the colors do not look harmonious?Experiment with the vibrance and saturation sliders to adjust the colors.
Can I change the adjustments made later?Yes, since you are using a smart object in the workflow, the adjustments are non-destructive.
Are there specific recommendations for using the clarity slider?A value between +30 and +40 usually provides an appealing image depth.
How can I best adjust the sharpness for portraits?Set the sharpness radius to 0.5 and the amount to about 70 to 80.


