The effective use of Tags in a Flow is crucial for managing your customer communication. Tags help you categorize customers and track their interactions, significantly improving your marketing strategies. In this tutorial, you will learn how to add Tags through Actions to automate the distribution of relevant information and to address customers specifically.
Key insights
- Tags enable precise categorization of contacts.
- The integration of Tags into your Flows increases the effectiveness of your customer communication.
- The use of Actions makes the automation of Tag assignments easier.
Step-by-step guide
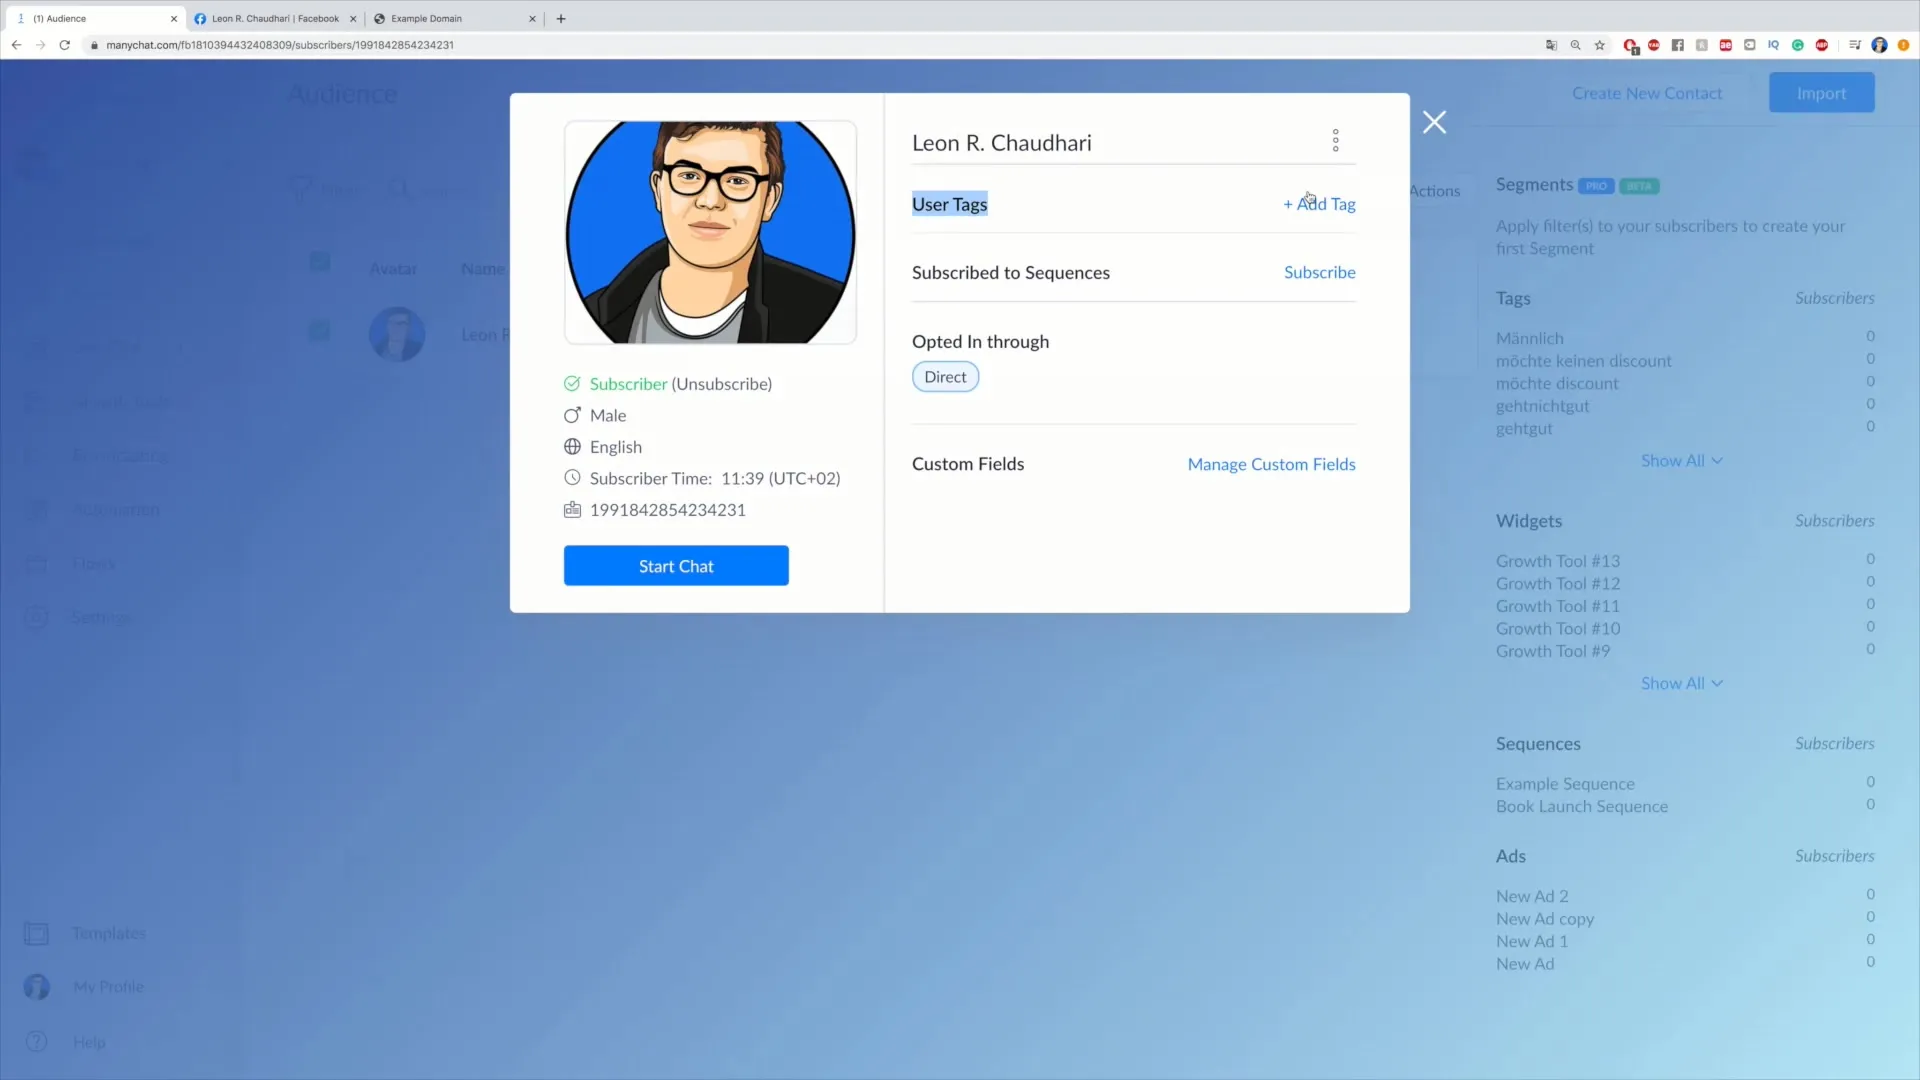
First, you should log in to your system with the Audience to view your subscribers' contact information. For example, you can manually add the tag 'male' for a specific contact if you know their gender.
To add automated Tags, navigate to your Flow. First, go to the point in your Flow where you want to set the Tag after clicking on “Edit Flow”. Here you have the opportunity to add Actions at various points in the Flow.
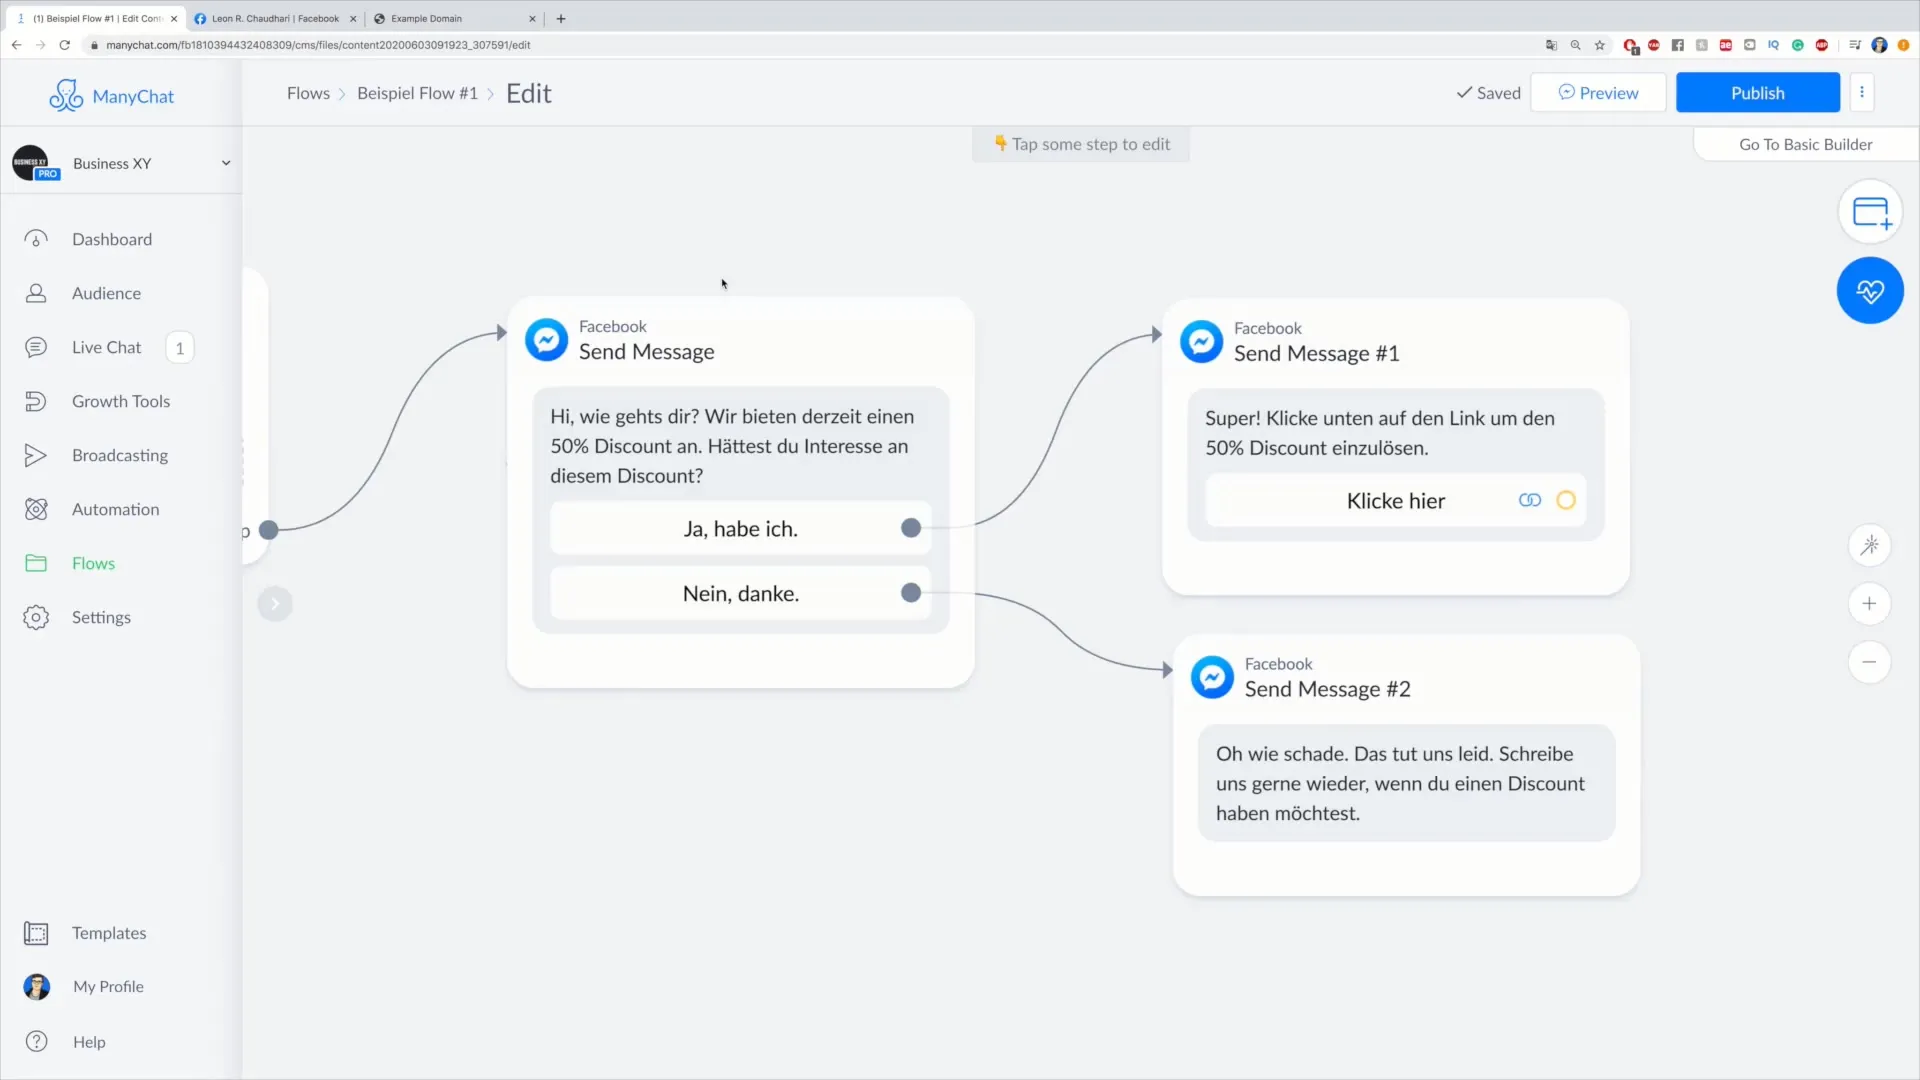
If you want to change text messages or buttons, you can do so at the displayed Flow option. Think about what information you want to convey to your customers. For example, if they requested a discount, you might send them a message afterwards asking them to rate the products.
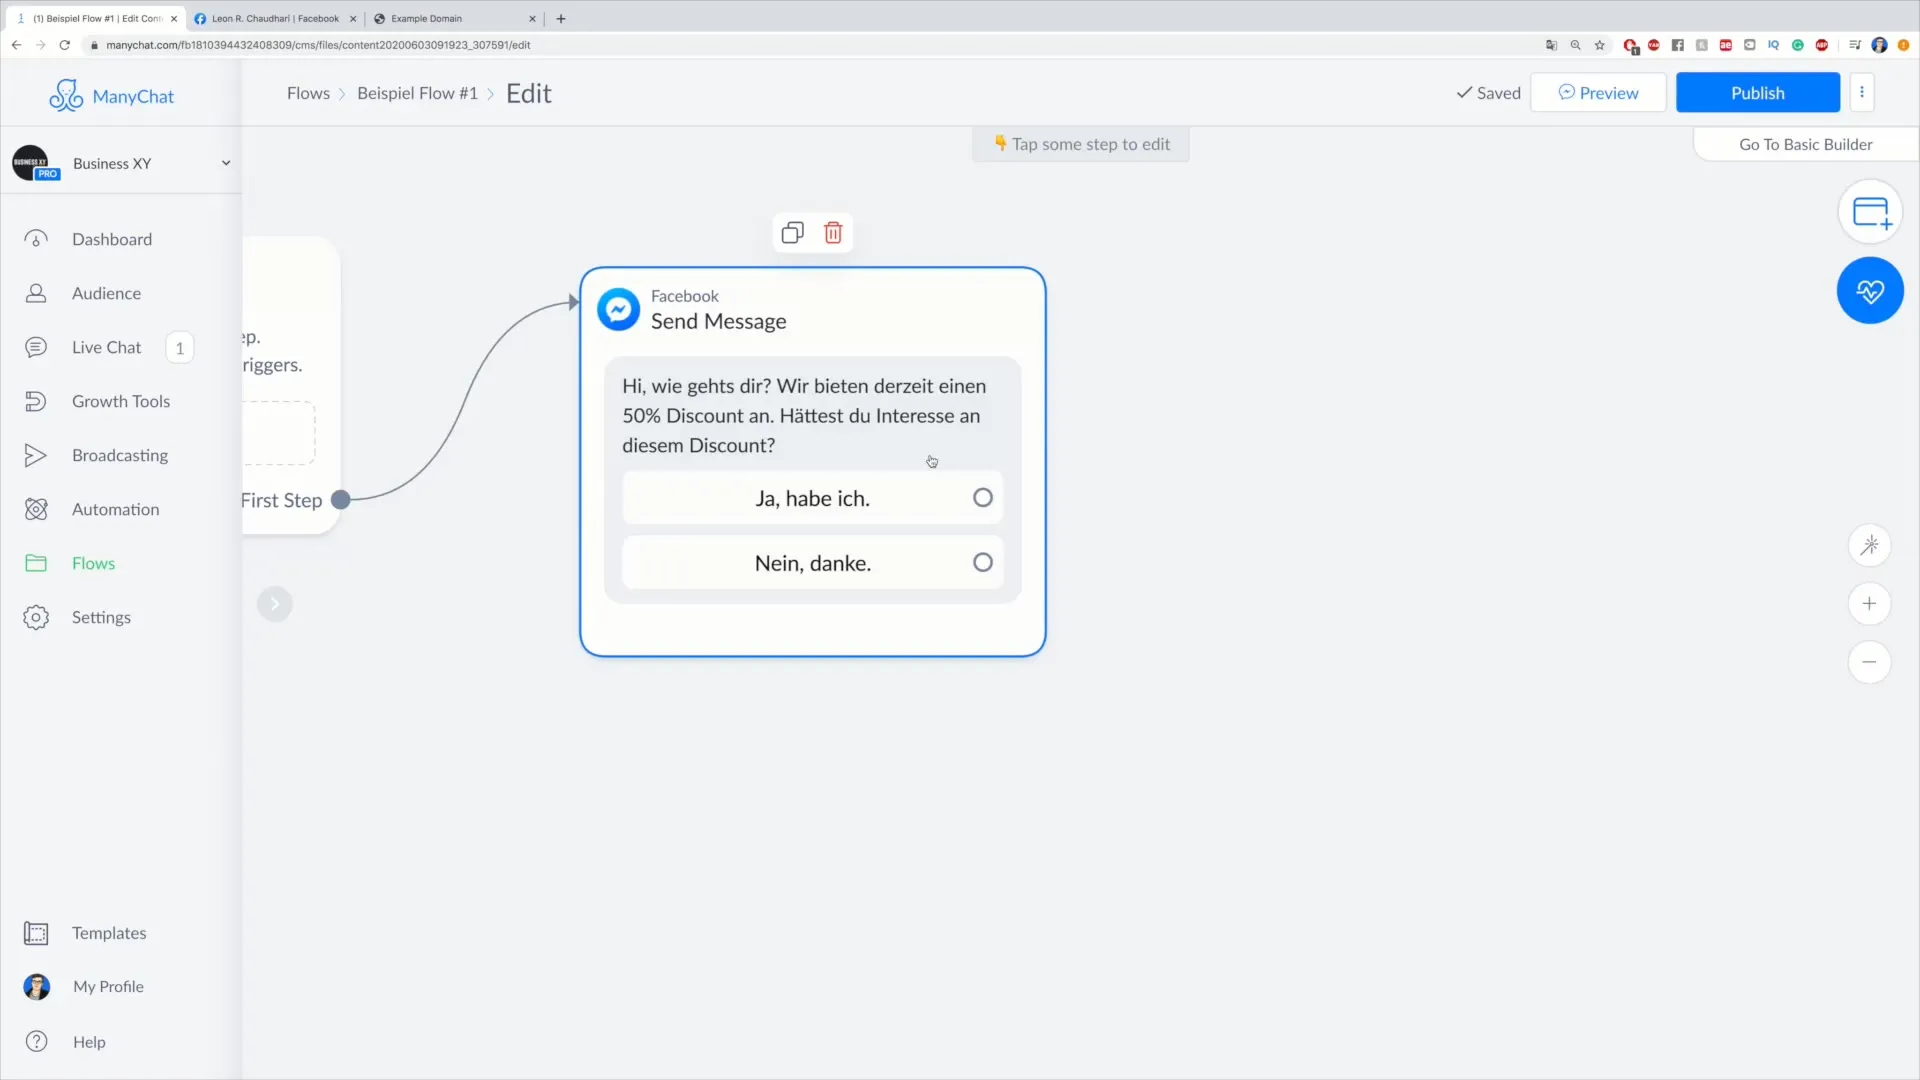
To add a Tag, you need to select the small circle in your Flow and then click on "Actions." There you can add a new action, in this case a Tag, to mark a specific status.
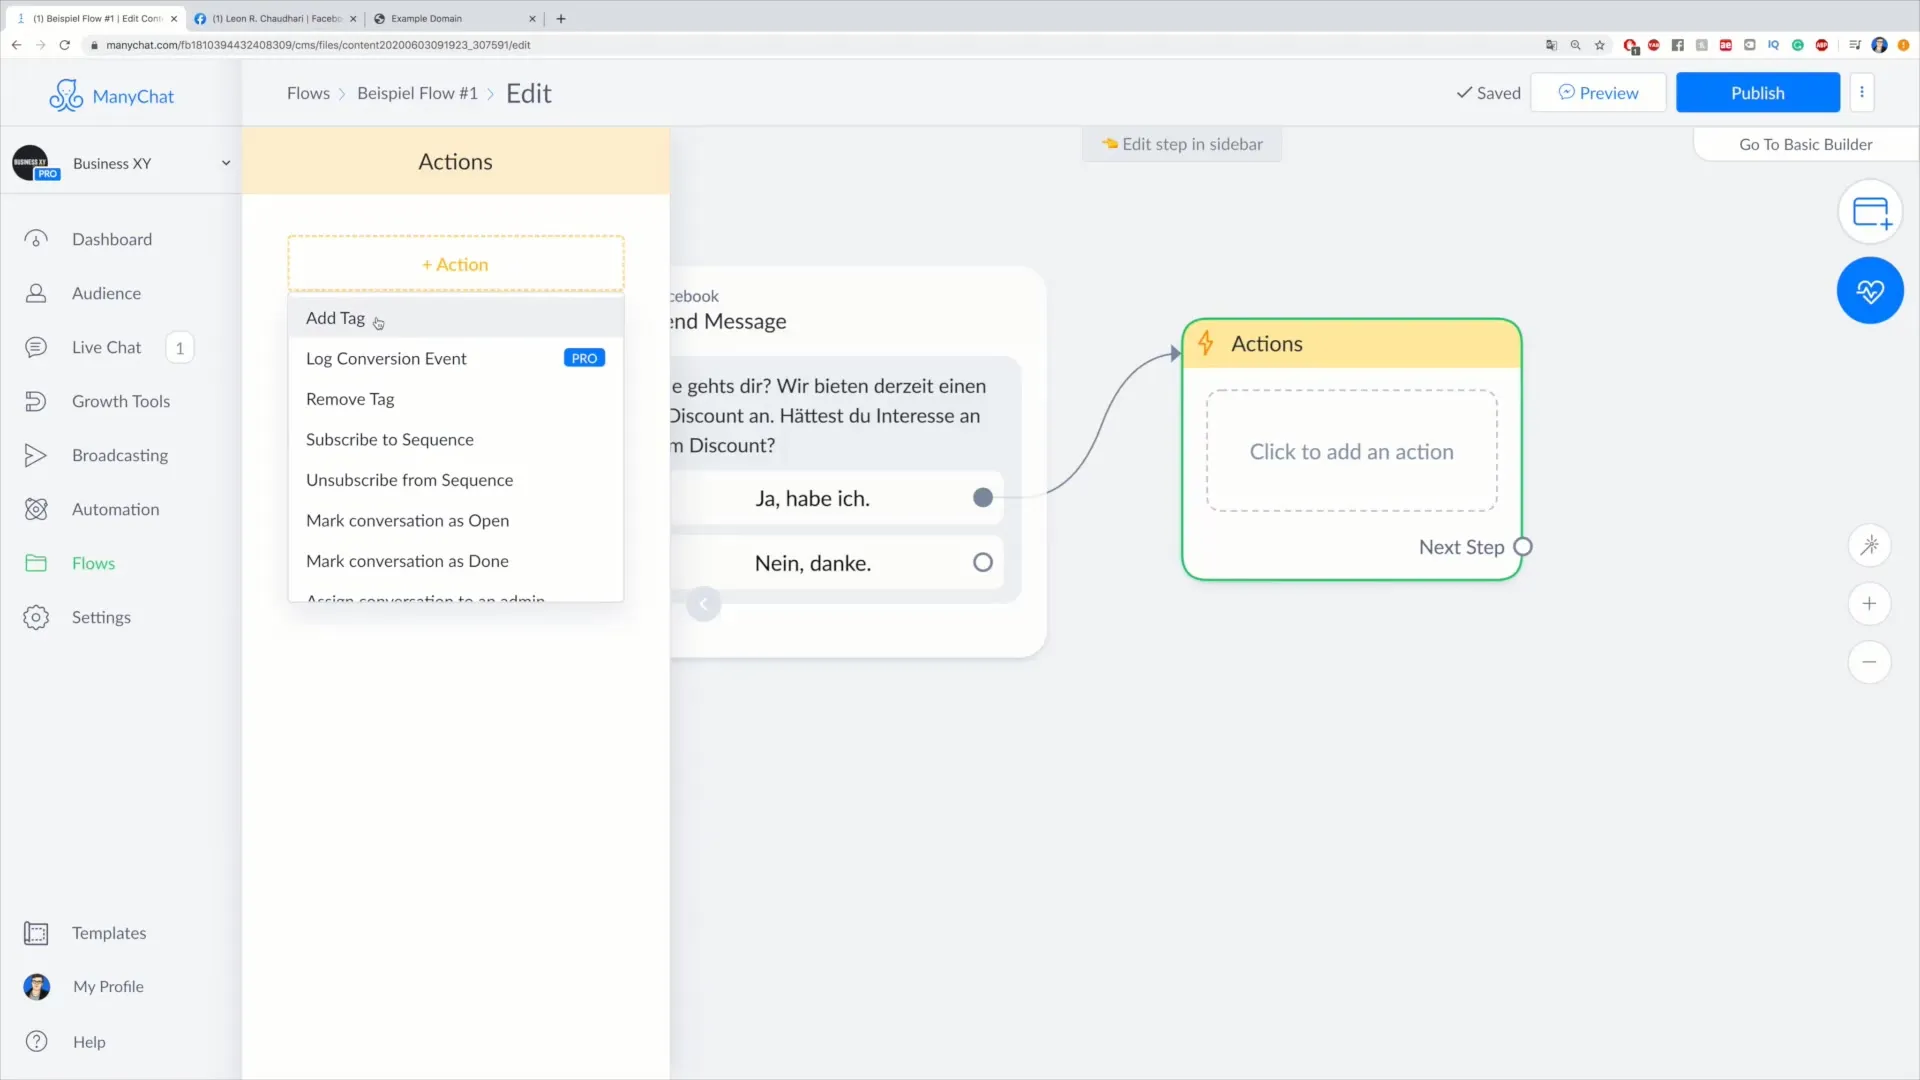
Select the Tag that seems most meaningful to you – perhaps “wants discount” or “does not want discount.” By adding the Tag, you can ensure that the customers receive the information they want.
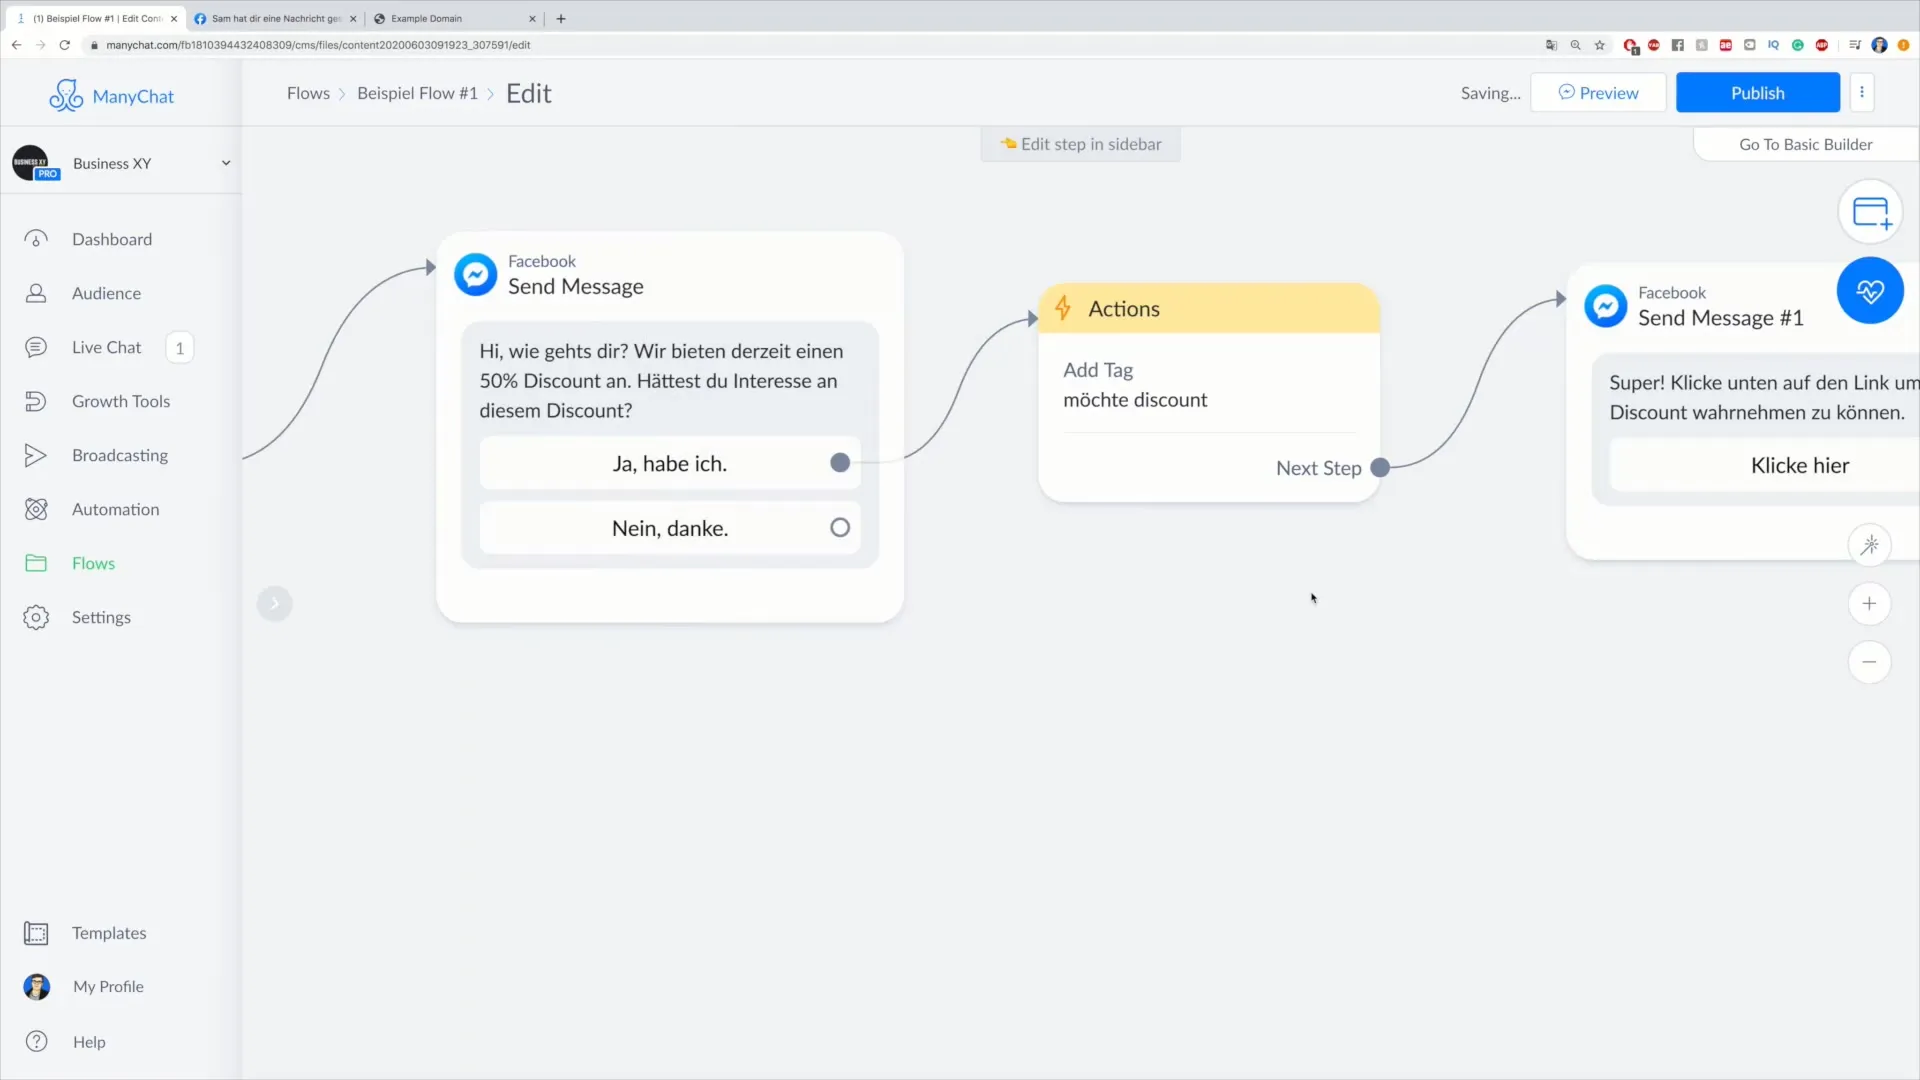
Now drag the action into the corresponding field and link it with a message that will be sent to the respective customer to offer them the discount. It could be a message like: "Great, click the link below to take advantage of your discount!"
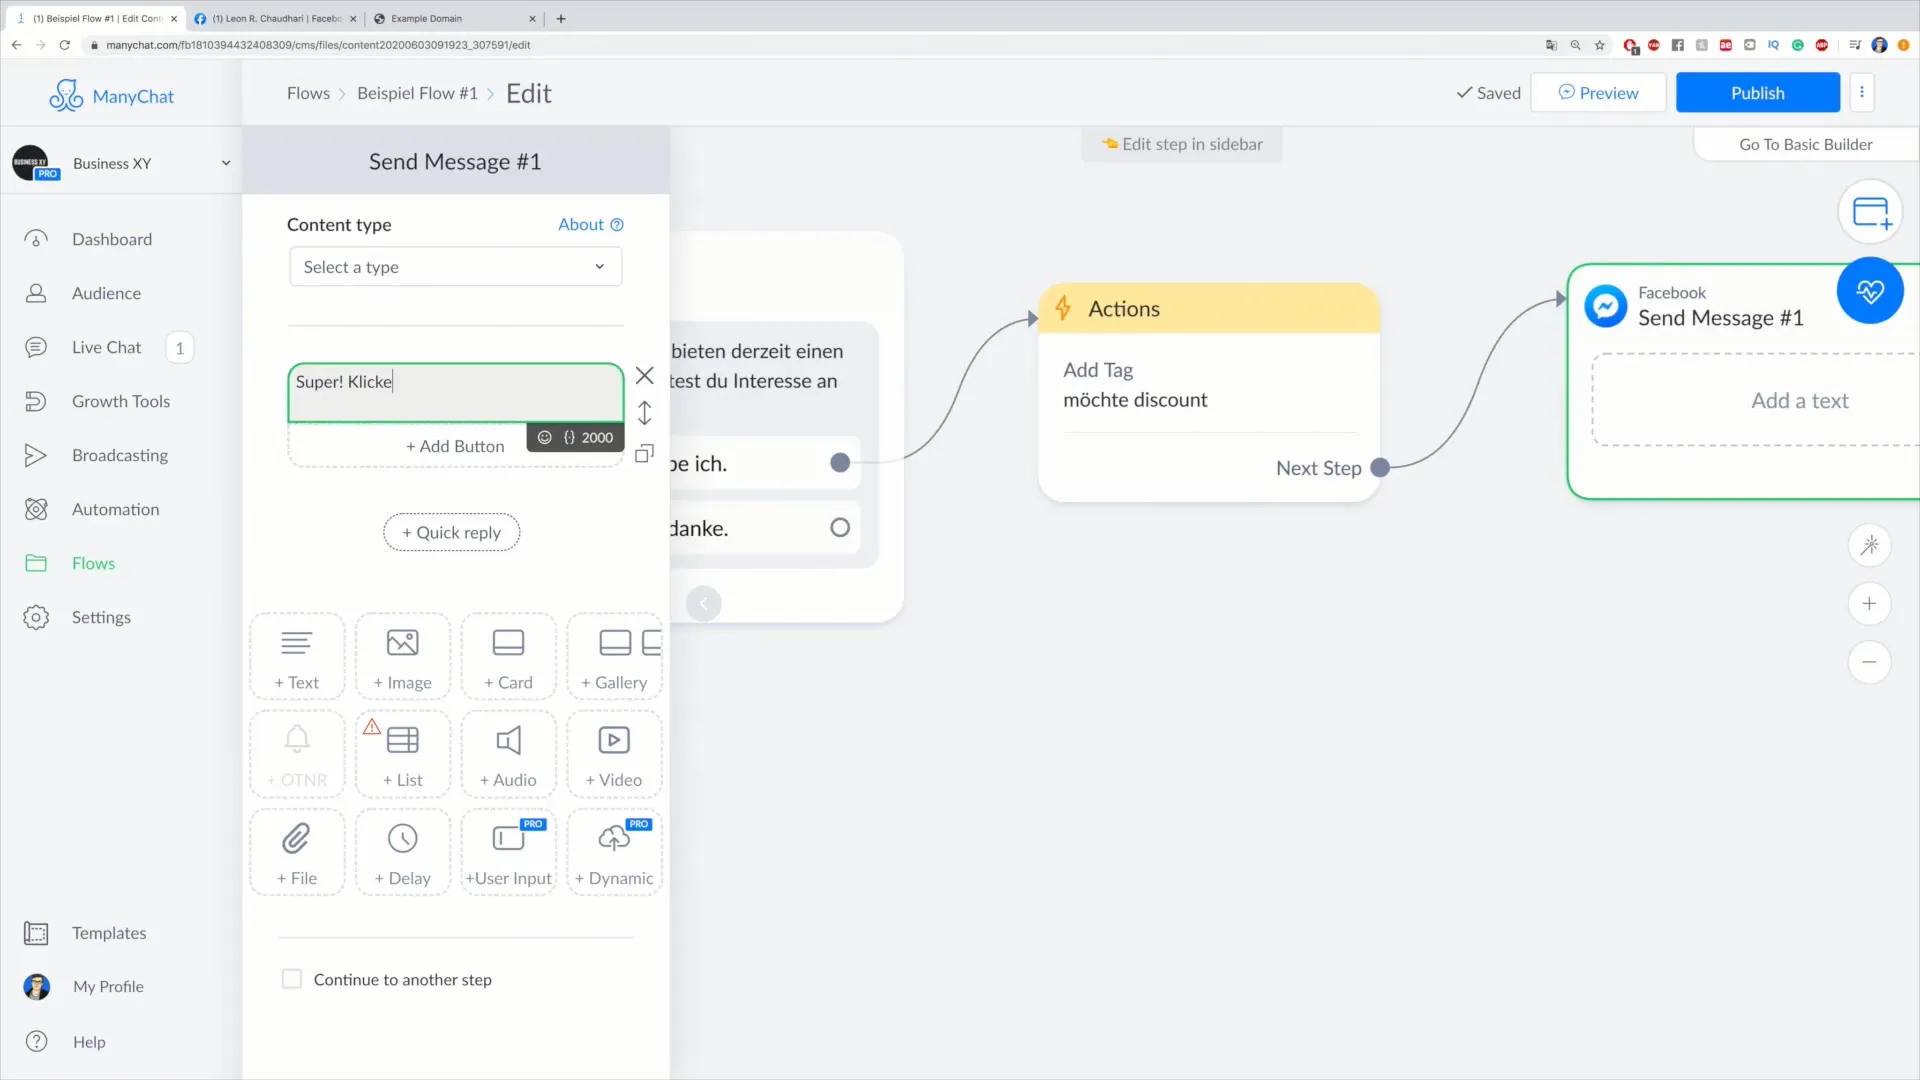
Your Flow should now also include a button that redirects the customer to the website if they wish to utilize the information. The design of this button should be clear, e.g., with the label “Click here.”
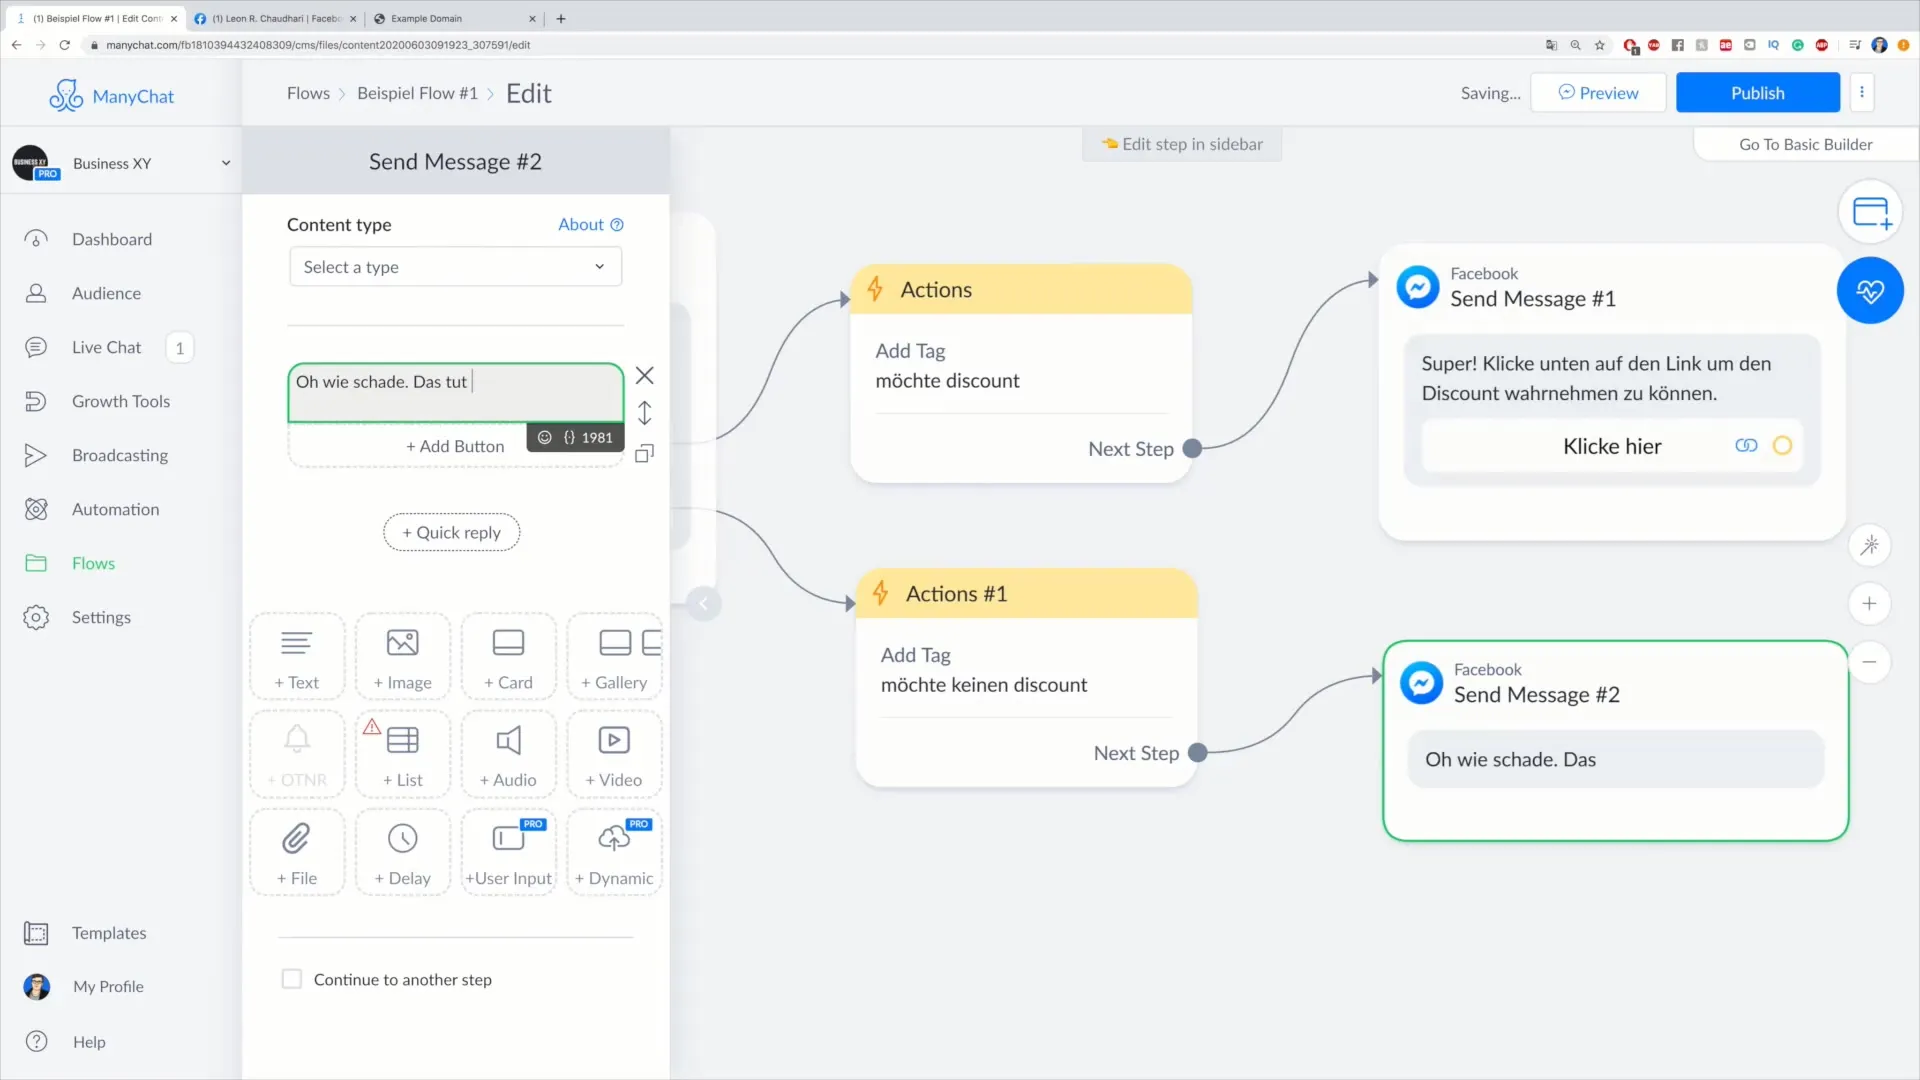
Don't forget to also repeat the process for rejection. If the subscriber clicks “No thanks,” the system must also set a new Tag – in this case “does not want discount.” Repeat the process of sending messages to give the customer polite feedback.
After creating the Flow, it is advisable to create a preview of it. This way, you can check whether everything has been created correctly and whether the contact receives the right Tags.
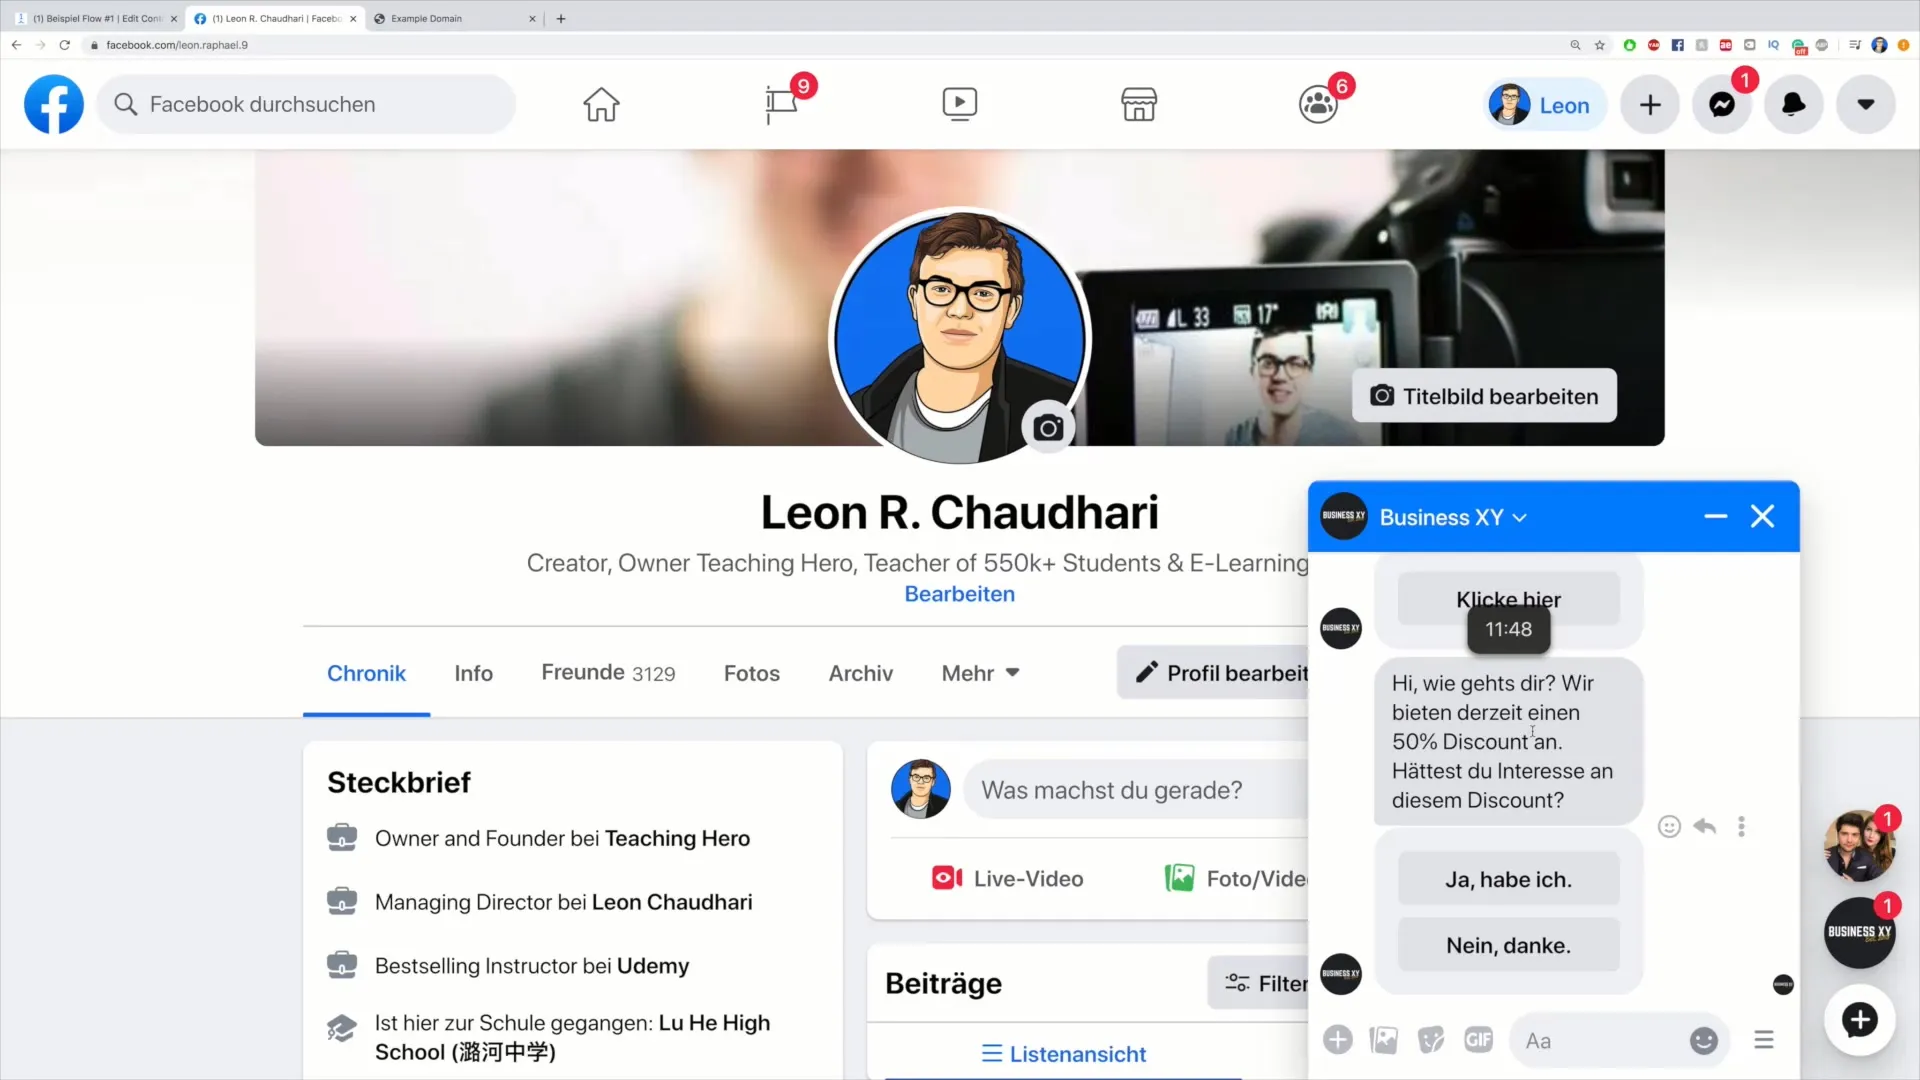
When a customer now makes a decision, the corresponding message is sent, and the Tag is added to the contact. You can then check in the Audience whether the Tag has been correctly assigned.
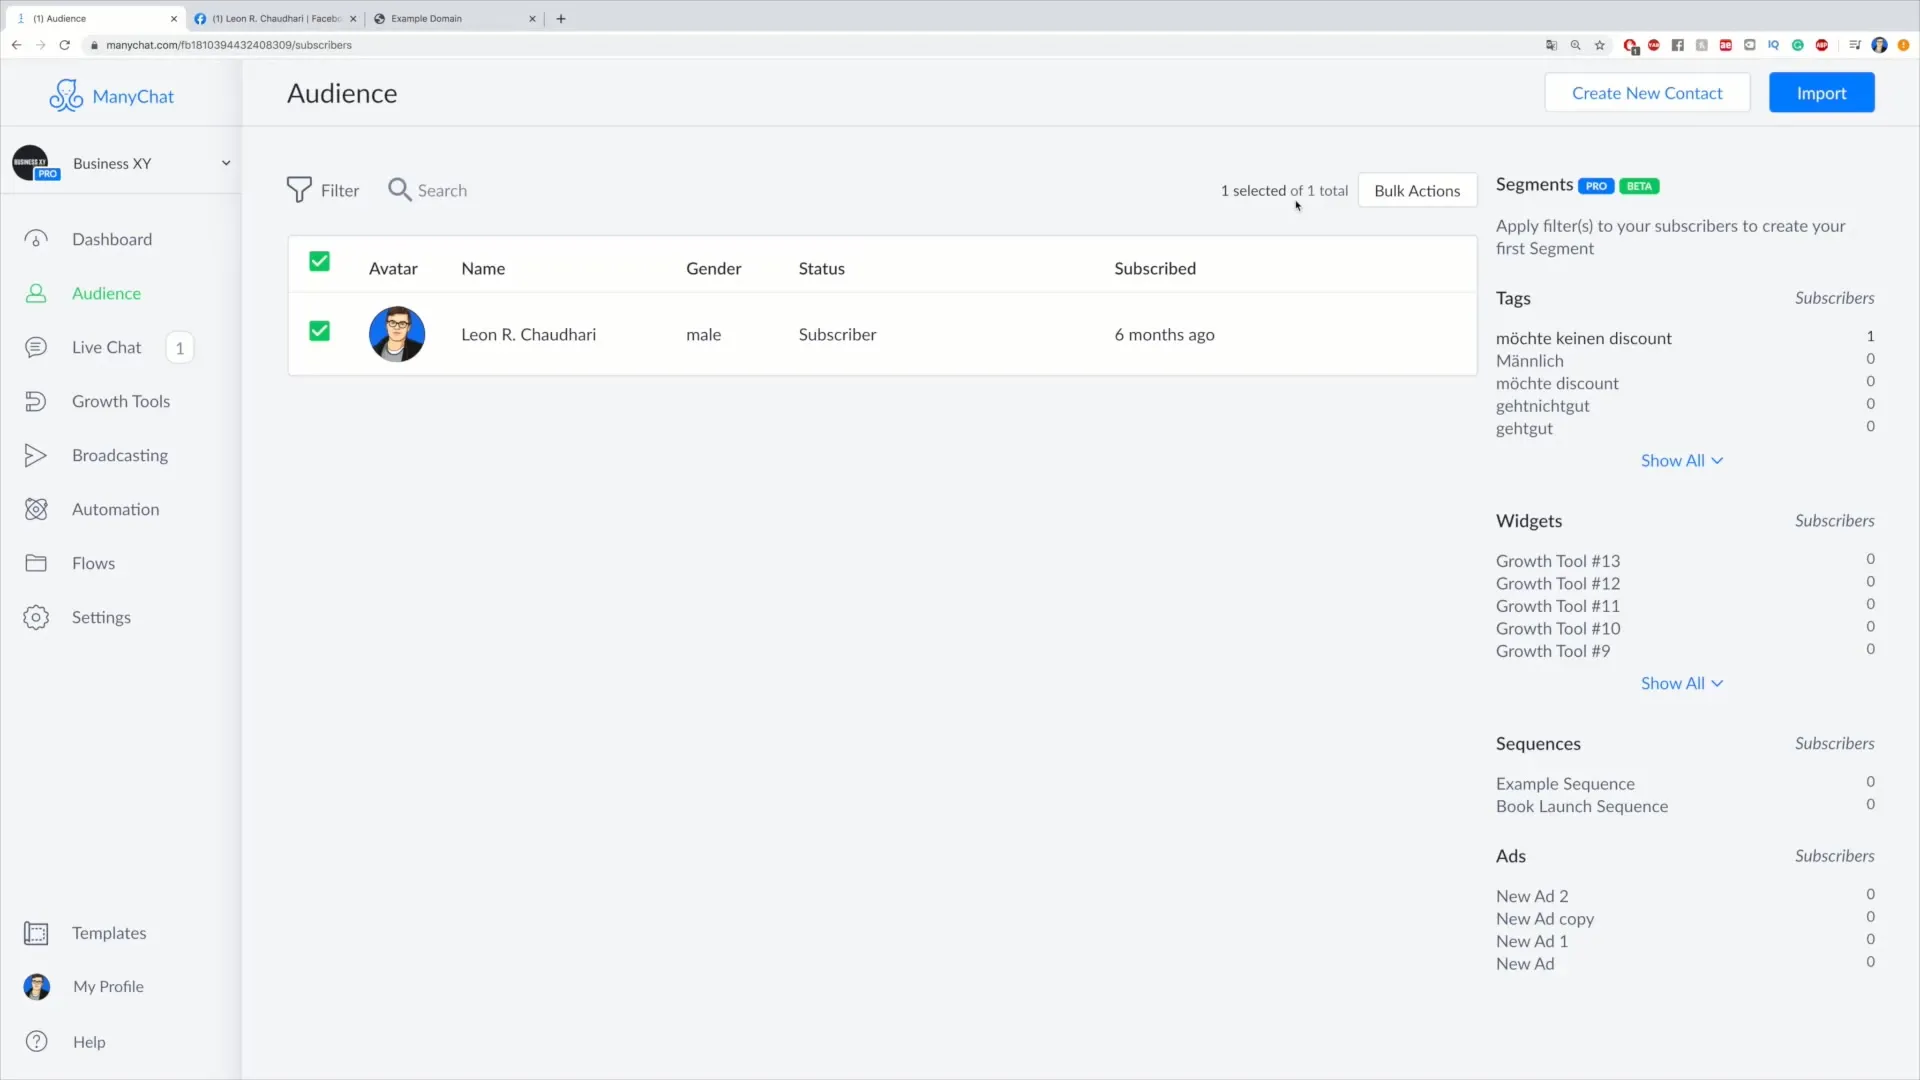
Here you have the opportunity to review all information and ensure that the system works smoothly, whether or not the customer is interested.
Summary – Adding Tags through Actions in Flow: Simplifying Customer Acquisition
In this guide, you have learned how to effectively integrate Tags through Actions in your Flow. The importance of Tags in customer acquisition cannot be underestimated as they help you build professional and personalized communication with your contacts, thus increasing the likelihood that your customers will interact with your offer.
Frequently Asked Questions
How do I add Tags to a Flow?You can add Tags to a Flow by selecting the relevant step, clicking on “Actions,” and then adding the desired Tag.
Can I add Tags manually?Yes, Tags can be added both manually and automatically through your Flow.
What is the purpose of Tags?Tags are used to categorize contacts and track their interactions, which improves your marketing strategies.
How do I check if a Tag has been added?You can do this by going back to the Audience and accessing the relevant contact to view the assigned Tags.
How can I test the Flow?Use the preview feature to check whether your Flow functions as desired and whether the correct Tags are added.
