Many old or blurry photos can be significantly improved with AI tools, without correcting every detail by hand. Canva offers features for this that work directly with Affinity Pixel. This guide shows you the most important tools: the highlighted depth for selections, upscaling, colorizing, as well as portrait lighting and portrait blur.
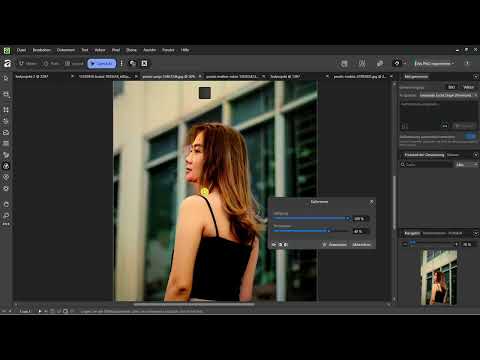
The video is only loaded from YouTube when you play it – data (including your IP address) is then transmitted to YouTube/Google. More in the privacy policy
Key Takeaways
- All AI tools in this area require a Canva Premium subscription. Without a subscription, every click takes you directly to the payment screen.
- The highlighted depth creates selections based on depth and tonal values rather than just color. This often lets you reliably separate foreground and background from each other.
- Before using a tool for the first time, you have to download the associated add-on component once.
- When upscaling, you should save your project beforehand, as the tool can cause crashes depending on your computer.
- Colorization and portrait light can be used non-destructively: You can readjust results via adjustment layers.
- Portrait lighting and portrait blur only look professional if you use them subtly.
Step 1: Open Canva AI Studio and check your subscription
Start in Affinity Pixel and switch to Canva AI Studio. The tools there are constantly changing, since they are AI functions. Before you get started, check your subscription: A Canva Premium subscription is mandatory. The speaker quotes the Pro price at about 12 euros per month. A trial month is usually free. Think in advance about whether you want to use the other Canva features in addition to the AI tools, because it is only worth it in that case.

Step 2: Select the foreground with the highlighted depth
Open a portrait in which the foreground is sharp and the background is blurred. Choose the tool for the highlighted depth. You can recognize it by the icon of the circle with the triangles. One click creates a selection that does not just respond to colors like the classic magic wand, but also to depth and tonal values in the image.

Afterwards, you can fine-tune the selection. With the sliders for near and far, you determine what should be selected. In the example, the speaker reduces the near range and increases the far range until the man is almost completely selected. The blur in the background is left out. You can then continue to process this selection as usual with masks or layers. The method requires some finesse, but it is worth it once you can operate the sliders confidently.

Step 3: Download the add-on component
If a tool does not respond, a window in the settings often opens. In it, you are asked to download the respective component. This applies to each tool individually. The download usually takes only a few seconds. Read the pop-up carefully and confirm it, otherwise nothing happens when you click the tool.

Step 4: Increase the resolution with upscaling
You can recognize the super resolution tool by the icon with the square and the S. It is suitable for photos or logos that are too small or too blurry. The calculation runs on the processor, which is why it takes different amounts of time depending on your computer.
In the speaker's trial version, Affinity crashed several times when clicking the tool. This may be due to the hardware, but also to current problems with the software. Therefore, be sure to save your project beforehand. Try out the tool, and if it runs stably for you, you can quickly see from the before-and-after view how much sharpness was gained.

Step 5: Colorize black-and-white photos
Colorizing is especially appealing for old family photos. Load a black-and-white image and choose the tool with the three semicircles. The AI recognizes sky, skin, grass, and clothing and assigns suitable colors. With the sliders for saturation and temperature, you determine how vivid and how warm the result looks. The speaker chooses a medium saturation and a neutral temperature and thus gets an image that looks like an older color photograph.


If you don't like the colors yet, proceed as follows: Apply the result to a pixel layer and place an adjustment layer on top of it, for example for levels correction. This way you can fine-tune the colors without destroying the generated image. The speaker explicitly calls colorizing one of his favorite tools.

Step 6: Adding portrait lighting after the fact
Open a portrait and select portrait lighting. The tool detects the face and adds light after the fact, as if an additional lamp had been used when taking the photo. The intensity can be adjusted using sliders. The speaker recommends keeping the value rather low, because lighting that is too strong quickly looks artificial and plastic.
With the other sliders, you determine what the circle of light looks like. The radius determines how large the illuminated area is. You can move it so that only the face, and not the shoulder, for instance, receives light. The distance changes the distribution of the light, and you can leave the surroundings unchanged if necessary. What matters is moderation: subtly used light looks professional, whereas exaggerated light looks cheap.


Step 7: Applying portrait blur for the bokeh effect
Last on the agenda is portrait blur. It simulates the soft background that a lens with a wide aperture produces. However, the tool does not work equally well with every subject. With photos that have unfavorable shadows or cluttered edges, the result can look unnatural. Therefore, choose an image in which the person is clearly separated from the background.
For fine-tuning, you have softness, focus, and radius available. A small radius can emphasize the shoulder less, so that the face and upper body stand out more. You should not set the softness completely to zero, otherwise the transition looks harsh. At the end, don't forget to click Apply. Only then will the change be accepted.


Summary – Improving photos with Canva AI: Selection, upscaling, and colorizing
With the selected depth, upscaling, colorizing, and the two portrait tools, powerful features are available to you in Canva AI. Most of them require a Premium subscription, so you should weigh the benefit against the cost. Make sure to download the additional components, save your projects before upscaling, and use the portrait effects sparingly. This way you achieve natural results that visibly enhance your photos.
FAQ
Do I need a subscription to use the AI tools?Yes, all the AI tools described require a Canva Premium subscription. Without a subscription, you will be taken directly to the payment screen when you click.
Why isn't a tool working for me?Often the additional component is missing. If a pop-up opens in the settings, download the component once.
Why does Affinity crash when upscaling?The tool works via the processor and, depending on the computer or current software issues, can cause crashes. Therefore, save your project beforehand.
Can I still change the colors after colorizing?Yes. Apply the result to a pixel layer and add an adjustment layer, for example for levels correction.
How do I avoid an unnatural look with portrait lighting?Keep the intensity low and make sure the light only reaches the face. Too much light quickly looks plastic and cheap.
Do I have to confirm anything after changes to portrait blur?Yes. Click Apply, otherwise the image remains unchanged.


