
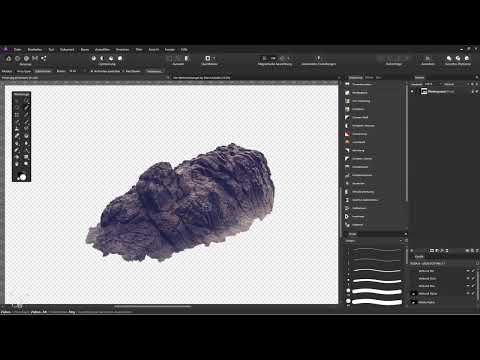
A Christmas angel needs a base on which it can stand convincingly. In this tutorial, you cut out a dark rock that lies on a light background and use it as a pedestal for your figure. You won't use the brush with Quick Mask or the Pen tool, but the Selection Brush. With strong light-dark contrasts, this approach is often the fastest.
The video is only loaded from YouTube when you play it – data (including your IP address) is then transmitted to YouTube/Google. More in the privacy policy
The process takes you from selecting through the mask and edge smoothing to inserting, flipping, and aligning the rock in the target image. Afterwards, you can reuse the rock however you like.
Key Takeaways
The Selection Brush automatically detects contrasts and contours, which makes it especially suitable for dark objects against a light background. Wide brush tips cover large areas faster, and corrections work by holding down the Alt key. The mask at the end makes the cutout non-destructive, and only when rasterizing is the rest of the image removed. When inserting, you first have to click the correct layer or group, otherwise the rock ends up in the wrong place.
Step 1: Open the source image and analyze the rock
First, open the image with the rock. Make sure the rock is dark and the background is white, because exactly this contrast makes the method so reliable. Zoom in on the rock so you can see the edges clearly.

Step 2: Activate the Selection Brush and enlarge the view
Select the Selection Brush in the toolbar. You can also reach it with the keyboard shortcut W. Then enlarge the view so you can follow the contours precisely. Check in the Layers panel that the image is present as a background layer.

Step 3: Make a rough selection with a larger brush width
The default width of three pixels is too small for larger objects. You'll notice this because small areas remain unselected. So increase the width significantly and paint once over the rock. The brush follows the contrast edges, so it usually finds the border on its own.

Step 4: Check the edges and close gaps
Not every spot works on the first pass. If an area is missing, simply click over it again. The brush then picks up that area as well. For low-contrast spots on the rock, you'll need to look a bit more closely and paint over them again.

Step 5: Remove excess selection with the Alt key
With the Alt key, you remove areas from the selection again. Hold it down and paint over the spots that don't belong, for example over the light background that was picked up. If the brush is too coarse at a difficult spot, reduce the width and work there deliberately.

Step 6: Move the image section with the spacebar
As long as you are zoomed in closely, you need to change the image section without losing the selection. To do this, hold down the spacebar and drag the image to the desired position with the mouse. This way you work your way piece by piece across the entire rock.

Step 7: Select the entire rock
Once you have worked on all the edges, increase the brush width once more so you can quickly cover the remaining areas. You decide for yourself how much of the lower rock area should be included in the subject. A small excess is not a problem, because you can correct it later with a mask.

Step 8: Create a mask from the selection
In the Layers panel, click the background layer and then the mask icon. The selection is thereby converted into a layer mask. Afterwards, deselect with Ctrl + D so it doesn't get in your way while you continue working. The rock is now cut out, and the rest of the background is hidden.

Step 9: Use a color layer for control
To better assess the edges, create a color layer via Layer and New Fill Layer. Choose a hue that stands out clearly from the rock, for example a cool blue. Then drag the color layer all the way to the bottom of the stack so you can check the edges of the rock without distraction.

Step 10: Smooth hard edges with a Gaussian Blur
After cutting out, the edges often look stair-stepped and hard because there is no antialiasing. To fix this, do not click on the image layer, but on the mask. Then choose Filter, Blur, and Gaussian Blur. Increase the radius only slightly, because it affects the mask and not the image itself. Just a few pixels are enough to make the edges look more natural. Confirm with Apply.

Step 11: Refine the mask with the Paint Tool
For a more accurate result, choose the Paint Tool, set the foreground color to black, and reduce the brush size. Stay on the mask and paint over areas where bright flashes or remnants of the background are still visible. With a colored background layer, you can see such errors much more clearly. The Selection Brush alone already delivers good results, but a precise cutout requires some manual work.

Step 12: Carefully mask out the remaining areas
Work your way step by step over all conspicuous spots. Consider how much time you want to invest. The more detailed your work, the cleaner the result will be. For a quick tutorial, a rough touch-up is enough, but for a publication you should proceed more precisely.

Step 13: Rasterize the rock
The mask still leaves the rest of the image in the document, even though it is hidden. So that you work only with the rock, right-click the rock layer and choose Rasterize. The mask is applied in the process, and only the cutout rock remains on the layer. Then rename the layer to "Fels" by double-clicking.

Step 14: Paste the rock into the target document
Copy the rock with Ctrl + C and switch to your document with the angel. Before you paste with Ctrl + V, click the top layer or group in the Layers panel. Make sure that no layer and no group is selected, otherwise the selection will disappear. The rock is then pasted directly above the layer you clicked.

Step 15: Move the rock down in the layer order
The rock should sit at the very bottom as a pedestal. Drag the layer down in the Layers panel and watch the blue markers. When the blue bar spans the entire width of the desired group, release the mouse. The layer then lands at the very bottom of the stack and sits behind the angel.

Step 16: Flip the rock
The shadow in the original image is on the right, but in the new composition it should match the direction of the light. So, with the rock layer active, choose Flip Horizontal under Transform. This way the lighting matches the angel and the rest of the image.

Step 17: Enlarge, rotate, and align the rock
Now adjust the size and position. Scale the rock so that it works as a pedestal for the angel, and pay attention to the edges. If a transparent area appears, the rock is too small or sits too far into the image. Rotate it slightly until the surface runs as horizontally as possible, and move it to the spot where the angel should stand. A slightly non-proportional scaling can help to adapt the shape better.

Step 18: Check the result
Take another calm look at the overall image at the end. If the shadows, alignment, and edges are right, the angel looks stable on the rock. If there is something you don't like, you can readjust the mask or the position at any time.

Summary ??? Isolating and placing a rock with the Selection Brush in Affinity Photo
With the Selection Brush, you can quickly isolate dark objects against a light background. You start with a wide brush tip, correct mistakes with the Alt key, and convert the selection into a mask. Then you smooth the edges, rasterize the layer, and insert the rock into your composition. Flipping, rotating, and scaling ensure that it fits your angel perfectly.
FAQ
When is the Selection Brush particularly suitable?The Selection Brush works best when the subject has a clear contrast to the background, such as a dark rock against a white background.
Which brush width should I choose?For small details, a few pixels are enough. For larger objects like a rock, you should increase the width significantly so that you work faster and no small gaps appear.
How do I remove areas from the selection?Hold down the Alt key and paint over the areas that do not belong to the subject. They will then be deselected again.
Why do the edges look hard after isolating?Without antialiasing, jagged edges appear. Slightly soften the mask with a Gaussian Blur by selecting the mask and not the image layer.
What does rasterizing mean in this context?When rasterizing, the mask is applied and the hidden part of the image is removed. Afterwards, the layer contains only the isolated object.
What do I need to pay attention to when pasting?Before pasting with Ctrl + V, click on the top layer or group in the Layers panel and do not select any layer or group. Only then will the object end up in the right place.


