
An empty billboard is just waiting to be filled with your favorite photo. In Affinity Photo, this works convincingly when you work with overlays. In this tutorial, you will learn how to isolate the canvas from a photo, edit highlights and shadows separately, and then insert any image with the right perspective. The inserted image remains replaceable, so you can swap it for a different one at any time.
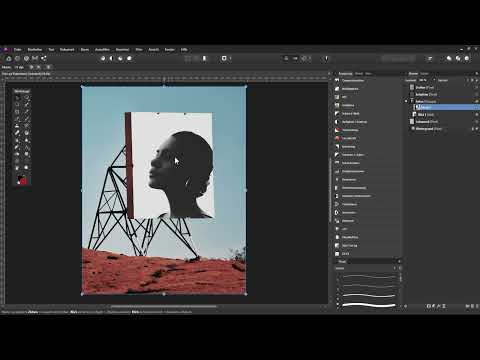
The video is only loaded from YouTube when you play it – data (including your IP address) is then transmitted to YouTube/Google. More in the privacy policy
Key Takeaways
- A clean pixel selection of the canvas is the foundation for all further steps.
- Highlights and shadows of the canvas are placed on separate layers so that the structure of the wall is preserved in the result.
- A layer mask on a group ensures that the photo is only visible within the canvas.
- The Perspective tool fits the photo to the edges of the canvas.
- Blend modes and adjustment layers bring contrast, color mood, and realism into the image.
Step-by-Step Guide
Step 1: Prepare the canvas with the Pen tool
Open your image of the billboard and select the Pen tool. You can access it via the icon or with the keyboard shortcut P. Set an anchor point in the top left corner of the canvas, then one at the bottom left, bottom right, and top right. A line is created between each of the points. Close the path by clicking the first anchor point. From this closed path, you create a pixel selection via the "Select" menu, recognizable by the typical marching ants.

Step 2: Refine the selection in Quick Mask mode
Switch to Quick Mask mode with the Q key. Areas marked in red are not selected, areas in the original color are selected. With a white paintbrush you add areas, with black you remove them. For the canvas edges, a brush hardness of about 70 percent is suitable, since the edge then stays clear but doesn't look harshly cut off. Remove the shadow on the right side with black. For blurry spots in the original image, you should lower the hardness significantly and use a larger brush to create a softer transition. You will notice that you can still touch up these spots later because the mask remains editable.

Step 3: Load the selection and place it on its own layer
Exit Quick Mask mode again with Q. The selection is now active. In the Layers panel, select the background layer and press Ctrl+J to copy the canvas onto its own layer. Give this layer a meaningful name, for example "Canvas". Then deselect with Ctrl+D.

Step 4: Separate highlights and shadows of the canvas
So that the structure of the wall looks realistic later, you divide the canvas into light and dark parts. Hold Ctrl and Shift and click on the thumbnail of the canvas layer. This creates a luminance selection that captures all the bright areas. Activate the canvas layer and press Ctrl+J. The bright areas now sit on their own layer, which you name "Highlights". Then briefly hide the canvas layer and the background layer to check the result.
For the shadows, you invert the selection. To do this, choose the command "Invert Pixel Selection" from the "Select" menu. Activate the canvas layer, press Ctrl+J again, and name the new layer "Shadows". Deselect with Ctrl+D.
Step 5: Place the photo and organize it in a group
Now drag the desired image file from Windows Explorer into Affinity Photo via drag & drop. The photo lands above the background layer and should sit below the highlights and shadows layers. Name the layer, for example "Image 1". Select it and press Ctrl+G to create a group. Name the group something like "Photos". This way, additional images can be managed together later.

Step 6: Create a mask from the canvas for the group
The photo should only be visible within the canvas. To do this, make the canvas layer visible again. While holding the Ctrl key (without Shift), click on the thumbnail of the canvas layer. This creates a normal selection of the visible area. Then hide the canvas layer again. Click on the "Photos" group and, with the selection active, create a mask via the mask icon. Then deselect with Ctrl+D. From now on, the group only takes effect within the canvas.

Step 7: Adjust the perspective with the Perspective Tool
Select the "Bild 1" layer and choose the Perspective Tool. Affinity Photo notes that the layer will be rasterized. Confirm this, because you have to convert the photo to pixels for this. A grid then appears. Drag the handles so that the lines of the grid follow the edges of the canvas. Use the top, right, bottom, and left edges as a guide. Make sure that the subject is not distorted too much. Then confirm with "Apply". Since you have to adjust the perspective individually for each new image, it is helpful to keep the canvas in the original image well in view.

Step 8: Blend highlights and shadows using blend modes
Without a blend mode, the photo covers the structure of the canvas. Therefore, select the "Lichter" layer and change its layer mode from "Normal" to "Screen" ("Negativ multiplizieren"). The highlights thereby brighten the photo underneath. For the "Schatten" layer, you choose the "Multiply" mode. It darkens the photo. The subject already looks much more coherent as a result.

Step 9: Control the contrast with Levels adjustments
Now the contrast is sharpened. Select the "Lichter" layer and add a Levels adjustment via the Adjustment menu. Drag the adjustment layer as a clipping mask directly onto the highlights layer so that it affects only this one. In the histogram, you move the black point to the right to hide the particularly dark tones. Then you brighten the remaining light areas further. Proceed similarly with the "Schatten" layer: Create another Levels adjustment as a clipping mask. Move the white point to the left so that areas that are too bright are hidden, and move the black point slightly to the right so that the dark areas get more contrast.

Step 10: Avoid color changes through Luminosity
The Levels adjustments often also change the color saturation. To prevent this, you set the blend mode of the two adjustment layers from "Normal" to "Luminosity". This way, the corrections affect only the brightness, not the colors.

Step 11: Remove distracting metal parts on the group mask
Zoom into the image and select the group's mask. Set the foreground color to black and use a brush with reduced hardness. Paint over the metal parts that the photo should not show. Be careful not to paint beyond the edge. You can lower the brush opacity to work more gently. It is important that you are really painting on the mask and not on the image itself. Check this by displaying the mask while holding down the Alt key. In addition, you can reduce the opacity of the highlights layer to about 85 percent so that the effect remains more natural.

Step 12: Transfer the ambient color with a color look
So that the photo picks up the mood of the surroundings, you create a fill layer within the group. Name it, for example, "Farblook". With the eyedropper, you select a blue tone of the sky in the image. The fill layer takes on this color. Change its blend mode to "Soft Light" so that the photo underneath remains visible.
Then you add a Curves adjustment as a clipping mask. Drag the lower anchor point upward to brighten the dark areas, and the upper anchor point downward to darken the bright areas. The photo thereby looks softer and is adapted to the mood of the canvas.

Step 13: Refine the group mask with a soft brush
Not every spot of the photo is convincing right away. Select the group's mask and set the paintbrush to an opacity of about 10 percent and a hardness of 0 percent. Paint gently over the edges with black until a soft gray veil forms. If you want to brighten a spot again, switch to white. If a larger area is affected, first create a selection from the mask by holding down the Ctrl key and clicking on the mask. Within this selection, you paint only where you want to. Then deselect the selection with Ctrl+D.

Step 14: Add a Vignette for the Edges
To finish, you can darken the edges with a vignette. To do this, create a new filter layer of the Vignette type and drag it to the very top in the Layers panel. Set the strength to about -1.5 so that the edges become darker. Reduce the hardness to about 50 percent. Increase the radius so that only the outer areas are affected, and adjust the shape to be slightly elliptical.

Step 15: Replace the Photo and Adjust the Vibrance
The big advantage of this technique is interchangeability. Hide the layer "Bild 1", select a different photo in Windows Explorer and drag it into Affinity Photo above the group. Scale the new image, adjust the perspective as in step 7 and confirm with "Apply". If the colors of the new photo look too strong, place a "Vibrance" adjustment layer as a clipping mask on the image and reduce the saturation. The textures of the canvas are preserved, so the new image looks as if it had been printed directly on the wall.

Summary ??? Affinity Photo: Placing a Photo Realistically on a Poster Canvas
With a clean pixel selection, separate highlight and shadow layers, and a mask for the group, you can place a photo realistically on a poster canvas. Perspective, blend modes, adjustment layers and a vignette refine the result. Thanks to the overlay structure, the image can be replaced at any time without having to rebuild the entire composition.
FAQ
How do I create a precise selection of the canvas?Use the Pen Tool (P) to set anchor points at the corners, close the path, and refine the selection in Quick Mask mode (Q) with white and black.
Why should I split the canvas into highlights and shadows?This way the structure of the wall is preserved when you place the layers with different blend modes over the photo.
What is the group with a mask for?The mask limits the photo to the visible area of the canvas, and new images can be inserted within the group with the same settings.
Do I have to readjust the perspective for every new photo?Yes, the Perspective Tool acts on the individual image layer. You should therefore check it again with every new image.
Why should I use Luminosity for the tonal corrections?The Luminosity blend mode prevents the corrections from unintentionally changing the color saturation.


