
Standard brushes from Affinity Photo rarely meet every requirement. Sometimes the stroke is too hard, sometimes the opacity looks too uniform, sometimes the desired texture is missing. This is exactly where brush management comes in, because every brush can be customized down to the smallest detail. You determine size, hardness, spacing and flow, define how the brush tip behaves, and can even incorporate textures.
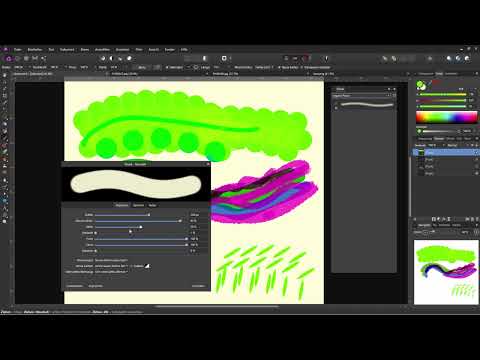
The video is only loaded from YouTube when you play it – data (including your IP address) is then transmitted to YouTube/Google. More in the privacy policy
In this tutorial, I will guide you step by step through the advanced brush settings. You will learn how to safely duplicate a brush, store it in a category of your own, and then refine it bit by bit. The original brushes remain untouched, so you can return to the starting point at any time.
Key Takeaways
- A brush should always be duplicated first before you change it. This way the original is preserved.
- Custom brushes can be organized in a category you name yourself, which makes work much clearer.
- Size, hardness, spacing, flow and shape controls together determine how a stroke looks.
- Dynamics settings only take full effect when a pressure-sensitive pen or a graphics tablet is used.
- Textures add a structural layer to any brush. Large, high-resolution patterns deliver the cleanest results.
Step-by-Step Guide
Step 1: Select a Brush and Try It Out
First, select a brush that you want to customize, for example a simple round brush. Draw a test line with it in a strong color, such as green. This way you can see immediately whether the default behavior matches your expectations or whether changes are needed.

Step 2: Open the Brush Dialog
In the brush palette, click the "More" button. A dialog box opens in which you will find all the settings of your brush. Alternatively, you can right-click the brush to open the context menu and choose "Edit Brush". Both ways lead to the same function panel.

Step 3: Duplicate the Brush
Before you change anything, you should duplicate the brush. You will find the duplicate function in the dialog box, not in the context menu. This creates a copy that you can edit safely, while the original is preserved in the default palette.

Step 4: Rename the Copy
The new copy appears at the end of the list and is named "Brush Copy". Give it a meaningful name so you can find it again quickly later. This is especially worthwhile if you create several variants.
Step 5: Create a Category of Your Own
Via the brush palette menu, you can create a new category. Affinity Photo initially assigns the default name "Brush" for it. Rename it via the dialog menu, because the context menu is not the right way for categories at this point. For example, the name "Custom Brushes" is suitable.

Step 6: Move the Copy to the Category
Return to the default palette and look for your copied brush tip. Right-click it and choose the option to move it to a category. Select your new category "Custom Brushes". Afterwards, you will find the brush there. Only now should you begin with the adjustments.

Step 7: Set the Brush Tip Size
The size determines how wide your stroke is. In the dialog box, you can enter the value in pixels, for example 200 pixels. The brush tip will then be correspondingly large. Afterwards, test the change with a short stroke on the canvas.
Step 8: Adjust Hardness, Spacing and Opacity
Hardness controls how soft the edges of your brush stroke are. At 100 percent the edges stay sharp, at lower values they become softer. Spacing determines how far apart the individual stamps that make up the stroke are. With high spacing you can clearly see individual dots, at zero percent a continuous line is created. With a larger spacing, a soft bokeh-like effect can also be created.
Accumulation ensures that overlapping strokes become darker or lighter, depending on how often they lie on top of each other. This allows you to control gradients and shading in a targeted way.
Step 9: Understanding flow and placing individual dots
Flow determines how much paint is applied within a single brushstroke. A medium value makes sense for many situations. If you set the flow to 100 percent and increase the spacing at the same time, individual dots are created that are excellent for tracing. Observe how spacing and flow interact: a lower flow with greater spacing results in loose, transparent patterns.
Step 10: Using the shape slider and rotation
With the shape slider, you can change the brush tip from a circle to an oval shape. With a round brush tip, rotation has no effect because the circle always looks the same. With image brushes, such as cloud or texture brushes, however, you can set a rotation and thereby determine how the shape is rotated as you draw. Afterwards, reset the values to zero when you need the default.

Step 11: Setting the blend mode and wet edges
In the area at the bottom of the dialog, you will find the blend mode. It determines how the brush blends with the pixels underneath. To start with, the "Normal" mode is usually enough. The "Wet Edges" option simulates the behavior of watercolor paint, where the edges of the paint run into each other. You can enable it, disable it, or define your own profile via "Custom". This function is especially interesting for painting, for example for watercolor effects.

Step 12: Understanding the dynamics settings
The dynamics filter controls how the brush changes when you work with a stylus. With a graphics tablet, the pressure, tilt, or angle of the stylus can influence the brush size, opacity, or flow. This does not work with a mouse because the left mouse button always delivers the same pressure. The dynamics values then override the basic settings only where an input device can actually evaluate them.

Step 13: Setting up size and offset jitter
With size jitter, you determine how much the brush tip varies randomly or through pressure. The offset shifts the brush tip sideways and thus creates a livelier stroke. Test both settings with a stylus, because only there does it become apparent how strong the effect is. With a mouse, size jitter remains ineffective unless it is set to random.
Step 14: Using color jitter and random behavior
With color jitter, you can let hue, saturation, and brightness vary slightly. This creates a natural change within a stroke. If you enable the "Random" option, you can achieve lively results even with a mouse, without the stroke depending exclusively on the input device. However, randomness remains unpredictable, so you should plan for several attempts.

Step 15: Applying a texture to the brush
Under the brush settings, you will find the "Set Texture" option. With it, you add a structure to the color of your brush, such as stone, paper, or cloud patterns. The texture changes not only the appearance but also the distribution of the paint on the canvas.

Step 16: Obtaining and loading textures
You can get suitable textures, for example, through the PSD tutorial offering or through the creative flat-rate offering on tutkit.com. There you will find large texture packs with several thousand motifs. Choose a texture, download it, and then integrate it into the brush. Make sure that the pattern has sufficient resolution.

Step 17: Adjusting scale and constant texture
With the scale slider, you determine how large the pattern appears on the brush tip. If the pattern is too small, it will appear blurry or messy when enlarged. It is therefore advisable to use large patterns. In addition, you can enable the "Constant" option so that the texture does not start anew with each stamp, but runs evenly across the entire stroke.
Step 18: Inverting the texture
If you invert the texture, light and dark areas are swapped. The result looks significantly different even though you are drawing with the same brush. Try out both variants to find the effect that suits your image.

Step 19: Changing, removing or resetting textures
You can choose a different texture at any time, remove the current one, or reset all settings to their original state. Try out different combinations until you find a variant that suits your project. Afterwards, you can use your own brush in the "Custom Brushes" category and create further variants from it if needed.

Summary ??? Customizing Affinity Photo Brushes: Mastering Brush Tip, Dynamics and Textures
You have learned how to customize a brush in Affinity Photo in a targeted way without losing the original. You duplicate the brush, create your own category, and then adjust size, hardness, spacing, flow, shape, blend mode and dynamics. With textures, you further expand your creative possibilities. Experiment with the values, because every small change affects the stroke.
FAQ
Do I always have to duplicate a brush before editing it?Yes, this is strongly recommended. This way the original brush remains unchanged, and you can fall back on it at any time.
Why does the dynamics have no effect for me?The dynamics settings mainly work with a pressure-sensitive pen or graphics tablet. With a mouse, the pressure always stays the same, so the values only take effect to a limited extent.
Which texture size should I choose?Use patterns that are as large and high-resolution as possible so that they do not become blurry when scaled.
What exactly does flow do?Flow determines how much paint is applied within a single brush stroke. Low values produce more transparent strokes.
Can I undo changes made to a brush?Yes, you can adjust the values at any time or reset the brush to the default settings.


