
Turning a simple black-and-white portrait into a forest man sounds more complicated than it is. You don't need a drawing program or any prior experience in retouching. A suitable photo as an overlay, a few layer blend modes, masks, and a handful of adjustment layers are enough. In this tutorial, you will follow the transformation step by step: hair and beard become foliage and branches, the face gets a woody bark texture, and in the end you have a colorful fantasy portrait with a vignette and a warm color look.
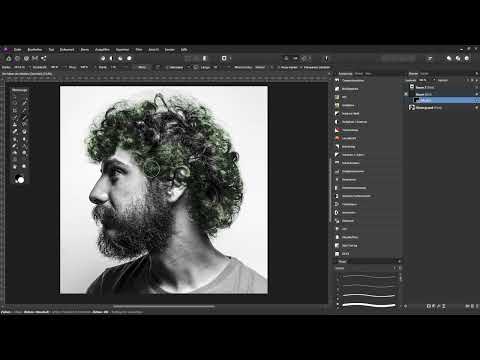
The video is only loaded from YouTube when you play it – data (including your IP address) is then transmitted to YouTube/Google. More in the privacy policy
You will work in Affinity Photo with an image of a man whose face was photographed from the side. The original image is black and white. All steps can be applied to other portraits, though you should adjust the values depending on your source material.
Key Takeaways
- Overlays bring the texture, while the blend modes and blend options connect them with the original image.
- The blend options work with source and composition ranges and are often more precise than pure layer blend modes.
- Black masks with a white brush reveal overlays selectively. With a reduced opacity, transitions can be made soft.
- Fill layers as a clipping mask tint only the layer beneath them, without changing the rest of the image.
- Live filters such as High Pass, Vignette, and Noise give the result sharpness, depth, and a uniform look in the end.
Step-by-Step Guide
Step 1: Prepare the Starting Image
Open your portrait in Affinity Photo. In the Layers panel, it appears as a background layer. Since you will edit hair and beard separately, it is worth working with clear layer names from the start. The background layer remains unchanged and later serves as the basis for the blend options.

Step 2: Place the Tree Overlay
Drag a tree or foliage photo from Windows Explorer directly into the Affinity window. The file automatically lands as a layer above the original. Using the handles, you scale the overlay proportionally and move it until the crown lies above the head. By double-clicking the Hand tool, you fit the view to the window. You now see the tree image on top and the original portrait beneath it.
Step 3: Duplicate the Overlay Layer
Before you edit the tree overlay, you create a copy as a backup. Select the layer and press Ctrl + J. Name the copy, for example, "Tree 2" and hide it for now. That way you always keep an unchanged version that you can use later for the beard.

Step 4: Try Out Layer Blend Modes
Activate the tree layer and open the Layer Blend Modes menu. Test the modes one after another and observe the hair in the image. Darken, Multiply, and Screen Multiply appear too dark or lose the color impression. Lighten or Soft Light come closer to the goal, since the hair looks greenish. With Hard Light you achieve a strong effect, but the saturation rises sharply. Since none of the modes is convincing on its own, you switch to the blend options.

Step 5: Get to Know the Blend Options
Click the gear icon of the tree layer to open the blend options. At the top you see the source layer with its own sliders, at the bottom the composition ranges of the layers beneath. If you drag the left handle of the source layer downward, the dark areas of the tree become transparent. If you drag the right handle downward, you bring out bright areas of the original layer. By clicking on the line, you set additional handles and thus control the midtones precisely. Every change can be undone by moving the handle again or clicking Reset.

Step 6: Fine-Tune the Blend Options Curve
In the composition ranges, pull the midtones upward, but not linearly, rather with a gentle curve. This creates soft transitions and no harsh tonal breaks. If you have set one point too many, right-click it and delete it. Make sure that hair and background blend harmoniously into each other in the image. A small piece of the original structure should always remain visible.

Step 7: Mask the tree layer
So that the foliage appears only on the hair on the head, you need a mask. Hold down the Alt key and click the mask icon. This creates a black mask that completely hides the overlay. Switch to the Brush tool and choose white as the foreground color. Set the opacity to 100 percent and the hardness to 0 percent so the brush is soft. If you are working with a graphics tablet, enable the pressure sensitivity option in every new document so that the brush size varies depending on pen pressure.
Step 8: Refine hair and transitions
Now paint with white over the areas where the foliage should become visible. At the edges, this creates hair tips that were barely noticeable in the original. Gray haze that shows through too strongly can be painted over with black at reduced opacity. This gives you control, because each opacity level has a stronger effect with repeated painting. Work especially carefully at the ear. With light pressure on the pen, you can deliberately uncover fine gaps in the hair. You can switch back to the blending options at any time and adjust the curve further.

Step 9: Design the beard with a second tree layer
Switch to the "Tree 2" layer and make it visible. Move it to the area of the beard and open the blending options again. First hide everything, then pull the midtones up and pay attention only to the beard, not the hair. With an additional point, the curve can be shifted to the left until the beard looks harmonious. Then you add a black mask again using the Alt key, paint over the beard area with white, and remove the distracting haze with black. This creates the impression that branches are growing through the beard.

Step 10: Insert a bark texture for the face and neck
For the woody skin, you use another overlay, this time a photo of tree bark. Drag it into the document and place it above the other layers. To rotate the image to portrait orientation, move the mouse outside the transformation frame. While holding the Shift key, the rotation snaps in 15-degree steps. Then scale the overlay to fit the face.

Step 11: Integrate the bark with blending options and blend mode
Open the blending options of the bark layer and bring back the bright areas of the original by moving the right handle downward. Limit the effect with a second handle so that mainly the face and neck are affected. For the layer blend mode, Overlay is suitable, because it creates a high-contrast, almost marble-like impression. The colors are not right yet, but you will correct that in the next step.

Step 12: Mask the bark
Create a black mask again using the Alt key. With a white brush, paint in the texture where you want to see it on the face. Make the brush smaller for the ears and eyes, but use it larger on the neck. At the eyes, you take the texture back a little with black paint and low opacity so that the eye area remains natural. You can also interrupt a line on the face so that the result looks more harmonious.

Step 13: Build a brown tint with a fill layer
Reduce the opacity of the bark layer to about 80 percent. Then create a fill layer via Layer, New Fill Layer. Drag it directly under the bark layer so that it acts as a clipping mask and tints only that layer. Set the layer mode to Soft Light and choose a brown hue in the color field. Increase the saturation to about 46 to 50 percent and adjust the brightness until the face looks like wood or stone. With the opacity of this fill layer, you control the intensity.

Step 14: Remove the T-shirt with a white fill layer
The T-shirt in the lower part of the image does not fit the theme. Therefore, create a white fill layer and name it something like "hide lower area". Hold down the Alt key and click the mask icon to hide the mask completely. Paint over the shirt with white to make it disappear. Then switch to black, greatly reduce the opacity, and bring back areas of the beard and neck that you accidentally removed. If in the end you decide to keep the shirt after all, simply hide the layer.

Step 15: Sharpen the structure with a high pass
The following layers are adjustment and live filter layers. For sharpness, you choose the High Pass filter via the Live Filter menu. Set the mode to monochrome and the radius to about 6.9 pixels. Set the layer to the Overlay blend mode and use a mask to paint the sharpness in only where structures should stand out, for example on the eyes, the neck, and the area of the ear.

Step 16: Adjust the saturation of the green
Some shades of green look too strong. To fix this, create an HSL adjustment layer and move the saturation slider to the left, in the example to about 37 percent. You apply the change with a mask only where the colors are too intrusive. This way the foliage blends in with the other shades of green without looking like a foreign body.

Step 17: Direct the focus with a vignette
A vignette darkens the edges and draws the eye to the center of the image. You can find the filter in the Live Filter menu under Vignette. In the example, you use an exposure of minus 4, a hardness of 51 percent, a scale of 172 percent, and a shape of 86 percent. You reduce the layer's opacity to 35 percent because 100 percent makes the effect too strong. The values are guidelines and depend on the image.

Step 18: Add noise for a uniform look
A slight noise over the image unifies the edited areas. In the Live Filter menu, choose Add Noise. In the example, you use an intensity of 73 percent, the Gaussian variant, and the monochrome mode. Set the opacity to 80 percent and let the noise blend with the layers beneath it. In the full view, the noise looks strong at first, but when examined closely in the magnifier, it is fine and subtle.

Step 19: Fine-tune the color look with curves
Finally, you give the image a warmer mood. Create a Curves adjustment layer. Leave the master channel unchanged so that the contrast is preserved, and work only in the individual channels. In the red channel, you pull the curve upward, in the green channel slightly downward, and in the blue channel also downward. Compare the before and after states until you are happy with the color effect.

Summary ??? Creating a Man of the Forest in Affinity Photo with Overlays
You have seen how a black-and-white portrait becomes a forest creature. First, photos of trees and bark bring texture into the image. Then, with blend modes and especially with the blending options, you control which parts of the overlay are visible. Masks and soft brushes ensure precise transitions, while fill layers set the colors in a targeted way. In the end, high pass, saturation adjustment, vignette, noise, and curves round off the image. The technique can be applied to many creative portraits if you adapt the values to your image material.
FAQ
Which overlay is best suited for the hair?A photo with a clear structure, such as foliage, branches, or a tree crown, works well. It is important to have a similar light direction as in the portrait.
Why should I duplicate the overlay layer before editing?The copy serves as a backup and can be used for other areas such as the beard. This way you don't lose the unedited original.
Do I have to use a graphics tablet?No, masking works just as well with a mouse. However, a graphics tablet makes fine transitions easier because you can control the brush pressure directly.
Can I adopt the values from the video directly?The values are guidelines from the example image. Always adjust opacity, radius, and vignette to your own portrait.


