
Imagine you need the same cloud over and over again, a specific landscape shape, or your own watermark. The preinstalled brushes rarely fit exactly. The good news: in Affinity Photo, you can build your own brushes in just a few steps. This tutorial shows you how to turn an image section into an image brush, which selection tools you need for it, and how to adjust and name the brush afterwards.
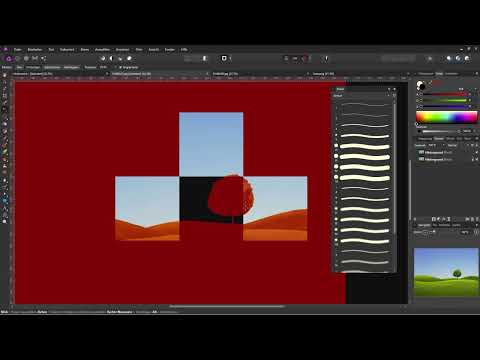
The video is only loaded from YouTube when you play it – data (including your IP address) is then transmitted to YouTube/Google. More in the privacy policy
You don't need any prior experience with brushes for this. However, basic knowledge of layers and selections will help you, because you will switch between these functions several times along the way.
Key Takeaways
- An image brush is created from an isolated image section, which is exported as a PNG file and then loaded into the Brushes panel.
- With mask layers, soft brushes, and a clean selection, you can control transitions and edges.
- An image brush takes over the colors of the source image, whereas an intensity brush only takes over the brightness values.
- Brush tips can be edited in the Brushes panel, moved into categories, and renamed.
Step-by-Step Guide
Step 1: Activate the Paint Brush for the Cloud
Open the image into which you want to paint your cloud later. Choose a suitable cloud and place it on a new layer so that the original image remains unchanged. In the toolbar, activate the Paint Brush tool. Make sure the foreground color matches your subject. If it is too dark, the cloud quickly looks like a stain, and you will have to make more corrections later.

Step 2: Create a Mask Layer
If you want to remove parts of your brush stroke again without destroying the drawing, you work with a mask layer. Create it via the Layer menu while the pixel layer with the cloud is selected. A new mask is initially completely white and therefore fully visible. With black color, you paint over areas that should disappear. This means you can, for example, protect the tree in the foreground by not painting there or by covering the mask again.

Step 3: Edit the Mask with a Soft Brush
For the correction, switch from the cloud brush back to a simple round brush with a soft edge. Set the size appropriately and, if needed, deactivate the stabilizer so that it follows your strokes more directly. The foreground color black hides, white restores. The preview under the brush tip shows you exactly which area you are currently editing.
Reduce the brush opacity gradually, for example from 100% to about 50%, so that the transitions become softer and the mask does not look cut off harshly. If you have removed too much, simply swap the colors and repaint the area.

Step 4: Set the Source Image for the Image Brush
Now it's about the actual image brush. To do this, open the image from which you want to create the brush. In my example, it is a landscape with a tree and a meadow, but the blue sky in the upper area should disappear. Only the tree and the meadow should remain later as the brush tip.

Step 5: Isolate the Background with the Magic Wand
Duplicate the background layer so that the original is preserved. With Ctrl + J, you create the copy quickly. Then choose the selection tool, click on the blue sky, and keep a tolerance of about 20%. The selection is based on similar color tones in the image.
Since the sky is not evenly blue everywhere, you have to add further areas to the selection via the "Add" option. Proceed piece by piece and check after each click whether the selection still makes sense. In the end, the sky appears completely selected, while the tree and meadow remain free.

Step 6: Check the Selection in Quick Mask Mode
The selection can be refined at any time. Switch to Quick Mask mode to check it precisely. There, unselected areas are displayed in red, while selected areas remain visible. Look for spots where remnants of sky are still stuck in the tree, and correct them. Afterwards, you exit the mode again and have the familiar selection edge.

Step 7: Expand the selection by one pixel
After the correction, it makes sense to expand the selection slightly. To do this, open the selection editing menu and expand the selection by one pixel. That sounds like very little, but it prevents remnants of the sky from remaining at the edge of the tree. These edge areas would later be visible as light edges in your brush stroke, and that is exactly what you want to avoid.

Step 8: Invert the selection and crop the brush area
To remove the background, you invert the selection. You can find Invert Selection in the "Select" menu. With Ctrl + J, you copy the selected area to a new layer. This way you can see what actually remains. With Ctrl + D, you deselect the selection again.
Then you crop the image so that only the desired area remains. A large empty margin is unnecessary and would needlessly enlarge the brush tip. Make sure that the subject is not cropped unnecessarily.
Step 9: Export the image section as PNG
Go to "File" and then "Export". Choose PNG as the format, because Affinity Photo needs a file with transparency so that the brush later draws only the subject and not the background field. You can decide whether the area should be exported with or without a background. For a brush tip, the version without a background is usually the right choice.
Also make sure that hidden layers are not exported along with it. Create a separate folder for your brushes and assign a clear file name, for example "Landscape 1".

Step 10: Create an intensity brush or image brush
Now open the Brushes panel. In the panel's menu, you will find the option to create a new brush. There are two variants to choose from. The intensity brush determines the strength of the stroke based on the brightness values of the image. The image brush, on the other hand, transfers the image itself as the brush tip, including the colors.
For most use cases where you really want to see the subject, the image brush is the right choice. Select your PNG file and confirm the selection.

Step 11: Move the brush to the "Custom Brushes" category
The new brush appears in the Brushes panel, usually at the bottom of the list. Right-click it and choose "Move to Category". Place it in the "Custom Brushes" category. There you will find all the brushes you have created gathered together and you do not have to search the entire list every time.
If you want to try it out, you can also create the same brush as an intensity brush and compare. This way you can see the difference directly in the result.
Step 12: Test the brush on a new layer
Create a new, empty layer and set the foreground color to black. Select your brush from the "Custom Brushes" category and draw with it on the layer. You will see that the intensity brush only reproduces the brightness of the image, while the image brush reproduces the subject correctly.
Also try a different color, such as pink or violet. The image brush retains the colors, so you do not have to adjust them afterwards. Adjust the size via the brush tip and the tool options until the result fits.

Step 13: Adjust the brush settings
With the brush settings, you control how your image brush works. To do this, open the brush editing. There you will find, among other things, the size, which is 64 pixels by default, the spacing between the motifs, the flow of the color, and the rotation of the brush tip.
Increase the size if the subject looks too small. Change the spacing if the individual elements are too close together or too far apart. Rotating the brush tip creates additional effects, for example large-area bristle strokes. Feel free to experiment, because you can undo any setting at any time.

Step 14: Rename the brush
So that you can quickly find your brushes later, you should name them meaningfully. To do this, right-click the brush and choose the rename option in the context menu. "Landscape 1" can thus become, for example, "Landscape Color" if the brush takes on the colors of the image, or "Landscape Brightness Values" if you have chosen an intensity brush.
A clear name will save you a lot of searching later, especially as your collection grows over time.

Step 15: Using custom brushes for watermarks and signatures
The real strength of this method shows in watermarks and signatures. Create a lettering or a logo, export it as a PNG, and then load it as an image brush. With a single click, you can then place the watermark in any image you edit. Many photographers use this technique to mark their images and to protect themselves, at least to some extent, against unauthorized use.

Summary ??? Creating custom brushes in Affinity Photo: From image section to finished image brush
You have seen how to build your own brush in Affinity Photo. You start with an image section, remove the background using selection and mask, export the result as a PNG, and load it as an image brush into the Brushes panel. Then you adjust size, spacing, and rotation and assign a descriptive name. Experiment with your own motifs, because watermarks, signatures, and textures in particular can be reused this way with little effort.
FAQ
Why does my brush only look like brightness levels?You have probably created an intensity brush. It only takes over the brightness values. For motifs with color and shape, choose the image brush.
Can I change the colors of an image brush afterwards?An image brush keeps the colors from the PNG file. For a different color, you should edit the file accordingly and create the brush again.
Why should the selection be enlarged by one pixel?This removes fine edge remnants of the original background that would otherwise be visible as light edges in the brush stroke.
Which file format do I need for a brush tip?PNG is best suited because it supports transparency. This way only the motif is drawn and not the background box.
Where do I find the brushes I created myself?They are located in the Brushes panel in the "Custom Brushes" category, provided you have moved them there.


