
A firework display over a nighttime skyline looks especially impressive when the light is also reflected on a water surface. You can achieve exactly that in Affinity Photo with just a few steps, without having to do any elaborate masking. The trick lies in the layer blend mode, which makes the dark areas of a photo invisible and leaves only the bright lights standing. After that, you adjust brightness, blur, and opacity until the result looks believable.
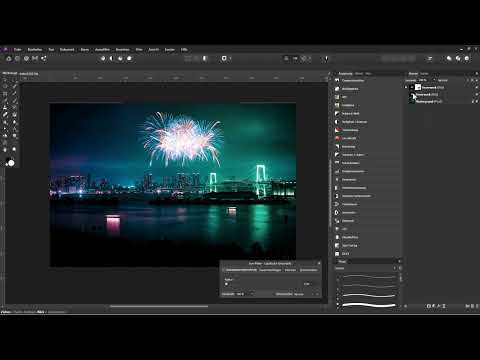
The video is only loaded from YouTube when you play it – data (including your IP address) is then transmitted to YouTube/Google. More in the privacy policy
As source material, you need two photos: a city view in the evening with water in the foreground and a firework image with a background that is as black as possible. The effect does not work during the day, because fireworks are barely visible then.
Key Takeaways
Key Takeaways
- The layer blend mode "Screen" hides dark areas and leaves the bright lights of the fireworks visible.
- A background that is as black as possible in the firework image is the most important prerequisite for a clean result.
- A Levels adjustment as a clipping mask lightens or darkens only the firework layer, without changing the rest of the image.
- A Gaussian Blur as a live filter creates soft, glowing light trails.
- The reflection is created by a copy of the firework layer that you move downward and apply motion blur to.
- With the layer blend option and a mask, you control precisely which areas of the reflection are visible.
- A slight noise over the entire image unifies the image quality if the firework photo has compression artifacts.
Step-by-Step Guide
Step 1: Import and Place the Firework Image
Drag your firework photo directly from Explorer into the open Affinity Photo document and drop it there. The image automatically lands as the top layer in the Layers panel, and the layer name matches the file name. Then you move the layer to the desired spot in the sky by clicking and dragging. Using the handles at the edge, you scale the fireworks proportionally so that they fit the skyline. You can also distort it, but you should only do so if necessary, since the proportions will otherwise look unnatural.


Step 2: Apply the "Screen" Blend Mode
With the firework layer active, select the "Screen" mode in the Layers panel. The fireworks are immediately blended with the layers beneath. The dark areas disappear, while the bright lights are preserved. This is the actual core of the effect, and it works better the blacker the background of your firework image is. If the background is gray instead, you will see a distracting frame around the fireworks.

Step 3: Adjust the Black Level with a Levels Adjustment
If the background does not become completely transparent despite the blend mode, a Levels adjustment helps. Click the adjustment layer icon at the bottom of the Layers panel and select Levels. Then drag the new adjustment layer directly between the thumbnail and the name of the firework layer so that it acts as a clipping mask and affects only this layer. In the dialog you will see a slider for the black level and one for the white level. Drag the black level slider to the right until the background is completely black and thus transparent. If the firework image is already clean, you can omit this adjustment layer.

Step 4: Intensify the Glow with a Layer Copy
If you want the lights to shine even more strongly, duplicate the firework layer. Select it and press Ctrl+J. The copy increases the brightness, but fine details such as the structures in the center of the fireworks are lost in the process. This is exactly what the next step is intended for, namely a blur.
Step 5: Use Gaussian Blur as a Live Filter
With the copy selected, click the Live Filter icon and choose Gaussian Blur. Since the filter is created as a clipping mask, it acts exclusively on the current layer. The layer's mode is already set to "Screen"; you do not need to change it again. Drag the radius up and watch as the light becomes softer and begins to glow. Values between roughly 20 and 21 usually give a good result.

Step 6: Fine-tuning opacity and brightness
So that the glow doesn't look exaggerated, you reduce the opacity of the copy. To do this, you can click on the word "Opacity" and drag the mouse to the left, or you can enter a value directly, for example 50 percent. This creates a natural glow effect. However, be aware that a small bright border can appear around the fireworks, because the background is not completely dark there. To fix this, add another Levels adjustment as a clipping mask on the copy and drag the black level slightly to the right. The border disappears as a result, and you can check the effect in a before-and-after comparison. Sometimes the effect is still a bit too strong afterwards, in which case a small adjustment of the opacity helps.
Step 7: Creating the reflection on the water surface
For the reflection, you create another copy of the fireworks layer with Ctrl+J. Rename the bottom fireworks layer, for example to "Reflection", and place it on the water surface. To do this, click into the image, hold down the Shift key and drag the layer downwards. With the Shift key held down, the movement stays exactly straight. Then you stretch the reflection out a little so that it looks more realistic and the lights are not too close together.
Step 8: Applying motion blur to the reflection
A reflection on water is softer than the original. Select the reflection layer, open the Live Filters menu and choose Motion Blur. Leave the rotation at 0 degrees, so that the reflection is smeared horizontally. You control the strength with the radius. Changing the rotation would alter the direction of the blur, which is not necessary in this case. When you are happy with the result, close the filter dialog.

Step 9: Controlling brightness via the layer blending options
The reflection still looks too bright and low in contrast on the water. Reducing the opacity helps little here, because it makes the image look artificial and flat. Instead, you open the blending options of the reflection layer via the gear icon. There you will find the "Underlying Layers" section. If you drag the anchor point downwards, the dark areas of the original layer return. However, this also makes the midtones partially transparent. To prevent that, you place a second anchor point on the diagonal and drag it upwards. This way, only the dark areas of the background come back. Also deactivate the option that keeps the gradient linear. This creates a smooth curve that looks more harmonious. You remove an accidentally placed anchor point with a right-click.

Step 10: Hiding unwanted areas with a mask
The reflection now also covers areas that should not reflect, such as buildings or the sky. Hold down the Alt key and click on the mask icon, and a black mask appears that hides everything. Switch to the paint brush, choose white as the color and paint over the water. With an opacity of 100 percent and a hardness of 0 percent, you get soft transitions. Make sure to paint only in the area of the water. For fine detail work, you can invest more time and zoom in further.
Step 11: Adding slight noise for a uniform look
When zooming in, you notice that the original photo shows slight noise and compression artifacts, since it was saved as a JPEG. The fireworks themselves, by contrast, look clear. To match the two, you apply a Noise live filter over the entire image. To do this, select the top layer or click next to the image so that no layer is selected. Then add a live filter layer and choose "Add Noise". Important: if a layer had been selected, the filter would only act as a clipping mask on that layer. Increase the intensity carefully, to about 18 to 20 percent, and choose the Gaussian variant with monochrome display. Then reduce the opacity of the noise layer to 80 to 90 percent so that the result does not look artificial.


Summary ??? Inserting fireworks in Affinity Photo: glow effect and water reflection
You have learned how to insert fireworks into a cityscape using the "Screen" blend mode, remove the dark backgrounds with a Levels adjustment, and create a strong glow with a layer copy and a Gaussian Blur. You then created a reflection on the water, softened it with motion blur, reduced it to the appropriate areas via the layer blending options, and cleaned it up with a mask. Finally, you unified the overall image with a noise filter.
FAQ
Which fireworks image is best suited?A photo with a background that is as black as possible works best, since it disappears completely with the blend mode.
Why do I see a bright border around the fireworks?The background of the fireworks image is not completely black. A Levels adjustment as a clipping mask with the black level shifted to the right removes the border.
Do I still have to change the blend mode setting after the blur?No, the "Screen" mode remains in place. The live filter only changes the appearance of the layer.
Why does the reflection on the water look too bright?Opacity is not the right lever for this. Instead, use the layer blending options and adjust the underlying layers there with the anchor points.
How do I remove an accidentally placed anchor point?Right-click the anchor point, and it will be removed.
Can I change the direction of the motion blur?Yes, you change the direction of the blur with the rotation slider. In the tutorial, it stays at 0 degrees for a horizontal blur.
Why does the noise appear only on a single layer?If a layer is selected when adding the live filter, the filter is applied as a clipping mask to that layer. Select no layer beforehand or place the noise layer at the very top of the layers panel.


