
A modern photo with sharp details and strong colors often looks too clean for retro projects. With Affinity Photo, you can give it the character of an old, noisy, and faded analog image with minimal effort. You don't need any special software for this, just Live Filters, adjustment layers, blend modes, and a handful of textures.
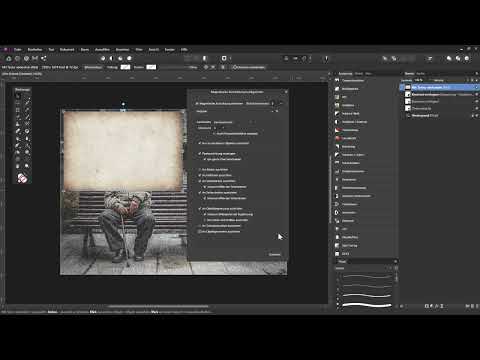
The video is only loaded from YouTube when you play it – data (including your IP address) is then transmitted to YouTube/Google. More in the privacy policy
In this tutorial, I'll show you how to turn a current photo of an elderly gentleman on a park bench into an image with a historical look. You'll learn how to use blur selectively, add noise and scratches, tame the contrast, and adjust the color tone. All steps remain non-destructive, so you can correct any setting at any time later.
Key takeaways
Live Filters and adjustment layers remain editable at all times. This way you work non-destructively and don't have to start over if you don't like a result.
The position of a layer determines the effect. As a clipping mask, a filter is applied only to the layer below it, whereas with no layer active, it is applied to all layers below.
Textures such as scratches, dust, and cracks only unfold their effect through blend modes like Multiply or Screen, as well as through the blend options, with which you hide bright or dark areas.
An old look comes from the interplay of several effects: blur at the edges, noise, reduced contrast, slightly desaturated and brownish colors, and worn edges.
Step-by-step guide
Step 1: Set the focus and blur the edge areas
Old photos are often sharp in the center and blurrier toward the edges, because lenses back then were not yet as advanced. You recreate this effect with the Depth of Field Live Filter. You open it via the Live Filter icon at the bottom of the Layers panel. Make sure that no other layer is selected, otherwise the filter ends up as a clipping mask on that layer.
In the dialog, you use the radius to adjust how strongly the edges are blurred. A value of about 17 pixels has proven effective. The circles in the image determine where the focus lies. To keep the old gentleman sharp, you drag the circle into an ellipse by moving the blue handle. You can also adjust the transition between the sharp and blurred areas. With the Clarity slider, you bring out the details somewhat more strongly.

Step 2: Add strong noise as grain
Old photos often show distinct grain. You create this effect with the Add Noise Live Filter. Choose the Gaussian variant and enable the Monochrome option so that the noise doesn't look colored. You pull the intensity up to 100 percent. This makes the image look somewhat broken at first, and that is exactly what is desired for the retro look. Since the filter sits at the top of the panel as a Live Filter, you can readjust it at any time later.

Step 3: Reduce contrast with Curves
Old shots are usually lower in contrast than modern photos. For this, you create a Curves adjustment layer. To do so, click next to the image so that no layer is selected, and choose the adjustment layer. Rename it right away, for example to Reduce contrast, so that you know later what it does.
In the histogram, you can see that the image is predominantly dark. Drag the lower anchor point upward to brighten the shadows. Drag the upper anchor point downward to soften the highlights. A click in the middle of the curve sets a new anchor point, with which you can additionally adjust the midtones. A right-click on an anchor point removes it again.

Step 4: Insert a texture and align it magnetically
Now the first overlay comes into play. Drag a texture file from Explorer into Affinity Photo. The texture lands as a new layer in the panel, and you can position and scale it using the transformation frame. Then give it a meaningful name, such as Darken texture.
To make the texture snap cleanly to the image edges, you enable magnetic alignment under View. The texture should cover the entire image. If you stretch it slightly, it fits the composition better. Afterward, create a copy of this layer with Control and J, which you call Lighten texture. You hide the copy for now so that you can first work on the darkening.

Step 5: Blending Textures with the Image and Using Blend Options
Set the layer Textur abdunkeln to the blend mode Multiply. This causes the dark areas of the texture to affect the image, while the light areas have hardly any influence.
Then activate the copy Textur aufhellen and set the mode to Screen. Now the light scratches affect the image, while the dark areas do not. Since the texture is very bright overall, it heavily covers the original image. The blend options help you here. Open them via the gear icon and hide the light tones using the Source Layer range slider. With an additional anchor point, which you set not linearly but as a curve, soft transitions are created. What remains are the scratches, and the original image shines through again.

Step 6: Lightening the Edges
Analog images used to be held in the hand, which is why the edges are often worn. To achieve this, copy the texture Textur abdunkeln with Control and J, drag the copy all the way to the top, and reset the mode to Normal. Rename it to Ränder aufhellen.
Select the layer and press Control and I to invert the tonal values. The Affinity assistant reports that the layer will be rasterized as a result. In this case that is unproblematic, so you confirm the message. Now the edges are light and the center is dark. Since the texture has a blue cast, you desaturate it in the next step.

Step 7: Desaturating and Sharpening Edges with Unsharp Mask
To remove the blue cast of the inverted layer, you create an HSL adjustment layer and drag the Saturation slider all the way to the left. So that the effect only affects the edges, you turn the adjustment layer into a clipping mask. To do this, drag it directly onto the layer Ränder aufhellen until the bar appears shifted to the right. Afterwards, you can reduce the saturation further if needed.
To make the scratches stand out more, you add a Live Filter Unsharp Mask. Make sure that no adjustment layer is selected beforehand, otherwise an unwanted clipping mask is created. A radius of about 1 pixel and a factor of around 2.8 bring out the details nicely. You blend the filter with the image using Screen. Since this also lightens the center somewhat, you open the blend options again and this time hide the dark areas of the source layer. The center thus stays dark, and only the edges are strengthened.

Step 8: Adjusting the Color Look with a Gradient Map
After the previous steps, the image is still too colorful. A Gradient Map helps you shift the colors to a warm, faded tone. Create it as an adjustment layer and drag it below the layer Ränder aufhellen. The image initially looks garishly colorful because the midtones are also tinted. Remove the middle anchor point by dragging it off the line, so that only shadows and highlights remain.
For the shadows, you choose a brownish hue, reduce the saturation to about 35 to 37, and make the color slightly darker. For the highlights, you choose a similar brown tone with a saturation of around 37 and a brightness of about 80. The colors do not have to be identical, so you can vary the look to your taste.

Step 9: Using Cracks as the Top Overlay
As the last element, you place a crack graphic at the very top of the layers panel. Drag the file into Affinity Photo and rotate it to landscape format by moving the mouse pointer outside the transformation frame while holding the Shift key. Enlarge or compress the graphic until it fits.
So that the cracks do not look colored, you desaturate them with an adjustment layer and set it as a clipping mask. A Curves adjustment in the form of a classic S-curve additionally increases the contrast. To do this, you pull the highlights up and the dark areas down. Then you blend the crack layer with the image by setting the mode to Screen. Using the blend options, you hide the dark or light areas as needed until the cracks look natural.

Step 10: Applying a Diffuse Glow to the Background Layer
The fine tonal gradations of the original still look somewhat harsh at the moment. Select the background layer and add a Diffuse Glow live filter. Drag the radius all the way down, increase the intensity to about 33 percent, and leave the threshold at around 52 percent. The effect looks softer and fits the retro look well.

Step 11: Transferring the look to any image
If you want to select all layers at once, hold down the Shift key and click the top and bottom layers. By clicking the visibility checkmark, you can compare the result with the original.
It gets exciting when you place a new image above the background layer. For example, drag a photo of an old chair into Affinity Photo. Scale it down and position it. Duplicate the diffuse glow with Control and J and drag the copy onto the chair as a clipping mask. This subject now also looks like an old photo, including blur, scratches, and color tone. The entire layer structure remains unchanged, and you can place any subjects underneath.

Summary – Old image look in Affinity Photo
You have seen that an old look is created from many small steps. You set the focus with a depth of field filter, add noise, reduce the contrast via curves, and apply textures to the image via layer modes and blend options. You brighten edges with inverted textures, adjust the colors via a gradient map, and bring out the sharpness of the scratches with Unsharp Mask.
The biggest advantage of this method is its flexibility. Because all filters and adjustment layers remain editable, you can fine-tune the look at any time. In addition, the layer structure works with any subject, so you can quickly reuse your retro set.
FAQ
Do I absolutely need Affinity Photo for this look?In principle, the techniques can also be implemented in other image editing programs with layers, layer modes, and blend options. However, the specific menus and live filters are described specifically for Affinity Photo.
Why should I work with live filters instead of permanently applied filters?Live filters remain editable at any time. You can readjust noise, blur, or sharpness later without altering the original image.
What is the difference between a live filter as a clipping mask and a live filter without an active layer?If a layer is selected, the new filter ends up as a clipping mask directly on that layer and only affects it. If no layer is selected, the filter affects all layers below it.
Can I use my own textures?Yes, you can insert any texture or graphic with scratches, dust, or cracks into Affinity Photo via drag & drop. It is important that the texture is light or dark enough so that the layer modes and blend options can be applied meaningfully.
What exactly do the blend options do?With the blend options, you determine which lighter or darker areas of a layer are visible. This way, for example, you can take over only the light scratches of a texture without covering the original image.
Why is a layer rasterized when inverting?Inverting is a pixel-based operation. Affinity Photo therefore rasterizes vector or smart layers before performing the inversion. With a normal pixel layer, the notice does not appear.


