A subject in front of a new background only looks convincing if the edges are clean. Anyone who simply works with the eraser destroys image information that they will still need later. In this tutorial, I will show you how to select a person in Affinity with the Selection Brush, refine the selection, and cut them out using a layer mask. The original remains untouched in the process, and that is exactly what every composite is built on.
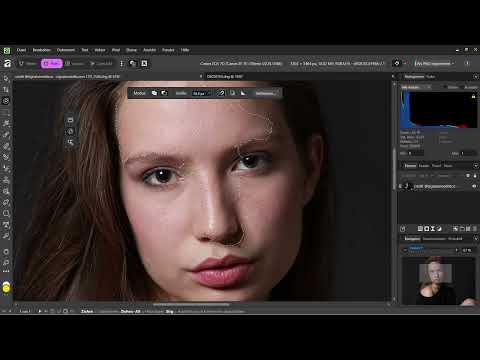
The video is only loaded from YouTube when you play it – data (including your IP address) is then transmitted to YouTube/Google. More in the privacy policy
Key Takeaways
- Cutting out means separating a subject from the background, not deleting the background.
- The Selection Brush works with the Add and Subtract modes, which you can quickly switch using the Alt key.
- In the Refine area, you control border width, smoothing, feathering, and expansion to avoid hard or jagged transitions.
- A layer mask makes the cutout non-destructive: you can turn it off or improve it at any time.
Step-by-Step Guide
Step 1: Activate the Selection Brush
You begin in Affinity's Pixel Persona. There you will find the selection tool, the so-called Selection Brush, with the shortcut W. Clicking the tool or pressing the key is enough. Compared to the erase tool, with the brush you only mark what you want to keep and do not change the pixels themselves.

Step 2: Prepare Machine Learning for Object Selection
Affinity also offers the Object Selection tool, which automatically recognizes subjects with the help of an AI model. For it to work, you first have to activate the model in the settings. To do this, open the settings, choose the Machine Learning section, and click Segment. Affinity then downloads the model, which can take about half a minute depending on your connection. In this lesson we use the brush, but the model is worthwhile later for quick preselections.

Step 3: Set the Brush Size and Make a Rough Selection
First, set the size in the brush's context toolbar. A large brush is suitable for the rough preselection because it lets you cover large areas quickly. Then, holding the mouse button down, roughly paint over the person. A single click only selects the area under the brush tip; the smaller the brush, the less is selected. Don't worry if the selection looks imprecise at first. The fine work follows in the next steps.

Step 4: Improve with Add and Subtract
As long as the mode is set to Add, all brush strokes are combined into one selection. If you switch to Subtract mode, you remove areas again that you didn't want to select, such as a part of the background that got caught while painting. You can work even faster if you hold down the Alt key in Add mode. Affinity then temporarily switches to Subtract, and you can keep painting normally and correct mistakes directly, without constantly switching tools.

Step 5: Snap to Edges and Select Generously
In the toolbar, activate the Snap to Edges option. It ensures that the brush follows contours and doesn't blindly paint beyond the boundary. After that, you paint over the person relatively generously, because anything that is selected too much can be trimmed back in the Refine dialog. In this example photo, the person's foot is cut off at the edge of the image, which makes the selection a little more difficult. As for the hair: it is a complex special case that we will look at more closely in the next lesson.

Step 6: Open the Selection in the Refine Area
Once the rough selection is in place, you click Refine. In this dialog you edit the selection without changing the image. You immediately see where too much is selected, for example in places that actually belong to the background. This is the key to a clean result, because the dialog gives you control over the transitions before you apply the selection.

Step 7: Fine-tuning Edge Width, Smoothing, Edge Sharpness, and Expansion
The edge width determines how far the refinement takes effect at the edge. With a higher value, the transition becomes softer; with a lower one, it stays sharper. Smoothing ensures gentle gradients. A high value produces very soft edges, but a value that is too high can blur details. The edge sharpness determines how strongly the edge remains defined, and the expansion determines how much of the surroundings is included in the selection. More expansion means more is picked up. In this example, you reduce the expansion so that the selection sits tightly around the person. Pay attention to the sweater, which must not be cut off. That is why you also lower the edge sharpness and smoothing a bit, until the transition looks coherent.

Step 8: Implementing the Cutout via a Layer Mask
After refining, you leave the dialog. The marching ants around the person show you the active selection. Instead of deleting pixels now, you create a mask in the layers panel. The icon for it is a white rectangle with a black circle. The background disappears immediately, while the original image remains fully preserved. If you turn the mask off, you see the complete photo again. Small leftover areas or unattractive edges can be touched up later directly on the mask with a brush in black or white.

Step 9: Deselecting and Checking the Result
When you are satisfied with the result, you deselect with Ctrl + D, on the Mac with Command + D. Otherwise, the selection outline remains and gets in the way of further work. Then check the cutout carefully: look at the edges, toggle the mask on and off, and check whether any dark remnants are still clinging to the edge. A clean cutout is the foundation for everything that follows, and that is exactly what you will build on in the next lessons.

Summary – Cutting Out in Affinity: Cleanly Separating Subjects from the Background
You have learned that for a clean cutout you do not work with the eraser, but mark the subject with the selection brush. With the Add and Subtract modes as well as the Alt key, you correct the selection flexibly. In the Refine dialog, you adjust edge width, smoothing, edge sharpness, and expansion until the transitions are right. You implement the cutout via a layer mask, so that the original image is preserved and you can make improvements at any time. Fine structures such as hair remain a challenge, which you will tackle in the next lesson.
FAQ
Why shouldn't I simply remove the background with the erase tool?Erasing permanently changes the pixels, while a mask leaves the image unchanged and can be adjusted at any time.
What is the Alt key used for with the selection brush?With the Alt key held down, the brush in Add mode temporarily switches to Subtract, so you can correct mistakes immediately without changing the tool.
Do I have to enable machine learning for the selection?It is required for the object selection, but not for the selection brush. However, the model helps with quick pre-selections.
What does expansion do in the Refine dialog?It determines how much of the area around the edge is included in the selection. A higher value picks up more, a lower one keeps the selection tighter around the person.
How do I deselect a selection?With Ctrl + D on Windows or Command + D on the Mac.

