
Imagine you are planning a project in MS Project, and a resource is supposed to work for two days. The program automatically distributes the working time evenly across these days. In practice, however, the working day often looks different: A new employee needs time to get up to speed, an intern can contribute more over the course of the week, and some tasks demand more effort toward the end. This is exactly where work contours come into play. With them, you control how a resource's working time is distributed over the task.
The video is only loaded from YouTube when you play it – data (including your IP address) is then transmitted to YouTube/Google. More in the privacy policy
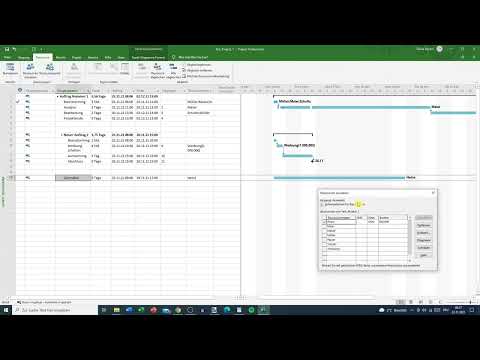
In this tutorial, you will learn using a practical example how to link a task to a resource, check the working time, and assign different work contours.
Key Takeaways
A work contour determines how a resource's working hours are distributed over the duration of a task. The default contour is flat, meaning even. In addition, back-loaded, front-loaded, double peak, bell, and turtle contours are available. For a resource to be taken into account at all, you must actually assign it in the Resource Usage view. Only then can work contours be applied meaningfully.
Step 1: Create a task and set the duration
First, create a new task. In the example, it is called "Paint task". Imagine you have to paint an office. Then think about how long the work is expected to take. In the tutorial, it is two days. Enter this duration in the "Duration" field so that MS Project can calculate the task's time frame.

Step 2: Create a resource
Before you can assign a person to the task, they must exist in the project. To do this, switch to the "Resource Sheet" view. There you create a new resource, in the example the employee Heinz. Enter a standard rate of €20 and an overtime rate of €30. This keeps costs and working time traceable later on.

Step 3: Assign the resource to the task
Then return to the Gantt chart. Select the task "Paint task" and open the "Assign Resources" function. Select Heinz there and click "Assign". The task now has a resource, and the duration of two days is calculated for this person.

In the Gantt chart, you can now see that the task runs from 25.11. to 26.11., each day from 8 a.m. to 5 p.m. This corresponds to two times eight hours of work, so sixteen hours in total.
Step 4: Check the working time in the standard calendar
The calculation is based on the project calendar. Under "Project", open the "Change Working Time" option to view the standard working time. There you can see that, according to the standard calendar, your resource works eight hours per day. This basis is important because all work contours build on it.

When planning, also consider whether the distribution is realistic. Nobody necessarily has to work eight hours each day for two days. Perhaps it makes more sense to spread the work over five days with fewer hours per day. What matters is whether the distribution fits the project goal. If the task must be completed after three days, a three-day distribution with a buffer is a good option. A period of five days would make no sense in this case.

Step 5: Remove disruptive summary tasks
In the example, there is still a summary task that disrupts the overview. Remove it from the task by outdenting it out of the structure. This makes the task independent, and the calculation of the working time remains clear.

Step 6: Check resource usage
In the View menu you will find the "Resource Usage" view. Here you see all resources with their tasks and can tell when and how much each person works. In the example, Heinz initially shows a total working time of 24 hours, distributed over several days.

Make sure the assignment was actually applied. If you click too quickly when assigning, sometimes no amounts appear, and the program has not recorded the person. In this case, you remove the assignment and assign the resource again. If amounts and hours are displayed, the assignment is correct.

Step 7: Split working time across three days
In the example, Heinz's 24 hours are distributed across three days of eight hours each. To do this, open the Resource Usage again and select the distribution for Heinz via the "Paint" option. Then right-click to open the assignment information.

Step 8: Define the work profile
In the dialog, under the "General" section, you will find the "Work Profile" field. By default, the "Flat" profile is selected here. This means that the working time is distributed evenly across all days. For three days, that is three times eight hours.

However, the profile can be adjusted. If you select "Back Loaded" and confirm with "OK", the workload increases toward the end of the task. In the Gantt chart, you can recognize this by the ascending symbol in the indicators column. The task now extends over five days. Heinz works one hour each on Thursday and Friday, three hours on Monday, five hours on Tuesday, and seven hours on Wednesday. This brings him to a total of 24 hours.
Step 9: Comparison of other work profiles
In addition to flat and back loaded, MS Project offers other profiles. The front loaded profile is the opposite of the back loaded profile. Here, the resource works more at the beginning than at the end.
The double peak profile distributes the work across several peaks. In the example, the work would even extend over six days, with very imprecise working hours. In such cases, check carefully whether the distribution makes sense.
The bell profile has its peak in the middle of the period. In the example, the peak would be on Monday, so the resource would have to work around 7.36 hours there. Here too, the question arises whether such a distribution is realistic.
The turtle profile is also an option. It distributes little work to the first and last day and more work to the middle days. Whether you need this shape depends heavily on the project.
Step 10: Using work profiles in practice
In practice, a flat work profile usually remains the best choice. Nevertheless, there are situations in which other profiles make sense. One example is the training period: A new employee or intern can accomplish less in the first days of a week and more and more over the course of the week. In this case, a rising, i.e. back loaded, profile is suitable. You enter this distribution using the Resource Usage.
Summary – Using work profiles in MS Project correctly
Work profiles help you distribute the working time of your resources realistically over a task. First you define the task, duration, and resource, check the standard calendar, and review the Resource Usage. Then you select the appropriate profile: flat for even work, back loaded or front loaded for uneven distributions, and double peak, bell, or turtle for special cases. Always choose the profile according to what your project actually requires.
FAQ
What is a work profile in MS Project?A work profile determines how the working hours of a resource are distributed over the duration of a task.
Which work profile is selected by default?By default, the "Flat" profile is selected, in which the working time is distributed evenly across all days.
What does a back loaded work profile mean?With a back loaded profile, the workload increases toward the end of the task, and the Gantt chart indicates this with an ascending symbol.
Why do no amounts sometimes appear after the assignment?Often the resource was not applied correctly. Remove the assignment and assign the resource again.
When is a turtle profile useful?A turtle profile is suitable when more work is to be done in the middle of the task than at the beginning and the end.
What is a front loaded profile used for?A front loaded profile fits when a resource is supposed to accomplish more at the start than toward the end of the task.


