
Not every company works on the schedule of 8 to 12 and 1 to 5 p.m. If your employees work with shifted breaks or a different weekly structure, for example, the default working times in MS Project should match, because only then will the calculations of your project plans be correct. This guide shows you how to define the working days in the standard calendar and set custom working times with individual breaks.
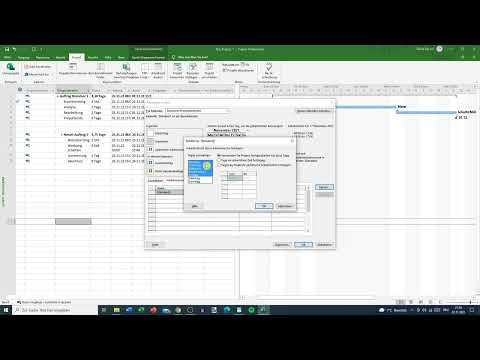
The video is only loaded from YouTube when you play it – data (including your IP address) is then transmitted to YouTube/Google. More in the privacy policy
Key Takeaways
- The change via "Change Working Time" affects the standard calendar and thus your standard work week, not just individual exceptions.
- In the work week details, you can select several days at once and assign the same times to all of them.
- For each day, five time columns are available, which you can also use to represent multiple breaks.
- The total number of hours does not have to be changed in order to adjust the distribution of working time.
Step-by-Step Guide
Open the working times in the project
In MS Project, start with the "Project" tab. There you will find the group with the project options, which contains the command "Change Working Time". Clicking it opens the dialog box in which all calendars are managed. Make sure you are not accidentally in the output area of an individual task, otherwise you will be editing the wrong calendar.

Select the standard calendar
In the dialog box you will see a list of the available calendars. Be sure to select the "Standard" entry here. It forms the basis for all tasks and resources that do not have their own calendar. If you edit a different calendar at this point, your changes will not apply to the entire project, which is why this step is particularly important.
Distinguish between exceptions and work weeks
In the standard calendar, two areas are available to you: the exceptions and the work weeks. Exceptions apply only to specific days or periods, such as a public holiday or a bridge day. Since you want to adjust the general working time here, you need the work weeks. So click the "Work Weeks" tab in the lower area and not on an exception, otherwise you would only change a single date.
Open the details area
Clicking "Details" on the right-hand side shows you the individual weekdays from Monday to Sunday. Here you can see for each day which working times are currently stored. The default values appear light gray: Monday through Friday are each set from 8 a.m. to 12 p.m. and from 1 p.m. to 5 p.m., while Sunday contains no working time because it is defined as a nonworking day.

Select multiple working days at once
You do not have to edit each day individually. Click on Monday, hold down the mouse button, and drag the pointer down to Friday. All selected days will then be edited together. Alternatively, you can hold down the Ctrl key and click the desired days one after the other. This is particularly handy if your work week is not contiguous, for example if Wednesday is supposed to be a day off.
Define the working days
Suppose your work week covers Monday through Friday. Then you select these five days. If, on the other hand, you work from Tuesday to Saturday and have Sunday and Monday off, you must explicitly set Monday as a nonworking day. This can also be done with one click when you choose the corresponding option for nonworking days. Make sure that your selection contains only the days that are actually worked.
Enter specific working times
Once the days are selected, you activate the option for specific working times. This takes you away from the default values of 8 to 12 and 1 to 5 p.m. and lets you define your own time slots. Each day offers five free columns in which you can enter the start and end of individual work blocks. This is the key place where you freely design your work structure.
Define the first work block
Begin in the first column with the start time, for example 8 a.m. Then enter the end, such as 10 a.m. or 10:30 a.m. You can type the time directly without having to look it up in a selection menu. It is important that you write the time format consistently so that MS Project interprets the values correctly.
Represent breaks as separate time blocks
Working time does not have to run in a single block. Instead of a one-hour lunch break, you can schedule two shorter breaks of 30 minutes each. One possible structure looks like this: The first block runs from 8 to 10 a.m., the second from 10:30 a.m. to 1 p.m., and the third from 1:30 p.m. to 5 p.m. The total still comes to around eight hours per day and 40 hours per week with five working days. So it is not the total working time that changes, but its distribution over the day.
Check the entries
Before you close the dialog, you should check all days. To do this, click on each weekday individually and verify that the correct time slots are entered and that the days off actually contain no working time. In the weekly overview area, the display is updated after every change. There you can immediately see whether the new values have been applied and whether the default working times are no longer set to 8 to 12 and 1 to 5 p.m.
Confirm the changes
Close the dialog box with "OK". The new working times now apply to the standard calendar. Tasks that use this calendar will be scheduled based on the new times. If you have resources or tasks with their own calendars, check their settings separately, because they are not automatically overwritten by the change in the standard calendar.

Summary – Adjusting standard working times in MS Project
You have learned how to edit the standard working times in MS Project via "Change Working Time" in the standard calendar. You select the working days via the work weeks, mark them by dragging or with Ctrl, define specific working times, and can thus integrate breaks into the daily routine in a targeted way. This way, your project plan matches the actual work organization of your company.
FAQ
Do I have to make the change for each day individually?No, you can select multiple days at once by dragging with the mouse or by holding down the Ctrl key and clicking the days.
Can I set a day as a non-working day?Yes, select the day and set it as a non-working day, then no working times will be taken into account for it.
What is the difference between exceptions and work weeks?Exceptions only apply to specific days or periods, while work weeks define the regular standard working time for every week.
Can I define more than one work block per day?Yes, five columns are available for each day, so you can, for example, map several short breaks instead of one long lunch break.
Does the total working time change if I distribute the breaks?Not necessarily. If you arrange the blocks so that the total stays the same, for example eight hours per day, the weekly working time also remains unchanged.
Do the changes also apply to existing projects?The changes affect the standard calendar. Tasks and resources that use this calendar will be rescheduled accordingly. Custom calendars must be checked separately.
Why do I still see the old times after the change?Check whether you edited the correct calendar and whether you confirmed the changes with "OK". Also check whether you worked in the standard calendar and not in an exception.


