
A project plan without resources only shows what has to be done, but not who does it or what it costs. This is exactly where this tutorial comes in. You will learn how to create people and materials as resources in MS Project, define their costs and capacities, and then assign them to the individual tasks. At the end, you will also know how to correctly interpret the warnings from MS Project.
The video is only loaded from YouTube when you play it – data (including your IP address) is then transmitted to YouTube/Google. More in the privacy policy
Key Takeaways
Key Takeaways
- Resources are either work resources (people) or material resources (consumables such as metal or paper).
- You can reach the resource sheet via the View menu or the view bar.
- With initials, max. units, standard rate, and overtime rate, you define a person's capacities and costs.
- Materials receive a standard rate per unit of quantity; machines can additionally be given a cost per use.
- You assign resources via "Assign Resources"; you select multiple people by holding down the Ctrl key.
- Warnings show you when the effort and costs unintentionally increase due to multiple resources.
Step-by-Step Guide
Step 1: Switch to the Resource Sheet
Your project is still quite empty in the network diagram, which is because no resources exist yet. To change that, switch to the "Resource Sheet" view. To do this, you can go to "View" in the menu on the left and select the resource sheet there. Alternatively, you open the view bar and select the resource sheet directly there. Both ways lead to the same result, so you can choose the variant that suits you better.

The resource sheet looks very similar to the task sheet, but contains columns for people and materials. Here you enter all the resources that will later work or be consumed in your project.

Step 2: Create Work Resources
Next, you enter your people, such as Meyer, Müller, and Schulz. Each person gets a row in the "Resource Name" column. The type "Work" specifies that it is a person who invests time. In contrast, there are the types "Material" and "Cost", which you will need later.
In addition to the name, you can assign initials, which appear as a short form in bars and views. You also define the max. units. It indicates what percentage of a person's working time is available to the project. For example, if Meyer can only contribute 80% of his time, you enter 80% there. Then MS Project will later not be able to assign him more than 80%.
Step 3: Define Hourly Rates and Overtime
So that MS Project can calculate the costs, each person needs a standard hourly rate. In your example, Meyer has €30, Müller €40, and Schulz €20 per hour. You enter these values in the "Standard Rate" column.
You can likewise store an overtime rate. For the example, €40 for Meyer, €50 for Müller, and €30 for Schulz per hour fit. As soon as overtime occurs, the program automatically calculates with this higher rate.
Step 4: Create Machines and Materials
Not every resource is a person. When you create a machine or a material, you select the entry "Material" in the "Type" column. So for metal and paper, you create a separate row each. For machines, you can additionally enter a fixed amount in the "Cost/Use" field, which is incurred regardless of the duration of use.
For materials, you enter the standard rate per unit of quantity. For metal, for example, you could set €100 per unit, for paper €2. You write the unit label directly in the "Material Label" column. Metal is specified there in kilos, for example, paper perhaps in grams, depending on how you calculate the price per kilo. Incidentally, a price of €2 per kilo for paper seems more realistic than a price per unit with no reference.
You normally do not need cost per use for materials. It is intended primarily for machines or fixed costs.
Step 5: Define the Resource Calendar
For people, the calendar is also important. Here you decide whether a resource works according to a standard calendar or, for example, in 24-hour operation or night shifts. For this tutorial, you leave the setting on "Standard". We will look at the calendar itself in more detail later.
Step 6: Assign resources to a task
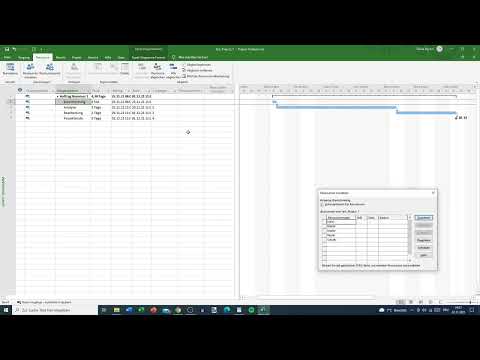
Now switch back to the "Gantt Chart" view. Click on a task there, for example "Brainstorming". Then open the "Task" section in the ribbon at the top and click on "Assign Resources". A window opens in which all available resources are listed.

Step 7: Assign several people at the same time
If several people are working on a task, you select them together. To do this, hold down the Ctrl key and click on the desired people with the left mouse button, for example Meyer and Müller. Then click on "Assign". Afterwards, you can close the window.

In the example, Meyer takes on the analysis. Schulz is intended for the processing. If you assign a person you forgot earlier, simply select them afterwards and click on "Assign" again. If no one appears in the window even though you made an assignment, repeat the process. This can certainly happen during operation.

Step 8: Interpret warning messages correctly
As soon as you have assigned Meyer, Müller and Schulz to the brainstorming, you will see an exclamation mark. This is not an error, but a notice. The units are each at 100%, and the three people each work three hours. The costs are therefore €90 for Meyer, €120 for Müller and €60 for Schulz. MS Project draws your attention to this because triple personnel costs are incurred. If the collaboration is intended, you can ignore the notice or remove the exclamation mark at the end.

Step 9: Check assignments and save
Finally, you check the assignments. In the example, Müller obviously only participates in the brainstorming, Meyer takes on the analysis and Schulz the processing. As soon as all people are entered correctly, the warning icon also disappears. Then save your work using the icon at the top left so that all changes are secured. Afterwards, you can continue with the next step.
Summary – Creating and assigning resources in MS Project
You have learned how to create people and materials in the resource sheet, set abbreviations, maximum units and hourly rates, and select calendars. You then assigned resources to tasks via "Assign Resources", selected several people at the same time and interpreted the warning messages about effort and costs. With these basics, your project plan is ready for the next steps, in which you will look at costs and calendars in more detail.
FAQ
How do I switch to the resource sheet in MS Project?You select the resource sheet in the "View" menu or open the view bar and select it there.
What is the difference between the types Work and Material?Work stands for people who invest time and are paid according to hourly rates. Material stands for consumables that are calculated using a standard rate per unit of quantity.
What is the maximum unit for?It determines what percentage of a person's working time is available for the project at most. At 80%, MS Project cannot assign them more than 80% utilization.
How do I assign a task to several people at the same time?Hold down the Ctrl key while selecting, click on all desired people with the left mouse button and confirm with "Assign".
Why does MS Project display an exclamation mark?The icon warns you about unusual assignments, for example when several people are entered for the same number of hours and higher costs are incurred as a result. If this is intended, you can ignore it.
Can I enter fixed costs for machines?Yes, in the "Cost Accrual" section you enter a fixed amount that is incurred regardless of the duration of use.


