
Imagine you have to renovate a bathroom, a kitchen and a living room at the same time, with multiple trades, limited people and a fixed deadline. That is exactly what MS Project is suited for. In this tutorial, I will guide you through a house renovation using a small practice project: from the first task to the finished project end.
The video is only loaded from YouTube when you play it – data (including your IP address) is then transmitted to YouTube/Google. More in the privacy policy
Introduction
Many beginners fail not because of how to operate MS Project, but because of the order of steps. If you first create resources, then set durations and only at the end set the dependencies, you keep the overview. I follow exactly this order in this practice project as well. You don't need any prior knowledge, just an installed copy of MS Project and about half an hour of time.
Key Takeaways
You create resources (people and materials) before you schedule the tasks. Tasks are structured via durations and outline levels. Links ensure that tasks run in the right order and in parallel. You mark milestones with a duration of zero. Save regularly, and use templates for recurring projects.
Step-by-Step Guide
Step 1: Check the project information
Open a new project and start with the project information under "Project". Check whether the start date and the current date are correct. If the details are right, you can get started. Leave the tasks in "Auto Scheduled" mode for now until you have set up the basic structure, and then switch them to "Manually Scheduled". This way you can set durations without MS Project immediately shifting the plan.

Step 2: Create people in the resource sheet
Now switch to the resource sheet. Nothing can be planned without people, so you first enter all participants. In this project, these are the painters Müller and Meyer, the craftsmen Sebastian and Seifer, and a project manager. All people belong to the category "Work". If you later involve teams from other departments, you create them in the same way.

Step 3: Record materials as cost resources
Besides people, you can also create materials and equipment. For this, choose the resource type "Material". Enter a standard rate, in our example 1,000 euros for a lump-sum item, as well as wood at 200 euros, paper at 20 euros and equipment at 5,000 euros. Also enter the unit of measure, such as kilograms or pieces, so that it is clear later what is meant. The costs per use can thus be traced at any time.

Step 4: Create tasks for the living room
Now it gets concrete. Start in the Gantt view with the living room. The category "Living room" serves as the summary task and initially receives no duration of its own. Below it, you create the individual steps: clearing out, window removal, removing the heating, painting, reinstalling the heating and finally moving back in or the finished furnishing.

Step 5: Set durations
Now enter the duration for each task. You can specify hours or days. A value of four hours corresponds to about 0.5 days if you assume a working day of eight hours. Clearing out takes 0.5 days in our example, window removal also 0.5 days, painting one day, and the heating installation also about one day. The milestone "Living room finished" receives a duration of zero. A milestone marks a point in time at which a section is completed and requires no working time.
Step 6: Structure the tasks
To keep the overview, you indent the individual tasks under the living room. To do this, select the tasks and use the indent button. The category "Living room" can then be collapsed. This way you can see at a glance which tasks belong to which room, and the project structure becomes much clearer.

Step 7: Build up the kitchen as a second area
The kitchen follows the same pattern as the living room. Create a new category "Kitchen" and enter the steps below it: clearing out the kitchen, window removal, heating removal, painting work, heating installation, moving back in and "Kitchen finished" as a milestone. Make sure the tasks are in the right order. In the end, your plan should be structured the same way for both rooms.
Step 8: Assign resources
Now select a task, open the "Assign Resources" window via the "Resource" tab, and choose the appropriate person. For example, Müller is responsible for clearing out, and Meyer for painting. The window removal can be handled by Seifer, and the heating removal by Sebastian. If a task has to be handled by several people, you assign both. If you forgot a resource, you can add it at any time.

Step 9: Enter hourly rates
So that MS Project can calculate the costs, you need hourly rates. To do this, open the resource sheet and enter a rate for each person. In our example, the tradespeople earn between 20 and 30 euros per hour, and the project manager receives 50 euros. You can also set overtime rates. Once the rates are entered, the program shows you the total costs of the project.

Step 10: Save the project
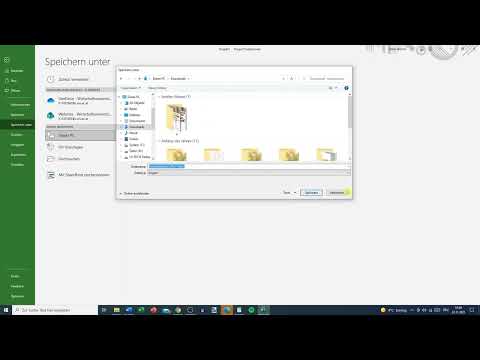
Save your project right after the first steps, not only at the end. Give it a clear name, such as "Project Example House Renovation". When you work with MS Project, this routine is worthwhile, because a crash or an unintended change would otherwise cost a lot of time.

Step 11: Check assignments in the Gantt view
In the Gantt view, you can now see which person is taking on which task. Via the "Resource Names" column, the assignments can be read directly. There it becomes visible, for example, that Müller is taking on the window removal, while the heating removal lies with Sebastian. Check the assignments carefully before you continue. Errors are quickly noticed here.

Step 12: Set durations for the kitchen and set the project end
Proceed with the kitchen as with the living room. Clearing out and window removal each take 0.5 days, the heating removal one day, the painting work also one day, and moving things back in 0.5 days. "Kitchen finished" again gets a duration of zero. At the end, you also set the milestone "Project end" to zero. The task "Finish up construction site" gets a duration of one. Make sure that this task does not automatically switch to "Manually Scheduled" after the change, because otherwise it is not correctly linked to the rest.

Step 13: Link tasks to each other
Now you bring logic into the plan. Select the tasks that have to take place in a fixed order and link them. The task "Finish up construction site," for example, depends on the milestones "Living room finished" and "Kitchen finished." The link ensures that changes in one place are automatically reflected in the rest of the plan.

Step 14: Coordinate parallel work
The living room and kitchen run in parallel in this example. This means that both rooms should be finished at the same time so that the construction site can subsequently be cleared together. For the cleanup, you assign Sebastian and Seifer together, while for moving things back in, only the tradesman Sebastian is scheduled. This makes it visible where personnel are tied up and where there are bottlenecks.

Step 15: Plan in a buffer
The plan shows that the kitchen is finished somewhat earlier than the living room. To bring both areas to the same end time, you can insert a buffer by entering an additional duration of 0.5 days for a task. After that, both strands end on the same day at 5 p.m., and the project winds down cleanly.

Step 16: Use templates and think ahead
Once you have set up a project cleanly, it is worth saving it as a template. The same structure is suitable for marketing plans, startup projects, or other undertakings with multiple phases. Think about which parts of your business or your everyday life can be mapped in this way. With MS Project, significantly larger and longer projects can also be carried out once you have mastered the basics.

Summary – Planning a House Renovation in MS Project: Step-by-Step Guide
You have planned a complete practice project: you created people and materials as resources, structured tasks for the living room and kitchen, defined durations and milestones, entered assignments and hourly rates, and linked everything together. If you stick to this sequence, you will quickly keep an overview even with larger projects.
FAQ
Do I have to create resources before I plan tasks?Yes, it makes sense. Resources such as people and materials can then be assigned directly to tasks, and you can see right away whether staff is missing.
What is a milestone in MS Project?A milestone marks an important point in time, such as the completion of a room. It is given a duration of zero because it does not require any working time of its own.
Why should I change the "Auto Scheduled" mode?In automatic mode, MS Project moves tasks on its own as soon as other values change. In manual mode, you stay in control of the dates until the plan is finalized.
How does MS Project calculate costs?The program multiplies the hourly rate of a person or the price of a material by the usage. The total costs of the project result from these values.
Can I save a plan as a template?Yes. A saved template is suitable for similar projects, such as marketing plans or further renovations, and saves you a lot of work next time.


