

A VPN server of your own needs a place where it can be reached around the clock. That is exactly what this guide is about. You will learn how to rent a small Linux server on the internet, start it, and log in via SSH for the first time. This guide is intended for you if you do not want to run your OpenVPN server locally in a virtual machine. If you have already decided on a Virtual Box or your own Linux computer, you can skip this section.
The video is only loaded from YouTube when you play it – data (including your IP address) is then transmitted to YouTube/Google. More in the privacy policy
The provider Digital Ocean serves as an example. It is one of the large cloud providers from the USA, offers small servers from just a few dollars a month, and has a helpful community. I will also introduce a few alternatives so that you can find the right solution for your budget and your location.
Key Takeaways
- A small server at Digital Ocean costs from 5 dollars a month. Since billing is hourly, you only pay fractions of a cent for short tests.
- The location of the data center affects latency. Choose a location as close as possible to you or to the users who will connect later.
- The prebuilt Ubuntu version saves you the entire system installation.
- At the first SSH login, you must immediately replace the password from the email with one of your own.
- After the first login, you should install updates, run the dist-upgrade, and restart the server.
Step-by-Step Guide
Step 1: Choose a Provider and Compare Prices
Start by taking a look at the provider's price overview. Digital Ocean offers a small server from 5 dollars a month. This plan includes 512 MB of RAM, one CPU, 20 GB of SSD storage, and 1 TB of data transfer. For our OpenVPN server, that is completely sufficient. If you would like to look around first, it is worth checking the link in the accompanying documentation, because there you will also find vouchers for new customers.

An important advantage is the hourly billing. The smallest server costs about 0.007 dollars per hour. If you are just trying out how to find your way around Linux, it costs you practically nothing. If something does not work as desired, you simply delete the server, create a new one, and start over.


Besides Digital Ocean, there are other providers. A Slovenian provider offers virtual servers with KVM from about one euro a month. A German provider is somewhat more expensive, from around 3 euros a month, and offers powerful KVM servers with more RAM. With KVM servers, as with Digital Ocean, you can install your own Linux packages and configure the system freely. With all providers, make sure that you get root access to the Linux system.
Step 2: Check Data Centers and Their Locations
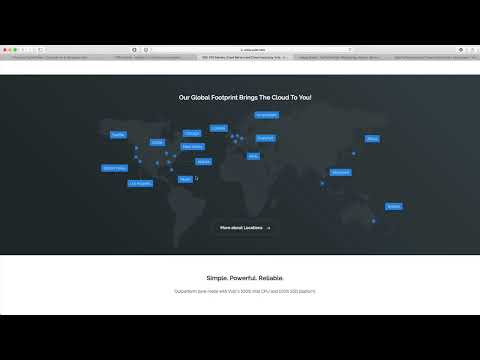
Digital Ocean operates data centers all over the world. On the home page, under the item "Global Footprint", you will find an overview of all locations. This overview helps you decide where your server should be located. A server in Singapore or Sydney is noticeably slower for users in Europe, because the data packets have to travel a long way. If you choose a European location instead, the response times are significantly shorter.

Step 3: Create a Droplet
At Digital Ocean, the server instances are called Droplets. After logging in, you will first see an almost empty interface. Click the "Create Droplet" button to create a new server. Then you choose the operating system.

You do not have to install the Linux system yourself. Digital Ocean provides ready-made images. Choose an Ubuntu version. In the video, Ubuntu 16.04 is used, the Long-Term Support version. It receives security updates over a long period and is therefore well suited for a server that is supposed to run permanently.

Step 4: Set the Plan and Datacenter
In the next step, you choose the cheapest plan with 512 MB of RAM and 20 GB of SSD. This plan is sufficient for a simple VPN server. Then you determine the datacenter. In the video, the choice falls on Amsterdam, because the server gets a Dutch IP address there. The choice of location is a matter of latency, and Amsterdam is easily reachable from Central Europe.

You can leave the remaining options empty for now. Optionally, you can add an SSH key, which makes logging in more secure later. For this guide, logging in with a password is sufficient. Then assign a hostname, for example "VPN-Server". The name doesn't matter much technically, but it helps you quickly find the server in the overview.

Click "Create" to start the server.
Step 5: Take the Login Details from the Email
After creation, it takes a few minutes until the server is ready. Digital Ocean sends the login details by email to the address you registered with. The email contains the server's IP address, the username "root" and a temporary password. Keep this data handy, as you will need it for the next steps.
Step 6: Connect with an SSH Client
To log in to the server, you need an SSH client. On Windows, the program PuTTY is a simple and proven choice. Just enter the IP address there and confirm with "Open".
On macOS or Linux, you use the Terminal. On the Mac, you start it via Spotlight search. To do this, press Command and the space bar, type "Terminal" and confirm with the Enter key. In the Terminal, you connect with the command ssh root@IP-Adresse, entering the IP address from the email.
Step 7: Confirm the First Login
When you connect for the first time, a security prompt appears regarding the server's fingerprint. This key uniquely identifies the server. Confirm the prompt with "yes". The system then asks for the password from the email. Copy it carefully and paste it in, because you will not see any characters when entering it.

Step 8: Replace the Temporary Password with Your Own
Right after the first login, the system prompts you to change the password. First, enter the old password from the email again. Then you set a new, secure password and confirm it. Write it down in a safe place, because you will need it for every further access to the server.
After the change, you are on the server in Amsterdam.
Step 9: Check the Server's IP Address
With the command ifconfig, you can display the server's network settings. There you will find the public IP address. You will need this address later so that your VPN clients can find the server. You can also use an IP lookup service to verify that the address actually belongs to Digital Ocean in the Netherlands.
Step 10: Apply Updates and the Dist-Upgrade
Before you continue, the system should be up to date. First run apt update. Then you install the available updates with apt upgrade. This is followed by the dist-upgrade with apt dist-upgrade, which also updates packages with dependencies. Confirm the prompts with "y" as soon as the terminal asks for it.

The advantage of a prebuilt image shows here: The basic installation is already set up, so you save a lot of time compared to an installation in Virtual Box.

Step 11: Restart the Server
So that all changes take effect, you restart the server with the command reboot. The SSH connection is disconnected in the process. Wait about a minute and then log in again. If no further updates are displayed, the server is ready for configuration. In the next step, you will preconfigure your Ubuntu system so that it can form the foundation for the OpenVPN server.
Summary ??? Renting an OpenVPN Server: Step-by-Step Guide for Digital Ocean
You have learned how to rent an inexpensive server at Digital Ocean, choose the data center and create an Ubuntu droplet. You then logged in via SSH with PuTTY or the Terminal, changed your password and updated the system. This lays the foundation for your OpenVPN server. The next step is about specifically preconfiguring the Ubuntu system for VPN operation.
FAQ
How much does a server at Digital Ocean cost?The smallest server costs from 5 dollars per month and is billed hourly, so about 0.007 dollars per hour.
Can I delete the server again after the test?Yes, you can delete the server at any time. With hourly billing, you only pay for the time it is actually running.
Which operating system do I need?The guide uses Ubuntu 16.04 LTS, a long-term support version with long-term security updates.
Which password do I use for the first login?The password is in the email from Digital Ocean. Right after that, you have to replace it with one of your own.
Which SSH client do I use on Windows?On Windows, the PuTTY program is suitable. You enter the server's IP address and connect with the user root.
Which location should I choose?Choose a data center close to the users who will connect later. This noticeably reduces latency.
Why should I run updates and the dist-upgrade?Updates close known security vulnerabilities and ensure that all packages are up to date.

