

Without a clean server configuration, your OpenVPN setup remains a piece of theory. In this lesson, you make sure that your server finds the right keys, receives the appropriate basic configuration, and secures the connection via TLS. You first copy the generated certificate and key files into the /etc/openvpn directory, then take over a sample configuration and adapt it to your environment. In doing so, you decide on the port and protocol, encryption and authentication, and whether all traffic runs through the tunnel. In the end, you will have a working server file and a clear overview of the most important adjustable settings.
The video is only loaded from YouTube when you play it – data (including your IP address) is then transmitted to YouTube/Google. More in the privacy policy
Key Takeaways
- The certificate and key files (CA, server certificate, server key, TLS key, and Diffie-Hellman parameters) must be located in the
/etc/openvpndirectory so that the server can find them. - A sample configuration supplied with OpenVPN from
/usr/share/doc/openvpn/examples/sample-config-files/serves as the starting point, which you only need to adapt. - Port and protocol determine how the traffic behaves: UDP on port 1194 is the standard, while TCP on port 443 can make the traffic look less conspicuous.
- TLS authentication with a
ta.keyadditionally protects the server from unwanted connection attempts. - Encryption methods such as AES-128-CBC and authentication with SHA256 are currently considered secure.
- With
redirect-gateway, you route all of the clients' traffic through the tunnel, and with DNS entries you specify which name resolution is used. - The file names in the configuration must match the files that were actually generated.
Step-by-Step Guide
Step 1: Copy key files to the OpenVPN directory
First, switch to the directory where your generated keys are located, usually the keys folder within your Easy-RSA directory. There you need five files: the certificate authority's certificate (ca.crt), the server certificate (server.crt), the server key (server.key), the TLS key (ta.key), and the Diffie-Hellman file (often dh2048.pem). Copy them to /etc/openvpn/ with sudo cp. Since this directory requires system privileges, you confirm the command with the password of your current user. Make sure the names match exactly, because you will need to find them again later in the configuration file.

Step 2: Check the result in the target directory
Next, you switch to the target directory with cd /etc/openvpn and display its contents with ls. The keys and certificates should now all be present there. If a file is missing, copy it over at this point before continuing. A check at this stage saves you tedious troubleshooting later, when the service aborts at startup with a message about missing files.

Step 3: Provide the sample server configuration
OpenVPN ships a compressed sample configuration in /usr/share/doc/openvpn/examples/sample-config-files/ that is suitable as a solid foundation. The file server.conf.gz is compressed, which is why you can read it with zcat. You pass the output through a pipe to sudo tee, which saves the data as /etc/openvpn/server.conf. This way, you avoid the need to first unpack the file and then move it.
Step 4: Verify that the configuration file was written successfully
Once the command has finished, the file server.conf is located in the /etc/openvpn directory. You can check this again with ls or open the file directly in the next step. Alternatively, you can unpack the file with gunzip and then move it, if you are more familiar with that method. What matters is that in the end you have a readable file named server.conf, because this is exactly what the OpenVPN service loads at startup.

Step 5: Open the configuration file in the editor
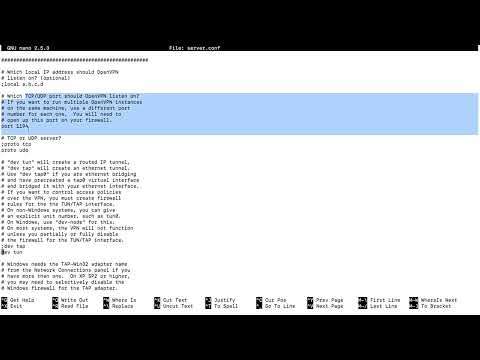
Now open the file with sudo nano /etc/openvpn/server.conf. Since the sample configuration is very extensively commented, you will find an explanation for every setting right in the text. Comment lines begin with a semicolon or a hash sign, and these are exactly the characters you will remove later for the settings you want to activate. Feel free to take your time reading the explanations, as this will help you better understand why you choose which option.

Step 6: Set the port and protocol
The proto and port settings determine how and via which route traffic reaches the server. The default is UDP on port 1194, which can be used without any trouble in most cases. Alternatively, you can choose port 443 with TCP, since the traffic then looks more like ordinary HTTPS traffic and is less often blocked in restrictive networks. Which option you use depends on your network. To help you decide, feel free to reread the basics of TCP and UDP, because the differences affect the speed and reliability of the connection.

Step 7: Enable TLS authentication
So that the server uses the TLS key, look in the file for the tls-auth entry. With Ctrl + W you open nano's search function. Remove the semicolon in front of the line and add ta.key at the end, as well as the parameter 0, which defines the role of the server. The line should then look something like this: tls-auth ta.key 0. Through this additional check, the server rejects connections that cannot present a matching key, before a certificate is even exchanged.

Step 8: Determine the key direction
Directly below the TLS line, you use key-direction 0 to specify in which direction the keys are used. This value must match the configuration on the client side. With the value 0, you force the server to use the key in a defined direction, which avoids mix-ups. On the client side, you then use the complementary value 1.
Step 9: Select the encryption method
The cipher option determines the encryption method of the tunnel. The sample configuration usually uses an older standard, so you set the line to cipher AES-128-CBC. This method is currently considered secure and offers a good balance of security and speed. Stronger key lengths such as AES-256 are also possible, but they cost somewhat more processing power. The higher the encryption level, the slower the connection can become, so you should make a conscious choice.
Step 10: Define the authentication method
Next, add the line auth SHA256 to define how messages are authenticated. SHA256 is a reliable choice, and SHA512 would also be possible if you want additional security. Make sure the line does not appear twice. If an auth entry already exists, replace its value instead of adding a second line.
Step 11: Set the user and group for the service
So that the OpenVPN process does not run with full privileges after startup, you define a restricted user. To do this, search for user and group. The sample configuration already contains the values nobody. Remove the semicolons in front of the lines so that the options become active. Through this separation, you limit the damage a compromised service could cause in the event of a failure.
Step 12: Route all traffic through the tunnel
If you want the clients' entire internet traffic to run through the VPN server, you activate the line push "redirect-gateway def1 bypass-dhcp". Search for it with Ctrl + W and remove the semicolon at the beginning of the line. The option ensures that the client switches its default gateway to the tunnel. The additional option bypass-dhcp prevents problems with DHCP communication. This setting makes sense if you want to achieve privacy and uniform network paths, but it affects all of the client's connections.

Step 13: Set the DNS servers for the clients
In this same section you will also find the entries push "dhcp-option DNS ...". Here, too, you remove the semicolon to activate the option. The sample configuration points to the OpenDNS DNS servers. If you want to use other resolvers, replace the IP addresses accordingly. This ensures that name resolution also runs through the tunnel and not through the client's local network.
Step 14: Save changes and check file names
Save the file with Ctrl + O and confirm the file name with Enter. With Ctrl + X you exit the editor. Then check in the /etc/openvpn directory whether the certificate files are named exactly as they appear in the configuration. For example, if the file is called server.crt and you named it differently, you must adjust the cert and key entries. Only when all names match is the configuration complete. The network settings on the server will then follow in the next lesson.

Summary ??? Configuring an OpenVPN Server: Step-by-Step Guide for Secure Connections
You have laid the foundation for your OpenVPN server. The required keys and certificates are located in the /etc/openvpn directory, and the sample configuration serves as a clean template. You have set the port and protocol, enabled TLS authentication, chosen encryption and authentication, and equipped the service with a restricted user. You have also decided whether all traffic runs through the tunnel and which DNS servers the clients use. Make sure that all file names in the configuration match the files that actually exist, because only then will the service start reliably. In the next step, you will take care of the network configuration.
FAQ
Why does the file have to be named exactly server.conf?By default, the OpenVPN service looks for the file server.conf in the /etc/openvpn directory at startup. You can only use a different name if you start the service with a correspondingly customized parameter.
What happens if I name the certificate files differently from what is specified in the configuration?OpenVPN aborts startup with an error message because it cannot find the specified file. In this case, adjust the cert, key, ca, and dh entries in the configuration to match the actual file names.
Should I use TCP or UDP?UDP is the default and offers better speed in most cases. TCP on port 443 is suitable if networks block UDP or if the traffic should appear less conspicuous. The decision therefore depends on your network environment.
Is AES-128-CBC really secure enough?According to current knowledge, AES-128-CBC is considered secure. If you are aiming for the highest level of security, you can switch to AES-256, but you will then have to expect slightly lower speed.
What does the redirect-gateway option do?It ensures that all of the client's internet traffic is routed through the VPN server. As a result, the connection appears from the outside as if it came from the server, which improves privacy and control.
Why do I have to remove the semicolon before a line?The semicolon marks a line as a comment, which OpenVPN ignores. Only when you remove it does the option become active and actually get evaluated.

