

Not every client that has been set up once is needed permanently. Maybe a notebook no longer belongs to you, maybe an employee has left the company. Then their access to the OpenVPN server should disappear, and not just in theory. A client certificate remains valid without further measures, even if you delete the associated files.
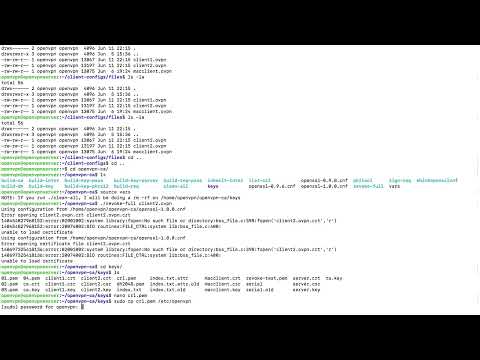
The video is only loaded from YouTube when you play it – data (including your IP address) is then transmitted to YouTube/Google. More in the privacy policy
In this tutorial, you will learn how to revoke a client certificate, generate a Certificate Revocation List (CRL), and configure the server so that it rejects revoked certificates. The steps assume an existing OpenVPN installation with an Easy-RSA certificate authority. The commands are intended for Linux systems with terminal access and sudo privileges.
Key Takeaways
- A client certificate can be revoked with the Easy-RSA command
revoke-full. - The revocation information is used to create the file
crl.pem, which the server needs for verification. - The file
crl.pemmust be copied to the directory/etc/openvpnand included in theserver.confviacrl-verify. - After each revocation, it is enough to regenerate the CRL, copy it, and restart the server. You only have to adjust the configuration once.
Step-by-Step Guide
Step 1: Clarify the Starting Point
Suppose you want to block the access of a Windows client that is no longer needed. The client should no longer be allowed to connect to the OpenVPN server, even if its configuration file is still on the device. This is exactly what the following steps are for. Note down beforehand the name of the certificate you want to revoke, for example client2. This name must exactly match the one with which the certificate was originally created.

Step 2: Change to the Easy-RSA Directory
Open your terminal and change to the folder where you set up OpenVPN. The certificate authority (CA), that is, the entity that issued your certificates, is also located there. All commands for revoking must be executed from this directory, since Easy-RSA finds its scripts and the certificate database there. Make sure you are not accidentally working in a different folder, otherwise the script will report an error later.

Step 3: Reload Variables
Before you revoke the certificate, you should reload the Easy-RSA environment variables. To do this, run the command source ./vars. This step ensures that the paths and settings of the certificate authority are up to date. After loading, the environment is ready for the revocation. If you forget the command, Easy-RSA may work with outdated values.

Step 4: Revoke the Certificate
Now comes the actual step. With the command ./easyrsa revoke-full client2 you revoke the certificate completely. The suffix full ensures that the certificate is not only marked as revoked, but permanently blocked for authentication. Replace client2 with the name of your own client. Confirm the input with Enter. Easy-RSA usually asks for confirmation, where you have to type yes. Pay particular attention to the name, because a misspelled certificate will not be revoked.
Step 5: Interpret the Error Message and Check the Revocation List
After the revocation, a message beginning with "unable to load" may appear in the terminal. Don't let that unsettle you. What matters is that Easy-RSA has generated the new file. This file is called crl.pem and contains the Certificate Revocation List, that is, the list of all revoked certificates. It is located in the folder keys. Change to it and check whether the file exists.
You do not need to open the contents of the file. It is a text document in PEM format that merely begins with a header line such as -----BEGIN X509 CRL-----. All that matters to you is that the file exists and is up to date.

Step 6: Copy the CRL to the OpenVPN Directory
The OpenVPN server does not read the revocation list from the Easy-RSA folder, but from /etc/openvpn. Therefore, you copy the file with the command sudo cp crl.pem /etc/openvpn/. The system will then ask you for your sudo password. Enter it and confirm with Enter. When typing the command, a typo can easily occur, as also happens in the video. If copying fails, check the spelling of the command and the path to the file before trying again.

Step 7: Open the server's configuration file
Now switch to the directory /etc/openvpn. There you will find the configuration file server.conf, which you can open with a text editor. Use the command sudo nano server.conf for this. Nano is a simple editor that runs in the terminal and is well suited for changes like this. You only have to perform this step once, because the change applies permanently to all future revocations.

Step 8: Enable the revocation list check in the configuration
Scroll all the way to the bottom of the file. There you add a new line that tells the server to check the revocation list. The line is crl-verify crl.pem. This entry causes the server to check on every connection attempt whether the client's certificate is on the list. Pay attention to the exact spelling, because a typo means the server will not recognize the option or will abort on restart.

Step 9: Save the changes
Save the file with the key combination Ctrl and O and confirm the file name with Enter. Then exit nano with Ctrl and X. Before leaving the editor, check once more that the line has been entered correctly. A clean configuration is the foundation for the server starting without errors on restart.
Step 10: Restart the OpenVPN server
For the server to take the new revocation list into account, you must restart it. Use the command sudo systemctl restart openvpn@server for this. On some distributions, the service name is openvpn-server@server. If in doubt, check this with systemctl list-units | grep openvpn. After the restart, the revocation list is included in the check, and the revoked client can no longer connect.
Step 11: Revoke additional clients
If you want to revoke additional clients later, the procedure is always the same. You run ./easyrsa revoke-full with the name of the client, copy the newly generated crl.pem to /etc/openvpn again, and restart the server. You do not have to repeat the change in server.conf, because the crl-verify entry remains in place. This way, with just a few commands, you keep control over which devices have access to your network.
Summary – Revoking an OpenVPN client's access: Revoke a certificate with CRL
With the revoke-full command, you permanently revoke a client certificate and generate an updated revocation list. You copy the file crl.pem to /etc/openvpn and include it in server.conf via crl-verify crl.pem. After restarting the server, it reliably rejects revoked clients. You only make the configuration change once. For every further revocation, the steps of revoking, copying, and restarting are enough.

