
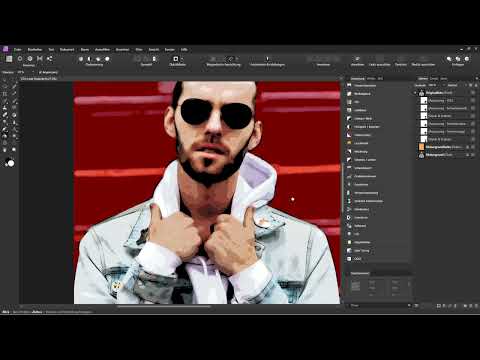
Imagine the person in your photo looks like a character from a video game, with bold outlines and a clearly defined background. That is exactly what Marco Kolditz demonstrates in this tutorial. After the colors of the original image have already been adjusted to the GTA look, there are now two steps: roughly cutting out the person and drawing comic-style outlines. Both can be done with the Paint Brush and the Quick Mask in Affinity Photo, and you don't need to work precisely for this.
The video is only loaded from YouTube when you play it – data (including your IP address) is then transmitted to YouTube/Google. More in the privacy policy
Key Takeaways
You don't have to work precisely when cutting out, because the messy edge will be covered by the outlines later anyway.
The Quick Mask is the fastest way to create a selection with the Paint Brush. White selects, black deselects the selection again.
Pressure sensitivity and stabilizer on the Paint Brush ensure smoother and softer strokes. Without a graphics tablet, the stabilizer is especially worthwhile.
From the selection you create a mask, with which you can hide the background without altering the original photo.
You draw the comic outlines on a separate pixel layer above the photo. This way you can make corrections at any time without damaging the image.
Outlines should be placed deliberately. Skin areas such as the face, mouth, nose, and ears generally remain free.
Step-by-Step Guide
Preparing the Original Photo Layer for the Mask
Start in the Layers panel on the right side. There you will find all the layers you have created in the project so far. Select the original photo layer, because the mask that removes the background will later sit on it. The selection is the starting point for everything that follows.

Switching to the Quick Mask
Press the Q key or click the Quick Mask icon in the toolbar at the top. You are then in mask mode. The image is covered with a red overlay, which means that nothing is selected at this point. With white paint, you paint the areas that should be kept later.
Setting Up the Paint Brush for the Selection
Select the Paint Brush in the toolbar and make sure white is set as the paint color. Paint once over an area of the person, exit the Quick Mask, and check the result. You will then see a selection with marching ants. With Control and D you deselect the selection again and can switch back to the Quick Mask.

Activating Pressure Sensitivity
If you are working with a pressure-sensitive graphics tablet, activate pressure sensitivity in the top toolbar. Make sure to activate this setting again after every restart of Affinity Photo. With more pressure the stroke becomes wider, with less pressure narrower. This makes painting more flexible, even if you don't necessarily need a tablet.
Adjusting the Stabilizer
The stabilizer smooths your brush strokes. Without it, the strokes quickly look shaky and jagged. Activate it in the top bar and adjust the length. In the video, a value of 19 is used, which makes the strokes noticeably softer. If you turn off the stabilizer, you immediately see how unsteady the lines can become. For the mask, a certain amount of smoothing is helpful, but if needed you can also reduce it again for fine areas.
Roughly Cutting Out the Person
Zoom in close to the person and set the hardness as well as the opacity of the brush to 100 percent. Then paint over the person with white. The marked areas appear in their original color, so you can see directly what is selected. Don't pay attention to details. You can also paint over the hair roughly, because an outline will be drawn over the edges later anyway.

Navigating and Correcting Mistakes
To navigate in the image, hold down the spacebar. The mouse pointer turns into a hand, with which you can move the image. If you have painted too far over the edge, activate the option in the preferences that lets you switch between colors with the X key. Then paint with black over the areas that should not belong to the selection. Afterwards, switch back to white to add further areas.


Roughly tracing the edge
Now trace along the outline of the person, at the bottom as well as at the top and on the left. You don't have to be precise here. What matters is that you capture the outlines in broad strokes. If you need more time for this step, feel free to take it. In the end, a rough delineation is enough.

Filling the areas with the Fill tool
You fill the areas inside the person with the Fill tool. Choose white as the color and click in the middle of the area. Make sure that your outline has no gaps. Otherwise, the white color will flow through the gap into the background. You can recognize areas that are not completely selected afterwards by fine lines. Simply paint over these once more.


Creating the mask
Exit the Quick Mask. You now see the selection of the person with the marching ants. Make sure the original photo layer is active and that the selection is still visible. In the Layers panel, click the mask icon at the bottom. This hides the background. Then deselect with Control and D. The background is now transparent and the cut-out person sits on the orange background you created at the beginning of the series.


You can view the mask by holding down the Alt key and clicking on the mask's thumbnail. Black areas are hidden, white areas are visible. Afterwards, click on the thumbnail of the original photo layer again to return to the normal image.

Creating a new pixel layer for the outlines
You need a separate layer for the outlines. To do this, click on the original photo layer and choose the icon for a new pixel layer in the Layers panel. The layer appears above the photo and is initially empty. On this layer, you draw the outlines without altering the original image.

Setting up the Paint Brush for the outlines
Choose the Paint Brush again and set black as the color. Opacity and hardness should be at 100 percent. Pressure sensitivity and stabilizer remain activated. You can adjust the stabilizer length to taste.

To quickly change the width and hardness of the brush, hold down the Alt key and the left and right mouse buttons at the same time. If you move the mouse to the right, the brush gets larger, to the left smaller. Upward it becomes softer, downward harder. In the video, Marco starts with a width of about 25 pixels. That was a bit too small for him, so he adjusted the width.
Drawing outlines over the edge
Now paint over the edge of the person. In doing so, you conceal the untidy cut-out from the previous step. You can vary the width of the brush in between. If a stroke is too heavy, undo it with Control and Z and start again. This way, the outlines can be built up step by step.
Placing outlines inside the image
Typical comic outlines don't appear only at the outer edge. Interior areas such as hands, sleeves, or clothing folds can also be emphasized with black lines. Decide from image to image where outlines make sense. If you place them everywhere, the image quickly looks overloaded. Concentrate on important shapes, such as hands, sleeves, or distinctive objects like a button.


Leaving Out the Skin Areas
On the face, mouth, nose, and ears, you should leave out the contours. This keeps the facial features legible and the person doesn't look distorted. In the video, Marco shows the before-and-after comparison. There you can clearly see that a messy cutout isn't a problem, because the edge is covered by the contours anyway.

Summary ??? Cutting Out a Person in the GTA Look and Drawing Comic Contours in Affinity Photo
You have learned how to create a rough selection of the person with the Quick Mask, turn it into a mask, and hide the background. Then, on a separate pixel layer, you drew comic contours by setting pressure sensitivity, stabilizer, and brush size appropriately. You place the contours deliberately along the edge and at important spots on the inside, while leaving out the skin. The next step covers the background and the final fine details of the image.
FAQ
Do I have to work precisely when cutting out?No, a rough selection is enough. The messy edges will be covered later by the comic contours.
How do I quickly switch to the Quick Mask?Press the Q key or click the Quick Mask icon in the top toolbar.
What does the color white mean when painting in the Quick Mask?White marks the areas that will be selected. Black deselects the affected areas again.
What is the stabilizer for?The stabilizer smooths the brush strokes and prevents shaky, jagged lines. Depending on the length, the strokes look softer.
Do I absolutely need a graphics tablet?No, a graphics tablet is not strictly necessary for cutting out and drawing. With a pressure-sensitive pen, however, you can control stroke thickness more flexibly.
How do I deselect a selection?Press Control and D to deselect.
How do I move the image while I'm working?Hold down the space bar. The mouse pointer turns into a hand, with which you can move the image.
Why should the contours be on a separate layer?This way the original photo stays unchanged, and you can correct or delete the contours at any time.
How do I change the brush size quickly?Hold down the Alt key and the left and right mouse buttons at the same time and move the mouse. Moving right makes the brush larger, moving left makes it smaller.
Why are the skin areas left without contours?This way the face, mouth, nose, and ears stay legible and the person looks more natural.


