
A picture in the GTA look only looks coherent when the background carries the atmosphere. With a stylized palm motif, bold coloring, and a few targeted filters, you bring out the comic look in your image composition. This tutorial guides you step by step through the process in Affinity Photo, from placing the palms to the final noise.
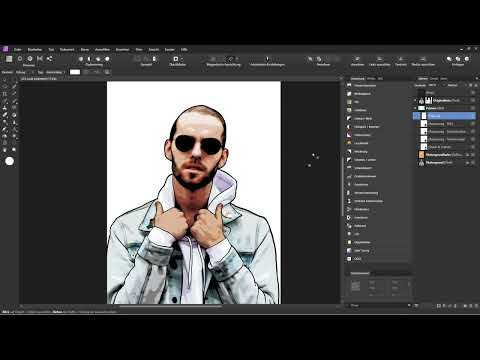
The video is only loaded from YouTube when you play it – data (including your IP address) is then transmitted to YouTube/Google. More in the privacy policy
This tutorial assumes that you already have a portrait or composite with an original layer open in Affinity Photo. The techniques from earlier trainings, such as posterize and gradation curves, are used again here.
Key Takeaways
- A background motif such as palms can be inserted directly into Affinity Photo from the file manager via drag-and-drop and scaled freely.
- Filter layers such as Dust and Scratches, Posterize, or Noise only have a targeted effect if you attach them as a clipping mask to the respective layer.
- With fill layers, color saturation, and the blend mode "Linear Light," you color the background intensely.
- A copy of the color layer above the original transfers the hue to the foreground and ensures harmony.
- With reduced opacity and subtle noise over the entire image, all elements blend together.
Step-by-Step Tutorial
Insert Palms as a Background Layer
In the file manager, select your palm motif and drag it into Affinity Photo via drag-and-drop. Release the file, and the motif is placed as a new layer. Then zoom out a bit so that you have the entire workspace in view. Drag the new layer directly below your original photo so that it is only visible in the background.

When placing it, make sure that the blue alignment bar remains continuous. This is how you can tell that the layer is cleanly aligned with the image.

Adjust the Size and Position of the Palms
Using the object's handles, you can enlarge or shrink the palms. Drag the corners until the composition looks coherent. In this example, the palms were initially too large, so they were reduced in size. You can also stretch the motif slightly lengthwise to adapt it to the perspective. Make sure the palms do not dominate the foreground.
Apply Dust and Scratches as a Clipping Mask
To make the background look softer, you apply a filter. Select the palm layer, open the Live Filters in the menu, and choose "Dust and Scratches." The filter should only affect the palm layer. Therefore, drag the filter layer directly onto the palm layer and release it. This creates a sublayer, or rather a clipping mask, that affects only the palms.

Then move the slider to the right until the image reaches the desired softness. In the example, a value of about 24 pixels worked well.

Highlight Details with the Layer Blend Mode
So that details become visible again after the blurring, you change the blend mode of this layer. In the example, a mode was chosen that emphasizes the darker colors. Try out the modes and observe how the palms behave in the image.
Use Posterize as a Clipping Mask
For the comic-like look, Posterize is now used, just as you already did with the portrait. Add an adjustment layer, select "Posterize," and set the slider to a low value. In the example, the optimal value was about 6. Keep an eye on the result and adjust the value until the effect is clear but not exaggerated.

However, Posterize should only change the brightness structure and leave the colors untouched. To do this, set the layer blend mode to "Luminosity." Afterwards, compare the before and after views to see whether the effect looks as desired.

Increase contrast with a curves layer
To strengthen the contrast, add a curves adjustment. First, set a point in the midtones and drag it upward to brighten the image, then set another point at the bottom and drag it downward to darken the shadows. The curve should take on an S-shaped course that gives the image depth.

If the colors seem too intense afterward, you can also set the curves layer to the blend mode "Luminosity". Then the contrast is preserved without the hues shifting.
Increase color saturation with an HSL adjustment layer
For a more vivid look, an HSL adjustment layer follows. Drag the saturation slider slightly to the right. In the example, the value was between 26 and 30 percent, which makes the colors look stronger, but not garish.

Color the background with a fill layer
Now you color the background. Choose "Layer", then "New Fill Layer", and select a solid color. The layer is initially filled with white. Open the color picker and set the color to Red 230, Green 108 and Blue 64. Confirm the selection.

Then change the layer blend mode of the fill layer from "Normal" to "Linear Light". This gives the palm trees a vivid, orange shimmer.

Transfer the color tone to the foreground
So that the orange tone also affects the figure, you create a copy of the fill layer. Select the layer and press Ctrl + J. Drag the copy above the original photo and make sure that the blue bar remains continuous here as well. The blend mode stays on "Linear Light", but the color is now too strong.
Therefore, reduce the opacity of the copy. You can set the value directly with the slider or enter it numerically. In the example, about 19 percent was chosen so that the foreground blends harmoniously into the background.


Scale the palm trees and check the overall image
Finally, you can make the palm trees a little smaller again so that they don't overload the background. Feel free to play around with the settings a bit until you like the result.

Add noise as the final touch
A slight noise over the entire image ties all the image elements together. To do this, click the top layer and choose a live filter at the bottom of the layers panel. Select "Add Noise". You control the intensity of the noise with the slider. Don't overdo it, because too much noise quickly looks restless.

If the noise seems too prominent, reduce the opacity of the noise layer. You can readjust the value at any time by double-clicking the filter.

Create a before-and-after comparison
To check the result, hide all editing layers at the same time. To do this, click the top layer, hold down the Shift key and click the background color layer so that all editing layers are selected. Then you uncheck the visibility checkmark of one of these layers. All selected layers are then hidden together, and the original image remains visible. Now compare both states.

Summary ??? GTA look in Affinity Photo: Designing a palm tree background and final steps
You have learned how to insert, adjust and stylize a palm tree motif as a background in Affinity Photo. With Dust and Scratches as well as tone separation, the image gets its comic structure. The curves and HSL adjustment provide contrast and color. The fill layer in the "Linear Light" blend mode colors the background, and a copy of this layer transfers the tone to the foreground. A subtle noise rounds off the result. Try out the steps with your own images and adjust the values to your style.
FAQ
Can I use other motifs instead of palm trees?Yes, you can also use city skylines as a background, for example. The procedure remains the same.
Why should I apply filters as a clipping mask?If you use filters as a clipping mask, they only affect the layer underneath and not the entire image. This way, the foreground remains untouched.
Which blend mode should I use for the tone separation?Set the layer to "Luminosity". This way, the tone separation only changes the brightness, and the original colors are preserved.
What does the "Linear Light" blend mode do for the fill layer?It blends the fill color with the image in such a way that bright and strong tones are created. The background therefore looks vivid and lively.
How do I avoid the noise looking too strong?Reduce the intensity of the filter and also lower the opacity of the noise layer. Subtle noise usually works best.
How do I quickly check how much I have edited?Select all editing layers at the same time and hide them. This way you see the original image and can compare it directly with the result.

